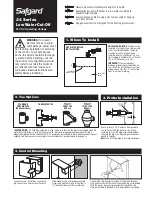
WARNING: Please carefully read and properly follow the instructions for installation found in this manual.
STEPS:
2
1
3/16 in. to 3/8 in.
Wall
Before installation, select the location for the timer (5).
Use the timer (5) as a template to mark the screw hole locations
where the screws are to be installed. Installing into drywall: Drill
two 1/4 in. holes and insert the anchors (3) and screws (4).
Installing into wood: Drill two 1/8 in. holes and insert the screws
(4). Do not use anchors (3).Install screws into the wall, leaving
3/16 in. to 3/8 in. clearance between the head of the screw and
wall. Hang the timer (5) on screws (4)
and tighten
until the timer (5)
is held firmly.
5
3
4
4
4
Install the sensor cable (1) to the connection (2) of the timer (7).
Ensure the holes (3) on the sensor cable (1) and the pi
ns
(4) on the
timer (7) are aligned to one another to ensure proper installation.
Ensure they are tightly connected by firmly pushing together.
If it is necessary to remove the timer (7), squeeze the tabs (5 & 6)
on the sensor cable (1) and timer (7) at the same time.
NOTE
:
After
batteries are installed in step
#1
0
,
If the connections
are made properly, the base of the control valve will flash red for 2
seconds and flash for 3 times, the timer (7) will work. If the
connections are not made properly, the timer (7) will not work.
NOTE: The base of the control valve will flash red when its time to
change filters and batteries. When the red light gradually flickers in
a fading pattern, 1 year has passed and it is time to replace the
filters and the timer batteries, then press reset button for 5 seconds
to reset timer.
2
3
1
4
5
7
6
2
3
1
4
5
7
6
2
3
1
4
5
7
6
2
3
1
4
5
7
6


