


V021417-EA
12
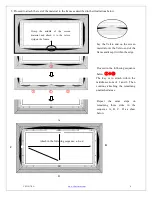
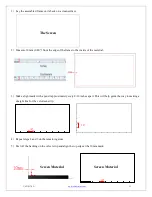
6)
Continue peeling off the backing until the other side has been reached. Make sure that the velvet strip is kept
straight the entire way.
7)
Fold back the excess unused velveteen.
8)
Repeat steps 5-7 to complete the velveteen strip installation.
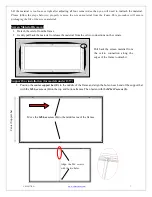
Installation
Locate your desired installation location with a stud finder (recommended) and mark the drill-hole area of where the
screen is to be installed.
1.
Drill a hole with the proper bit size according to the wood screws included.
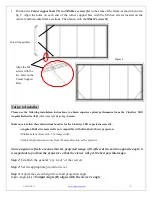
2.
Line up the wall brackets with the drilled holes on the installation location and screw them in using a Phillips
screwdriver.
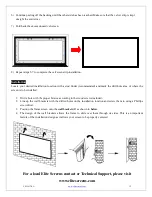
3.
Position the frame screen onto the
wall brackets
(F) as shown in
below
.
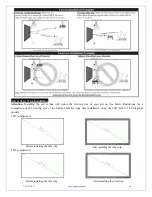
4.
The design of the wall brackets allows the frame to slide over them through its sides. This is an important
feature of the installation design as it allows your screen to be properly centered.
For a local Elite Screens contact or Technical Support, please visit


