8
Installation
Installation - Ducting version
It is recommended that the vent system be installed be-
fore hood is installed.
Before making cutouts, make sure there is proper clear-
ance within the ceiling or wall for exhaust vent.
Check your ceiling height and the hood height maximum
before you select your hood.
Disconnect power.
Determine which venting method to use: roof, wall, or
nonvented.
Select a flat surface for assembling the range hood.
Place convering over that surface.
Using 2 or more people, lift range hood onto covered
surface.
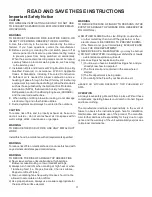
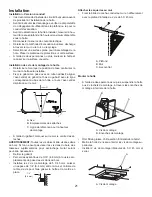
Range hood mounting screws installation
Determine and mark centerline on the wall the canopy
hood will be installed.
Tape template in place, aligning the template centerline
and bottom of template with hood bottom line and with
the centerline marked on the wall.
A. Centerline
B. Fastener locations
C. Mounting height reference
Mark centers of the fastener locations through the tem-
plate to the wall.
WARNING:
All screws must be installed into wood. If there is
no wood to screw into, additional wall framing supports may
be required.
Remove the template.
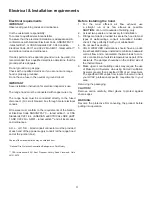
Drill 3/16” (4.8 mm) pilot holes at all locations where
screws are being installed into wood.
Install the 2 - 5 X 45 mm mounting screws. Leave a 1/4”
(6.4 mm) gap between the wall and the back of the screw
head to slide range hood into place.
•
•
•
•
•
•
•
•
•
•
•
•
Secure the bracket to the wall:
Attach vent cover bracket to wall flush to the ceiling us-
ing 2 -5 X 45 mm screws.
A. Ceiling
B. Wall
C. Centerline
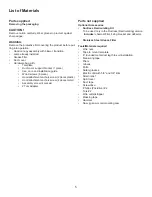
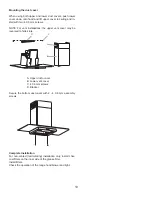
Mounting the hood
Using 2 or more people, hang range hood on 2 mounting
screws through the mounting slots on back of hood.
A. Mounting screws
B. Mounting slots
Remove the grease filter.
Level the range hood and tighten upper mounting screws.
Install 2 - 5 X 45 mm lower mounting screws and tighten.
A. Mounting screws
•
•
•
•
•
Ve
rtic
al C
en
te
rlin
e
CL
L
L
A
W
R
A
E
R
E
T
A
L
P
M
E
T
G
N
I
T
N
U
O
M
E
G
D
E
M
O
T
T
O
B
N
G
I
L
A
E
N
I
L
L
I
C
N
E
P
H
T
I
W
M
O
T
T
O
B
G
N
I
T
A
C
I
D
N
I
D
O
O
H
E
H
T
F
O
t
h
g
i
e
H
n
o
it
a
ll
a
t
s
n
I
T
R
O
P
P
U
S
L
L
A
W
R
A
E
R
R
O
S
D
U
T
S
H
G
U
O
R
H
T
S
E
L
O
H
T
O
L
I
P
"
6
1
/
3
)
O
W
T
(
2
L
L
I
R
D
e
n
i
L
l
a
t
n
o
z
ir
o
H
A
C
B
1/4”
(6.4 mm)
A
C
B
A
B
A
Summary of Contents for Hood
Page 41: ...LI3Y8A Ed 04 10 ...


