background image


18 

6.3.2.1 How to determine the Sound Velocity 


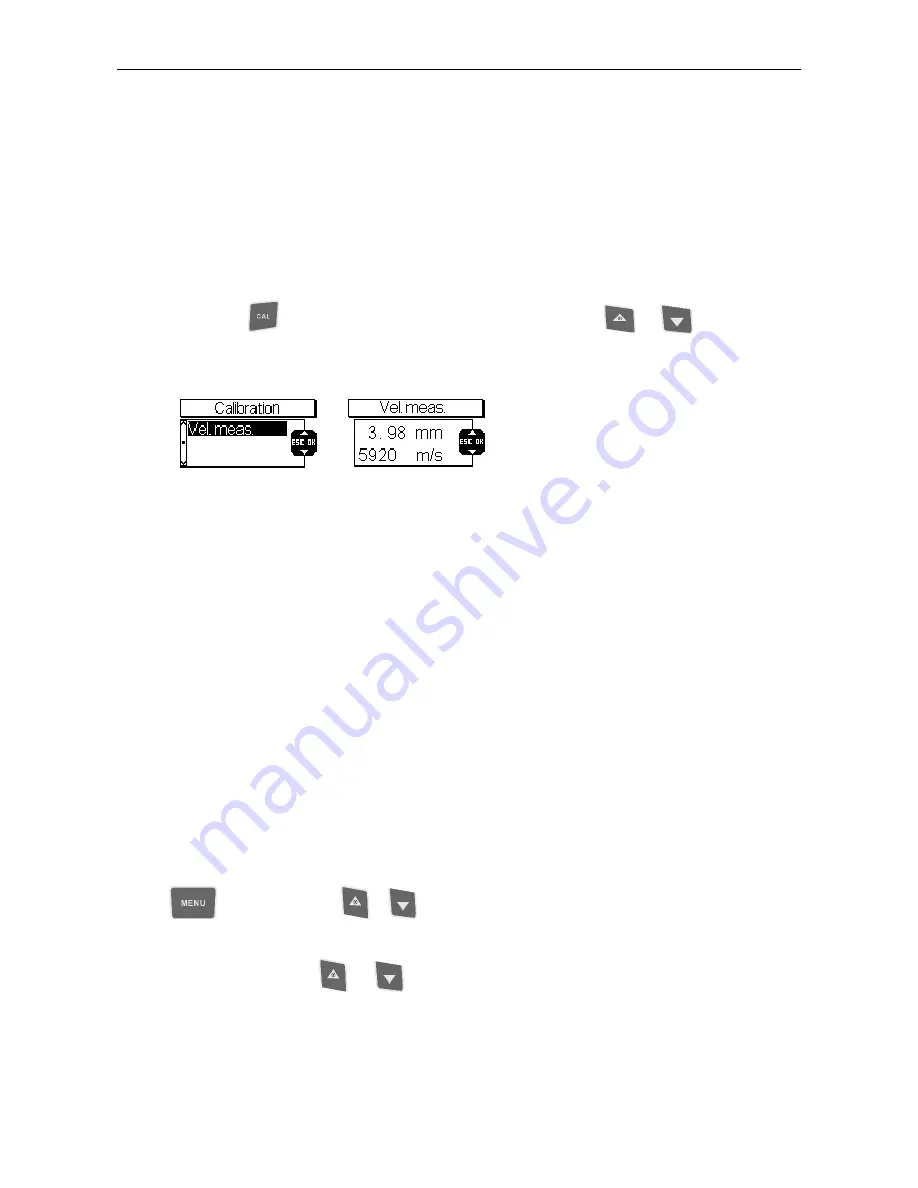
1.  Select a stored sound velocity or set the gauge to a sound velocity as close as possible to 

the sound velocity of the material to be measured.  

2.  Take a sample of a defined thickness as close as possible to the thickness of the later 

measuring object. If no such sample is available, take your measuring object and measure 

its thickness using a caliper or another measuring tool.  

3.  Now use MiniTest 430 or 440 to measure the sample in order to get a thickness value.  

4.  First press 

-key to go to the “Sound velocity”. Then press 

or 

 in order to 

adjust to the thickness reading you have measured and get the correct sound velocity 

accordingly.  


5.  Adjust the sound velocity so that the material thickness shown on display corresponds to 

the measured thickness of sample. 

6.  Re-measure the sample and check the deviation between reading and actual thickness. If 

both values are identical, the sound velocity is correct for this material.  


6.3.3 Calibration of the Transducer 

 
The transducer calibration function is to be used to compensate for errors or system errors that 

cannot be remedied by “Automatic calibration”. The cause of such error might be for instance a 

transducer change. First make sure the error is not due the setting of an unsuitable sound velocity.  

To carry out the transducer calibration please proceed as follows: 


1.  Adjust the gauge to the sound velocity 5920 m/s. 

2.  Take a reading on test block supplied with the gauge and take. The reading obtained 

should be 4.00 mm ± 0.01 mm. If the reading obtained differs from that value, press the 

-key. Then press 

or

. Choose “Transducer calibration“ and press OK to 

confirm.  

Now use arrow keys 

 or 

 to adjust the reading you obtained to the thickness of 

test block, i.e. 4.00 mm. Press OK to confirm the value. Then press ESC to go to the 

measuring mode.  


Summary of Contents for MiniTest 430

Page 1: ...Technical Manual and Operating Instructions Ultrasonic Thickness Gauges MiniTest 430 440 ...

Page 2: ...oatings in the echo echo mode it may occur that the thickness of coating layer is measured instead of the wall thickness that actually was intended to be measured The responsibility for proper use of the gauge and recognition of this phenomenon rests solely with the user of the gauge Editon 1 08 2014 Version 1 0 Subject to change without notice ElektroPhysik Dr Steingroever GmbH Co KG Pasteurstr 1...

Page 3: ...Measurement 14 5 1 Preparing the Gauge 14 5 2 Selection of the Transducer 14 5 3 Preparing the Surface of Measuring Object 15 6 Operation 16 6 1 Switch ON 16 6 2 Taking Readings 16 6 3 Calibration 17 6 3 1 Calibration 17 How to calibrate MiniTest 430 440 17 6 3 2 Determination of the Sound Velocity 17 6 3 2 1 How to determine the Sound Velocity 18 6 3 3 Calibration of the Transducer 18 6 4 User Me...

Page 4: ...aintenance and Precautions 30 8 1 Power Check 30 8 2 Precautions 30 8 2 1 General Precautions 30 8 2 2 Precautions to take during Measurement 30 9 Table of Materials and their typical Sound Velocity Longitudinal Wave 31 10 Safety Notes 32 11 Declaration of Conformity 33 11 After Sales Service 33 13 Change History 33 ...

Page 5: ...enable its quick use please read the sections below to get familiar with the preparatory requirements and basic functions 1 1 Important Notes on Wall Thickness Measurement Before using the wall thickness gauge please read the following instructions carefully Make sure to fully understand and follow the instructions in order to avoid errors that might lead to erratic readings Any decisions based on...

Page 6: ...as of the measuring object that have been targeted by the sound beam Conclusions to other areas of the measurement object are not admissible They are only allowed if extensive experience on the process of manufacture of the measuring objects is available and if appropriate methods of statistical evaluation can be applied It should be taken into consideration that the ultrasound beam might be compl...

Page 7: ...aterial If the gauge has been adjusted to a cold reference sample and wall thickness measurement is made on a warm object major measuring errors are very likely to occur To avoid such measuring errors it is recommended to use a temperature adapted reference sample for adjusting the gauge Another option would be to correct for the applicable temperature influence by means of the sound velocity temp...

Page 8: ...readings obtained should be used as the correct one for this measuring spot senkrecht vertical 1 1 2 6 Duplication of Reading Do not measure in a range lower than the measuring range specified for the sensor In such case the first back wall echo would not be strong enough for being processed whereas the amplitude of the second one would be strong enough to be processed accordingly As a result the ...

Page 9: ...0 3 of reading Sound velocity 1000 9999 m s Data memory 10 batches for a maximum of 500 readings per batch Measuring frequency 2 readings second in the standard mode 10 readings second in the high performance mode scan Zero point calibration automatic Auto switch off 2 minutes 5 minutes or shut down manually Power supply 2 x AA battery battery life 80 h in continuous operation Operating temperatur...

Page 10: ...y to the measuring object A portion of the ultrasound signal is reflected from the surface of measuring object another one is reflected from the opposite side of the object when travelling back The sensor receives both echoes The wall thickness is calculated according to the exact time of travel of pulse and shown as reading on display ...

Page 11: ...ansducer socket Identify PIN 6 USB interface MiniTest 430 440 4 2 Supply Schedule 1 1 x plastics carrying case 2 1 x MiniTest gauge model 430 or 440 3 1 x ultrasonic transducer U5 0 for MiniTest 430 U5 0E for MiniTest 440 4 1 x couplant gel 200ml 5 1 x operating instructions German English French 6 1 x CD with data transfer software 7 1 x USB connecting cable 8 2 x 1 5V AA batteries ...

Page 12: ...readings stored in this batch 2 transducer model 3 battery state fully charged empty 4 measuring mode 5 measuring icon and measuring unit 6 gain mode of amplifier selection A Auto L Low M Medium H High 7 sound velocity selection 8 current reading ...

Page 13: ...P DOWN to scroll through the different menu options Press arrow UP to enable disable the backlight OK ESC key Press OK to confirm a selection in the menu Press ESC to quit the menu CAL key Quick access for sound velocity calibration it is required the wall thickness is known Data memory short cut key ...

Page 14: ...t comply with the supply schedule you have ordered Any damage of the gauge should be reported upon delivery Do not use the gauge in case it seems to be damaged 5 2 Selection of the Transducer Type Frequency Measuring range Temperature U2 0 2 0 MHz 2 0 mm 500 mm 60 C U5 0E 5 0 MHz E E 3 0 mm 25 mm I E 1 0 mm 200 mm 60 C U5 0 5 0 MHz 0 8 mm 300 mm 60 C U5 0HT 5 0 MHz 3 0 mm 200 mm 350 C U7 5 7 5 MHz...

Page 15: ...i objects with a thickness 50 mm U5 0E 5 0 MHz Standard transducer for MiniTest 440 When connected to MiniTest 440 this transducer is able to measure in the E E mode the wall thickness of steel through a coating applied to the steel U2 0 2 0 MHz Rough surfaces such as on cast components U5 0HT 5 MHz Suitable for temperatures 350 C U7 5 7 5 MHz Thin wall thickness and small curvature radius U10 0 1...

Page 16: ...ansducers suitable for MiniTest 430 440 Otherwise the gauge will not work correctly and the error message ERROR will appear 6 2 Taking Readings There are two options to access the measuring mode 1 Connect transducer and switch on the gauge 2 From the menu you can press ESC and go back to the measuring mode Once you have put the transducer onto the measuring object the display will show the measuri...

Page 17: ...n and free from any residual couplant or other dirt particles that might impair measurement and thus the calibration accuracy In case temperature varies strongly during measurement it is recommended to use the calibration function more frequently in order to ensure accuracy of measurement 6 3 2 Determination of the Sound Velocity The sound velocity in the measuring object depends on the material t...

Page 18: ...measure the sample and check the deviation between reading and actual thickness If both values are identical the sound velocity is correct for this material 6 3 3 Calibration of the Transducer The transducer calibration function is to be used to compensate for errors or system errors that cannot be remedied by Automatic calibration The cause of such error might be for instance a transducer change ...

Page 19: ...modes Please select the correct mode according to your requirements and measuring conditions Standard mode The current reading is shown This mode applies if you are satisfied with the standard measuring needs Minimum mode In this mode the lowest values is shown during measurement This mode is recommended for curved surfaces or if it is required to indicate the lowest thickness values This would be...

Page 20: ...ge Alarm mode Limitation In this mode a visual alarm will be given once the upper or lower limit if set previously has been exceeded This mode enables a quick and easy checking of readings so that a permanent monitoring of readings will not be necessary In practical operation this mode is more frequently used than the Difference mode Scan mode high performance mode This mode is particularly suited...

Page 21: ...ndicate the lowest thickness values This would be a typical application of tube measurement Important note This mode is NOT recommended for cast iron or Aluminium alloys Difference mode If you have adjusted a set point previously this mode will indicate the difference between the current reading and set point This mode is particularly suitable for quality inspection and if it is required to identi...

Page 22: ...de The Echo Echo E E mode is able to measure between two successive back wall echoes This allows to measure the actual wall thickness through a coating Please note This function for measuring the wall thickness through a coating is only available with the U5 0E transducer model ...

Page 23: ...aterial and the pre set sound velocity Vel Custom The sound velocity is user adjustable 6 4 2 1 Materials If the material and its specific sound velocity are known users can select the sound velocity from the gauge accordingly Nine 9 different velocities are stored in the gauge and can be selected by the user Aluminium titanium steel stainless steel glass copper brass polystyrene and nylon Note Th...

Page 24: ...et your requirements the sound velocity can be adjusted individually Please refer to the table given in the appendix section 9 of this manual Use this table to set to the correct sound velocity as requested Note For more accurate measurements please refer to section 6 3 2 1 How to determine the sound velocity ...

Page 25: ... using the U5 0HT or U2 0 transducers the following setting is recommended 0 1 mm 0 01 in 6 4 4 Data Memory Both models MiniTest 430 and 440 feature a data memory for storing a maximum of 10 batches with 500 readings storable per batch Total data memory capacity is 5000 readings A batch memory includes the following data readings type of transducer head sound velocity and selected measuring mode A...

Page 26: ... then change the transducer model or measuring mode the following message will appear Change batch In such case the batch is not available as it has been defined with another transducer model and or measuring mode Please select another batch that matches the transducer model measuring mode you are currently using 6 4 4 2 Delete a Batch MiniTest 430 440 Use this function to delete a batch First sel...

Page 27: ...uto Low Medium and High Auto This mode matches different transducers and is suitable for the majority of measuring requirements Low Suitable for high scattering and materials exhibiting low attenuation properties Medium Suitable for a large field of applications High Suitable for high attenuation materials 6 4 6 Switch Off Mode Both models MiniTest 430 and 440 offer three different service modes a...

Page 28: ...th models MiniTest 430 and 440 offer two different data processing options Press the key to get access to the two options Data read If you have selected a batch the stored data will immediately be displayed on the screen Data transfer Via the USB interface the stored data will be transferred to a PC Please note For a detailed description on data transfer to a PC via the USB interface please refer ...

Page 29: ...n a range of about 30mm in diameter The smaller of the readings represents the thickness of the measuring object 4 Continuous measuring method use the single point measuring method and take readings continuously along the designated route The intervals between measurements should be less than 5mm The smallest reading represents the thickness of the measuring object 7 2 Measurement on Pipes and Tub...

Page 30: ...s 8 2 1 General Precautions Keep the gauge away from strong vibrations Do not stock in an environment with increased levels of air humidity To prevent cable damage plug or unplug the transducer by holding the cable jacket 8 2 2 Precautions to take during Measurement 1 Once you place the transducer on the measuring object the measuring symbol appears on display arrow down to indicate the coupling a...

Page 31: ...000 Inconel 0 220 5700 Iron 0 230 5900 Lead 0 085 2200 Magnesium 0 230 5800 Mercury 0 057 1400 Molybdenum 0 250 6300 Monel 0 210 5400 Neoprene 0 063 1600 Nickel 0 220 5600 Nylon 6 6 0 100 2600 Oil SAE 30 0 067 1700 Platinum 0 130 3300 Plexiglass 0 110 1700 Polyethylene 0 070 1900 Polystyrene 0 0930 2400 Polyurethane 0 0700 1900 Quartz 0 230 5800 Rubber Butyl 0 070 1800 Silver 0 140 3600 Stahl stai...

Page 32: ... sure to use only original accessories and batteries supplied recommended by the manufacturer of the gauge Connect only to compatible peripheral devices Connecting other devices If you connect the gauge to any other device please refer to the respective instructions manual of such device for detailed information on safety issues Do only connect original accessories Keep away from water The measuri...

Page 33: ...uct quality Should you nevertheless notice any error please contact the ElektroPhysik after sales service and advise your problem Please retain the original packing for future transportation needs if a repair should become necessary For more detailed information on the use applications service or technical data please contact your local agent or ElektroPhysik ElektroPhysik Dr Steingroever GmbH Co ...

Reviews: