Page 55
EA Elektro-Automatik GmbH
Helmholtzstr. 31-33 • 41747 Viersen
Germany
Fon: +49 2162 / 3785-0
Fax: +49 2162 / 16230
www.elektroautomatik.de
PS 9000 T Series
3.7
Control panel (HMI) lock
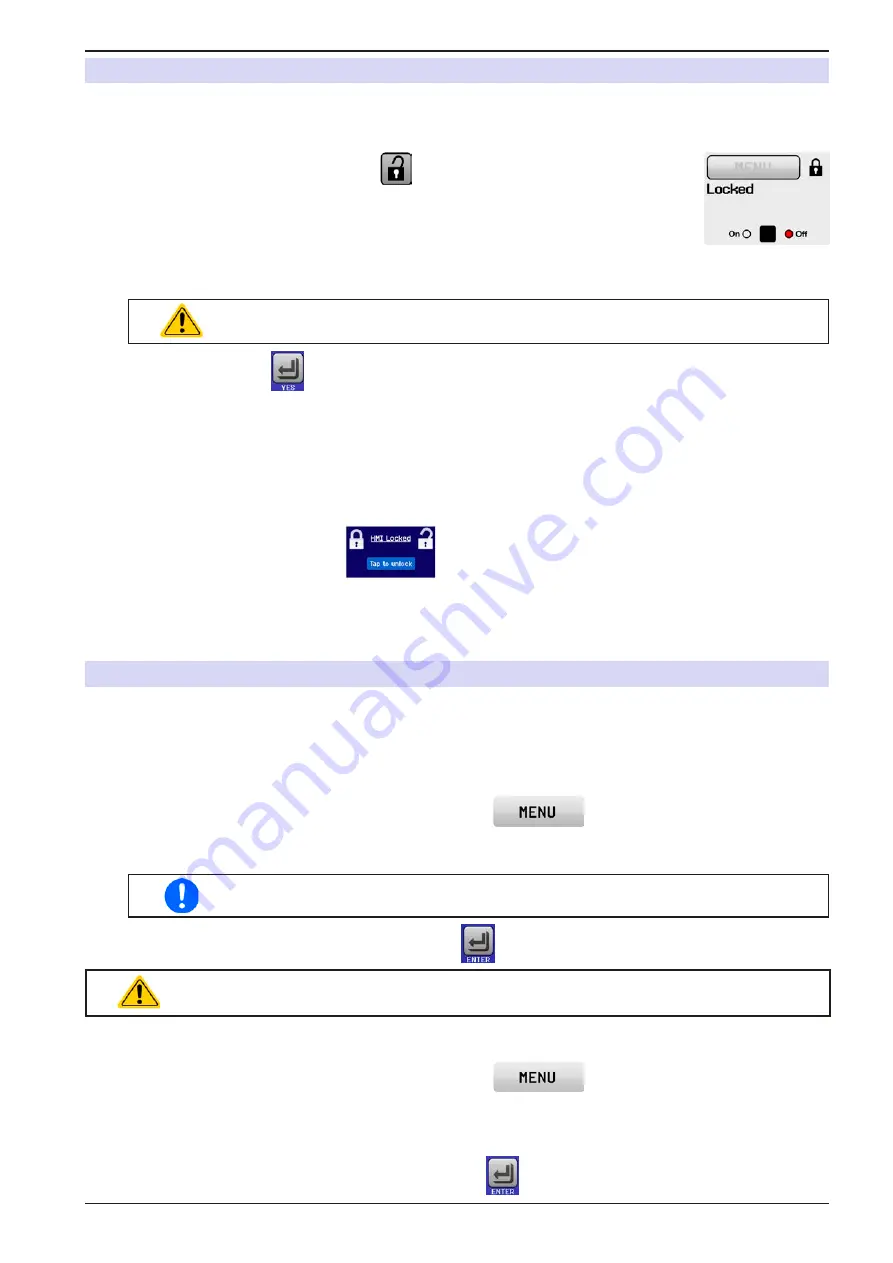
In order to avoid the accidental alteration of a value during manual operation, the rotary knobs or the touchscreen
can be locked so that no alteration of values will be accepted without prior unlocking.
►
How to lock the HMI
1.
In the main page, tap the lock symbol
.
2.
In the settings page “
HMI Lock Setup
” you are then asked to chose between a
complete HMI lock (check mark set for “
Lock HMI
”) or a partial lock where the On/
Off button on the front of the device is still usable (check mark also set for “
On/Off
”).
You may also chose to activate the additional PIN (“
Enable PIN
”). The device would
later request to enter this PIN every time you want to unlock the HMI, until the PIN is
deactivated again.
Be careful with the “
Enable PIN
” option if you are unsure what PIN is currently set. If you
are unsure, use “
Change PIN
” to define a new one.
3.
Activate the lock with
. The status “
Locked
” as shown in the figure to the right.
If an attempt is made to alter something whilst the HMI is locked, a requester appears in the display asking if the
lock should be disabled.
►
How to unlock the HMI
1.
Tap any part of the touchscreen of the locked HMI, or turn one of the rotary knobs or press the button “On/
Off” (only in “Lock all” situation).
2.
This request pop-up will appear:
.
3.
Unlock the HMI by tapping on “Tap to unlock” within 5 seconds, otherwise the pop-up will disappear and
the HMI remains locked. In case the additional
PIN code lock
has been activated in the menu “
HMI Lock
”,
another requester will pop up, asking you to enter the
PIN
before it finally unlocks the HMI.
3.8
Limits lock
In order to avoid the alteration of the adjustment limits (also see
„3.4.4. Adjustment limits (Limits)“
) by an unprivi-
leged user, the screen with the adjustment limit settings (“Limits”) can be locked by a PIN code. The menu pages
“
Limit Settings
” and “
Profiles
” will then become inaccessible until the lock is removed. Tapping a locked menu
page. i.e. touch area is greyed out, will give the option to unlock the access by entering the PIN.
►
How to lock the limits settings
1.
While the DC output is switched off, tap the touch area
on the main screen.
2.
In the menu tap on “
Page 2
”, then “
HMI Settings
” and there “
HMI Lock
”.
3.
In the settings page set the check mark for “
Lock limits
” and also “
Enable PIN
”.
Enabling the PIN for the limits lock is recommended. The PIN is also used for the HMI lock.
4.
Activate the lock by leaving the settings page with
.
Be careful with the “
Enable PIN
” option if you are unsure what PIN is currently set. If you are
unsure, use “
Change PIN
” to define a new one.
►
How to unlock the limits settings
1.
While the DC output is switched off, tap the touch area
on the main screen.
2.
In the menu tap on “
Page 2
”, then “
HMI Settings
” and there “
HMI Lock
”.
3.
In the settings page “
HMI Lock Setup
” unset the check mark for “Lock Limits”. In the following pop-up tap
on “
Unlock
” and then you will be asked to enter the 4-digit PIN.
4.
Deactivate the lock by submitting the correct PIN with
.


