background image

www.electrolux.com/shop

117899562-A-512015

Summary of Contents for ESF 7530ROW

Page 1: ...ESF 7530ROW ESF 7530ROX EN DISHWASHER USER MANUAL ...

Page 2: ...e in the knowledge that you ll get great results every time Welcome to Electrolux Visit our website for Get usage advice brochures trouble shooter service information www electrolux com webselfservice Register your product for better service www registerelectrolux com Buy Accessories Consumables and Original spare parts for your appliance www electrolux com shop CUSTOMER CARE AND SERVICE Always us...

Page 3: ...Keep children and pets away from the appliance door when it is open Children shall not carry out cleaning and user maintenance of the appliance without supervision 1 2 General Safety This appliance is intended to be used in household and similar applications such as farm houses staff kitchen areas in shops offices and other working environments by clients in hotels motels bed breakfast and other r...

Page 4: ...an Always use a correctly installed shockproof socket Do not use multi plug adapters and extension cables Make sure not to cause damage to the mains plug and to the mains cable Should the mains cable need to be replaced this must be carried out by our Authorised Service Centre Connect the mains plug to the mains socket only at the end of the installation Make sure that there is access to the mains...

Page 5: ...gramme is completed There can be detergent on the dishes The appliance can release hot steam if you open the door while a programme operates Do not put flammable products or items that are wet with flammable products in near or on the appliance 2 5 Disposal WARNING Risk of injury or suffocation Disconnect the appliance from the mains supply Cut off the mains cable and discard it Remove the door ca...

Page 6: ...n 6 Start button 7 Indicators 8 Option button 4 1 Indicators Indicator Description Washing phase It comes on when the washing phase and the rinsing phases operate Drying phase It comes on when the drying phase operates Multitab indicator TimeManager indicator Rinse aid indicator It is always off while the programme operates Salt indicator It is always off while the programme operates www electrolu...

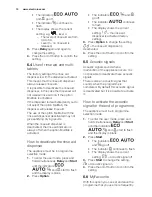
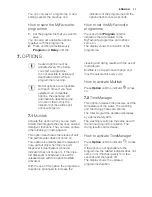
Page 7: ...or crockery and cutlery with normal soil This is the standard programme for test institutes 2 The appliance senses the degree of soil and the quantity of items in the baskets It auto matically adjusts the temperature and the quantity of water the energy consumption and the programme duration 3 With this programme you can wash a load with mixed soil Very heavy soil in the lower bas ket and normal s...

Page 8: ...titab option without rinse aid The level of rinse aid according to the required dosage These settings will be saved until you change them again How to set the programme selection mode The appliance is in programme selection mode when the programme indicator is on and the display shows the programme duration When you activate the appliance usually it is in programme selection mode However if this d...

Page 9: ...me selection mode 1 To enter the user mode press and hold simultaneously Delay and Start until the indicators and start to flash and the display is blank 2 Press Program The indicators and go off The indicator continues to flash The display shows the current setting e g level 5 3 Press Program again and again to change the setting 4 Press the on off button to confirm the setting 6 3 The rinse aid ...

Page 10: ...ld simultaneously Delay and Start until the indicators and start to flash and the display is blank 2 Press Option The indicators and go off The indicator continues to flash The display shows the current setting the rinse aid dispenser is activated factory setting 3 Press Option to change the setting the rinse aid dispenser is deactivated 4 Press the on off button to confirm the setting 6 5 Acousti...

Page 11: ...ctions They can also contain other cleaning or rinsing agents This option deactivates the release of salt The salt indicator does not come on This option also deactivates the release of rinse aid but only when the rinse aid dispenser is deactivated rinse aid indicator does not come on If the rinse aid dispenser is activated rinse aid is released even with the option Multitab activated With the use...

Page 12: ...o recharge the resin in the water softener and to assure good washing results in the daily use How to fill the salt container 1 Turn the cap of the salt container counterclockwise and remove it 2 Put 1 litre of water in the salt container Only for the first time 3 Fill the salt container with dishwasher salt 4 Remove the salt around the opening of the salt container 5 Turn the cap of the salt cont...

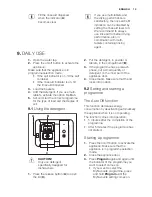
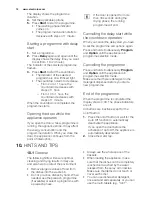
Page 13: ...N Only use detergent specifically designed for dishwashers 1 Press the release button A to open the lid C 2 Put the detergent in powder or tablets in the compartment B 3 If the programme has a prewash phase put a small quantity of detergent on the inner part of the appliance door 4 Close the lid Make sure that the lid locks into position 9 2 Setting and starting a programme The Auto Off function T...

Page 14: ...ptions again Press and hold simultaneously Program and Option until the appliance is in programme selection mode Cancelling the programme Press and hold simultaneously Program and Option until the appliance is in programme selection mode Make sure that there is detergent in the detergent dispenser before you start a new programme End of the programme When the programme is completed the display sho...

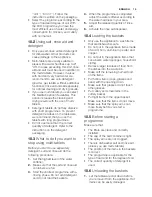
Page 15: ...l of the water softener 2 Make sure that the salt and rinse aid containers are full 3 Start the shortest programme with a rinsing phase Do not add detergent and do not load the baskets 4 When the programme is completed adjust the water softener according to the water hardness in your area 5 Adjust the released quantity of rinse aid 6 Activate the rinse aid dispenser 10 4 Loading the baskets Only u...

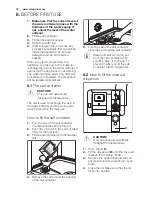
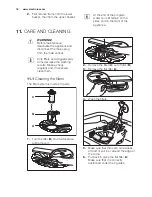
Page 16: ...ogged spray arms decrease the washing results Make a check regularly and if necessary clean them 11 1 Cleaning the filters The filter system is made of 3 parts C B A 1 Turn the filter B counterclockwise and remove it 2 Remove the filter C out of filter B 3 Remove the flat filter A 4 Wash the filters 5 Make sure that there are no residues of food or soil in or around the edge of the sump 6 Put back...

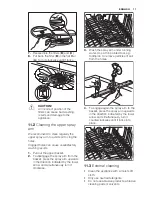
Page 17: ...gage the spray arm from the basket press the spray arm upwards in the direction indicated by the lower arrow and simultaneously turn it clockwise 3 Wash the spray arm under running water Use a thin pointed tool e g toothpick to remove particles of soil from the holes 4 To engage again the spray arm to the basket press the spray arm upwards in the direction indicated by the lower arrow and simultan...

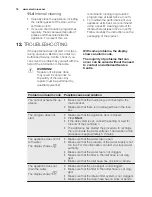
Page 18: ...contact an Authorised Service Centre Problem and alarm code Possible cause and solution You cannot activate the ap pliance Make sure that the mains plug is connected to the mains socket Make sure that there is no damaged fuse in the fuse box The program does not start Make sure that the appliance door is closed Press Start If the delay start is set cancel the setting or wait for the end of the cou...

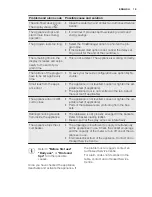
Page 19: ... The appliance door is not centred on the tub Adjust the rear foot if applicable The appliance door is diffi cult to close The appliance is not levelled Loosen or tighten the ad justable feet if applicable Parts of the tableware are protruding from the bas kets Rattling knocking sounds from inside the appliance The tableware is not properly arranged in the baskets Refer to basket loading leaflet M...

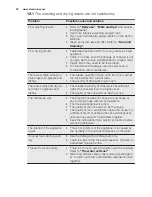
Page 20: ...shes The released quantity of rinse aid is not sufficient Adjust the rinse aid level to a higher level The quality of the rinse aid can be the cause The dishes are wet The programme does not have a drying phase or has a drying phase with low temperature The rinse aid dispenser is empty The quality of the rinse aid can be the cause The quality of the multi tablets can be the cause Try a different b...

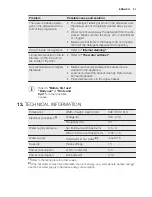
Page 21: ...re Make sure that only dishwasher safe items are washed in the appliance Load and unload the basket carefully Refer to bas ket loading leaflet Place delicate items in the upper basket Refer to Before first use Daily use or Hints and tips for other possible causes 13 TECHNICAL INFORMATION Dimensions Width height depth mm 596 850 610 Electrical connection 1 Voltage V 220 240 Frequency Hz 50 Water su...

Page 22: ...ers to recycle it Help protect the environment and human health and to recycle waste of electrical and electronic appliances Do not dispose appliances marked with the symbol with the household waste Return the product to your local recycling facility or contact your municipal office www electrolux com 22 ...

Page 23: ...ENGLISH 23 ...

Page 24: ...www electrolux com shop 117899562 A 512015 ...

Reviews: