background image

Cancel a delay start or a washing
programme in progress

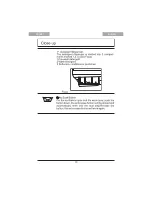
• Simultaneously press and hold the two

function buttons 

B

 and 

C

 until all the pro-

gramme lights come on.

• Cancelling a delay start will also cancel the

washing programme. You have to select
the washing programme again.

• If a new washing programme is to be se-

lected, check that there is detergent in the
detergent dispenser.

End of the washing programme

• The dishwasher will automatically stop and

the 

programme in progress

 indicator

light goes off.

• The 

End

 indicator light comes on.

• The light of the programme just ended re-

mains on.

• Zero appears in the digital display.
1. Switch off the dishwasher by pressing the

On/Off button.

2. Open the dishwasher door, leave it ajar

and wait a few minutes before removing
the dishes; this way they will be cooler
and the drying will be improved.

Standby mode

If you do not switch off the appliance at the
end of the washing programme, the appli-
ance automatically goes into standby mode.
The standby mode decreases energy con-
sumption.
Three minutes after the end of the pro-
gramme, all indicator lights go off and the
digital display shows one horizontal bar.
Press one of the buttons (not the on/off but-
ton), to go back to end-of-programme mode.

Unloading the dishwasher

• Hot dishes are sensitive to knocks. The

dishes should therefore be allowed to cool
down before removing from the appliance.

• Empty  the  lower  basket first and then the

upper one; this will avoid water dripping
from the upper basket onto the dishes in
the lower one.

• Water may appear on the sides and the

door of the dishwasher as the stainless

steel will eventually become cooler than
the dishes.

When the washing programme has
finished, it is recommended that the
dishwasher is unplugged and the
water tap turned off.

Washing programmes

Washing programmes

Programme

Degree of soil

Type of load

Programme description

 Intensive

Heavy soil

Crockery, cutlery, pots
and pans

Prewash
Main wash up to 70°C
2 intermediate rinses
Final rinse
Drying

 Auto 

1)

Any

Crockery, cutlery, pots
and pans

Prewash
Main wash up to 45°C or
70°C
1 or 2 intermediate rinses
Final rinse
Drying

 Quick 

2)

Normal or light soil

Crockery and cutlery

Main wash up to 60°C
Final rinse

 Eco 

3)

Normal soil

Crockery and cutlery

Prewash
Main wash up to 50°C
1 intermediate rinse
Final rinse
Drying

16 

 electrolux

Summary of Contents for ESF 46710

Page 1: ...user manual Dishwasher ESF 46710 ...

Page 2: ...n appli ance use and safety Correct use This dishwasher is only intended for wash ing household utensils suitable for ma chine washing Do not put any solvents in the dishwasher This could cause an explosion Knives and other items with sharp points must be loaded in the cutlery basket with their points down or placed in a horizontal position in the upper basket Only use products detergent salt and ...

Page 3: ...eep children well away from the dish washer when the door is open Installation Check your dishwasher for any transport damage Never connect a damaged ma chine If your dishwasher is damaged con tact your supplier All packaging must be removed before use Any electrical and plumbing work required to install this appliance must be carried out by a qualified and competent person For safety reasons it i...

Page 4: ...Product description 1 Upper basket 2 Water hardness dial 3 Salt container 4 Detergent dispenser 5 Rinse aid dispenser 6 Rating plate 7 Filters 8 Lower spray arm 9 Upper spray arm 10 Worktop 4 electrolux ...

Page 5: ...ded End Comes on when a washing programme has ended Multitab function Indicates the activation deactivation of the multi tab function Refer to Multitab function Salt1 Comes on when the special salt has run out Rinse aid1 Comes on when the rinse aid has run out 1 The salt and rinse aid indicator lights never come on while a washing programme is running even if filling with salt and or rinse aid is ...

Page 6: ...hts come on The programme has been cancelled and the machine is now in setting mode First use Before using your dishwasher for the first time Ensure that the electrical and water con nections comply with the installation in structions Remove all packaging from inside the ap pliance Set the water softener level Pour 1 litre of water into the salt container and then fill with dishwasher salt Fill th...

Page 7: ...splayed level 5 displayed level 10 4 To change the level press function but ton A Each time the button is pressed the level changes For the selection of the new level see the chart Examples If the current level is 5 by pressing function button A once level 6 is selected if the current level is 10 by pressing function button A once level 1 is selected 5 To memorize the operation switch off the dish...

Page 8: ...id detergent This would damage the appliance Rinse aid ensures thorough rinsing and spot and streak free drying Rinse aid is automatically added during the last rinse 1 Open the container by pressing the re lease button A 2 Add the rinse aid in the container The maximum level for filling is indicated by max The dispenser holds about 110 ml of rinse aid which is sufficient for between 16 and 40 was...

Page 9: ... Lay small objects in the cutlery basket Plastic items and pans with non stick coat ings have a tendency to retain water drops these items will not dry as well as porcelain and steel items Light items plastic bowls etc must be loaded in the upper basket and arranged so they do not move For washing in the dishwasher the following cutlery and dishes are not suitable are of limited suitability Cutler...

Page 10: ...al hazard Long and or sharp items of cutlery such as carving knives must be positioned horizontally in the upper basket Take care when loading or unloading sharp items such as knives Forks and spoons should be placed in the removable cutlery basket with the handles facing downwards and the knives with their handles facing upwards If the handles protrude from the bottom of the basket obstructing th...

Page 11: ...s and glasses Arrange items on and underneath the cup racks so that water can reach all surfaces Glasses with long stems can be placed up side down in the cup racks For taller items the cup racks can be folded upwards Mini cutlery basket The upper basket is supplied with a mini cut lery basket Caution NEVER PUT KNIVES IN THE MINI CUTLERY BASKET THIS WILL PREVENT DAMAGE TO THE APPLIANCE Place the m...

Page 12: ...an only be posi tioned on right hand side of the basket Once positioned correctly press them down firmly and make sure they do not move Caution BEFORE CLOSING THE DOOR MAKE SURE THAT THE SPRAY ARMS CAN ROTATE FREELY Adjusting the height of the upper basket If washing very large plates you can load them in the lower basket after moving the upper basket to the higher position Maximum height of the d...

Page 13: ...detergent Only use detergents specifically de signed for use in dishwashers Please observe the manufacturer s dos ing and storage recommendations as stated on the detergent packaging Using no more than the correct amount of detergent contributes to reducing pol lution Fill with detergent 1 Open the lid 2 Fill the detergent dispenser 1 with de tergent The marking indicates the dosing levels 20 appr...

Page 14: ... Activate deactivate the Multitab func tion before the start of a washing pro gramme Once the programme is running the Multitab function can NO longer be changed If you want to cancel the Mul titab function you have to cancel the programme setting and then deactivate the Multitab function In this case you have to set a washing programme and desired options again Activation deactivation of the Mult...

Page 15: ...tart 1 After having selected the washing pro gramme press the delay start button until the flashing number of hours for the delay start appear in the digital display The start of the selected washing programme can be delayed for between 1 and 19 hours 2 Close the dishwasher door the count down starts automatically The number in the display is no longer flashing but fixed with static light 3 The co...

Page 16: ...gramme all indicator lights go off and the digital display shows one horizontal bar Press one of the buttons not the on off but ton to go back to end of programme mode Unloading the dishwasher Hot dishes are sensitive to knocks The dishes should therefore be allowed to cool down before removing from the appliance Empty the lower basket first and then the upper one this will avoid water dripping fr...

Page 17: ...1 Auto 0 8 1 3 10 19 Quick 0 8 8 Eco 0 8 0 9 12 13 Glass 0 6 0 7 11 12 1 The digital display shows the programme duration The pressure and temperature of the water the variations of power supply and the quantity of dishes can change these values Care and cleaning Cleaning the filters The filters must be checked and cleaned from time to time Dirty filters will degrade the washing result Warning Bef...

Page 18: ... damp cloth We recommend every 3 months you run the wash programme for heavy soiled dishes us ing detergent but without dishes Prolonged periods of non operation If you are not using the machine for a pro longed period of time you are advised to 1 Unplug the appliance and then turn off the water 2 Leave the door ajar to prevent the forma tion of any unpleasant smells 3 Leave the inside of the mach...

Page 19: ...ws Anti flood device is activated Close the water tap and contact your local Service Force Centre Malfunction Possible cause and solution The programme does not start The dishwasher door has not been properly closed Close the door The main plug is not plugged in Insert the main plug The fuse has blown out in the household fuse box Replace the fuse Delay start has been set If dishes are to be washe...

Page 20: ...etergent may be the cause Contact the detergent manufacturer con sumer care line If after all these checks the problem persists contact your local Service Force Centre Technical data Dimensions Width Height Depth 45 cm 85 cm 63 cm Electrical connection Voltage Overall power Fuse Information on the electrical connection is given on the rating plate on the inner edge of the dishwasher door Water sup...

Page 21: ...t Installation Warning Any electrical and or plumbing work required to install this appliance should be carried out by a qualified electrician and or plumber or competent person Fitting under a counter kitchen worktop or sink Remove all packaging before positioning the machine If possible position the machine next to a water tap and a drain electrolux 21 ...

Page 22: ...e and sealing of the door When the appliance is correctly levelled the door will not catch on either side of the cab inet If the door does not close correctly loosen or tighten the adjustable feet until the ma chine is perfectly level Water connection Water inlet connection This appliance can be connected to either a hot max 60 or cold water supply With a hot water supply you can have a sig nifica...

Page 23: ...ve in water If water inlet hose or the safety valve is damaged remove the mains plug imme diately A water inlet hose with safety valve must only be replaced by the Service Force Centre Warning Dangerous voltage Water drain connection The end of the drain hose can be connected in the following ways 1 To the sink outlet spigot securing it to the underside of the work surface This will prevent waste ...

Page 24: ... appliance by pull ing on the cable Always pull the plug The manufacturer accepts no liabil ity for failure to observe the above safety precautions Environment concerns The symbol on the product or on its packaging indicates that this product may not be treated as household waste Instead it should be taken to the appropriate collection point for the recycling of electrical and electronic equipment...

Page 25: ...electrolux 25 ...

Page 26: ...26 electrolux ...

Page 27: ...electrolux 27 ...

Page 28: ...117959480 00 102008 www electrolux com ...

Reviews: