electrolux
19
EN
Opening the lid too long.
A defect in the system, see chapter
"What to do if...".
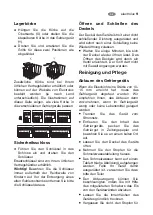
Storage baskets
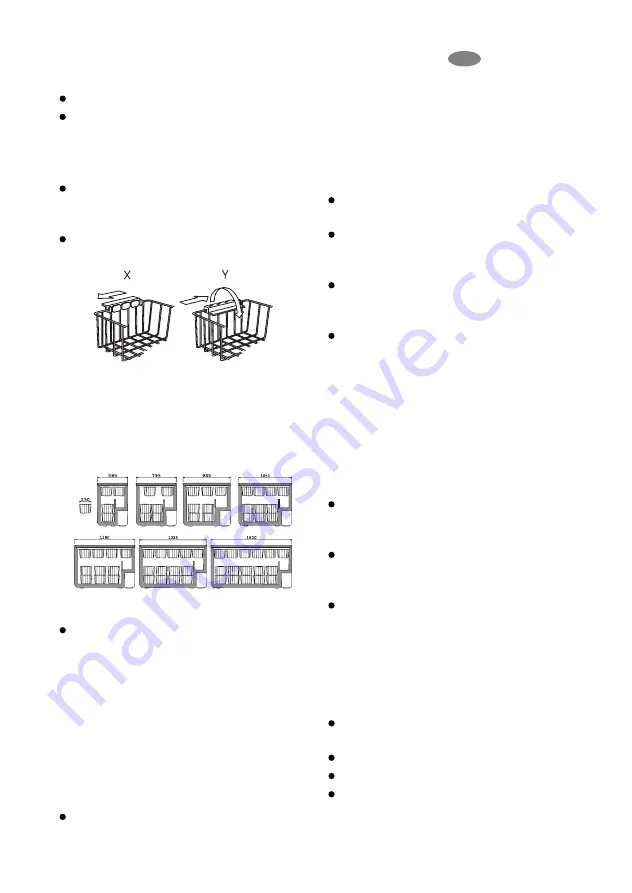
Hang the baskets on the upper edge
(X) or place the stackable baskets
inside the freezer (Y).
Turn and fix the handles for these two
positions, as shown in the drawings.
Spare baskets can be obtained from your
local Service Force Centre or from the
Electrolux website (depending on
country). The illustrations on this page
show how many baskets can be placed in
the various freezer models.
Security lock
Push the key in the lock while turning.
Spare keys can be obtained from your
local Service Force Centre.
Important!
Keep the keys out of reach of
children. Before disposing of an old
freezer remove the keys.
Opening and closing the lid
As the lid is fitted with a tightly closing
seal, it will not re-open easily
immediatedly after closing.
Wait a few minutes before re-opening
the lid. A valve will allow the lid to be
re-opened easily. Never pull the
handle violently.
Care and Cleaning
Defrosting the freezer
Disconnect the appliance from the
power supply.
Remove all loose accessories and the
vented floor, as shown on the
illustration.
Use a damp cloth to clean your
freezer. Use hot water and a mild, non-
aromatic detergent.
Clean the loose accessories and the
vented floor, before replacing them
again.
Important!
Never use strong detergents,
scouring powder or aromatic detergents
to clean your freezer.
Cleaning
The best time to clean your freezer is
after defrosting.
Disconnect the appliance from the
power supply and remove all loose
accessories.
Use a damp cloth to clean your
freezer. Use hot water and a mild, non-
aromatic detergent.
Clean the loose accessories, before
replacing them again.
Important!
Never use strong detergents,
scouring powder or aromatic detergents
to clean your freezer.
When not in use
Disconnect the appliance from the
power supply.
Remove all food from the freezer.
Clean the freezer as described above.
Leave the lid slightly open.
Summary of Contents for BMI 190
Page 2: ...We were thinking of you when we made this product ...
Page 43: ......

