46
Installation manual
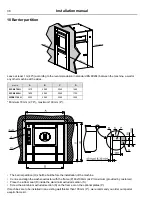
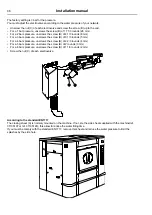
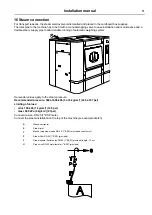
The factory setting is 3 bar for the pressure.
You must adjust the electrovalves according to the water pressure of your network.
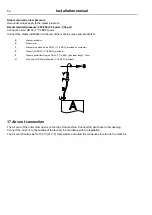
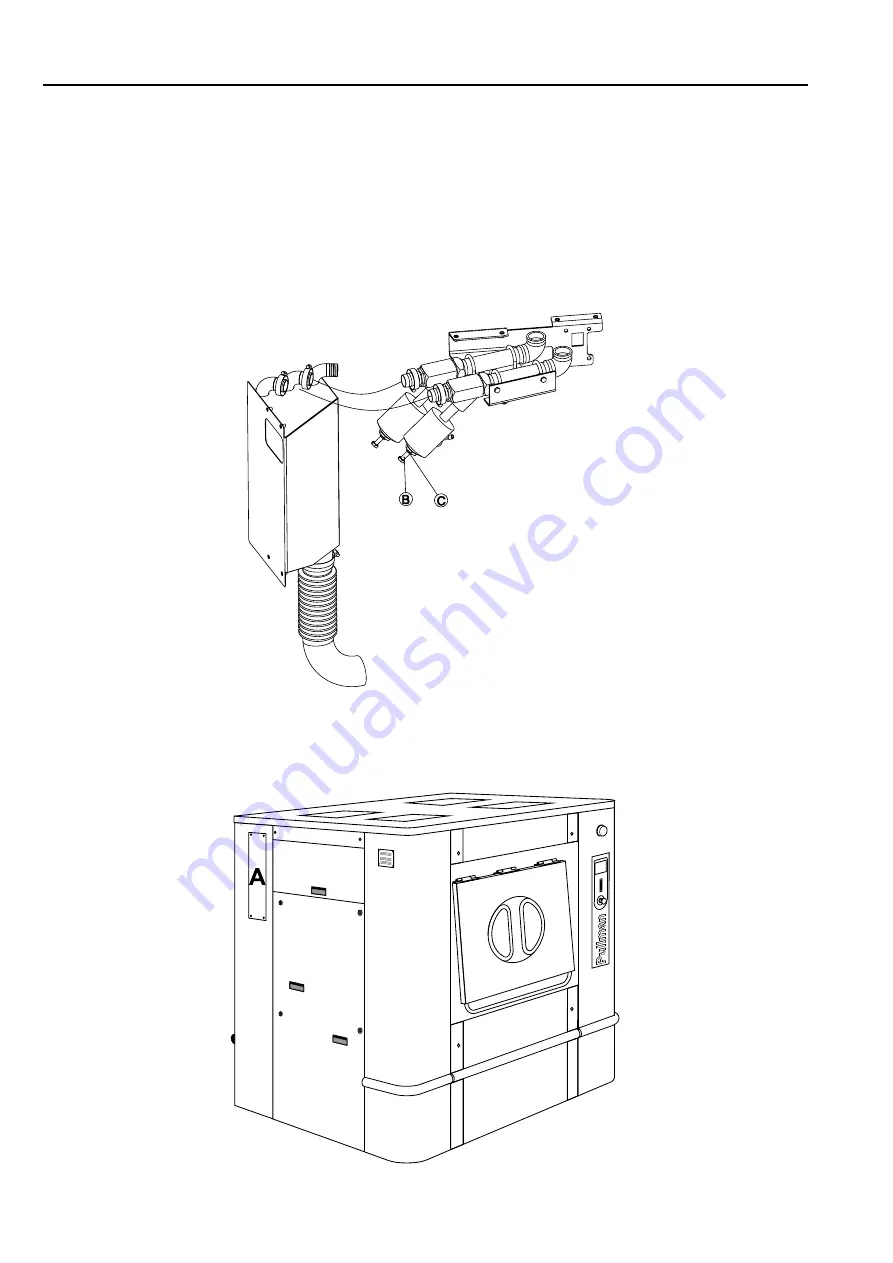
• Unscrew the nut (C) of each electrovalve and screw the screw (B) up to the end,
• For a 1 bar pressure, unscrews the screw (B) of 17 1/3 rounds (26 mm)
• For a 2 bars pressure, unscrews the screw (B) of 4 1/3 rounds (6 mm)
• For a 3 bars pressure, unscrews the screw (B) of 3 1/3 rounds (5 mm)
• For a 4 bars pressure, unscrews the screw (B) of 2 2/3 rounds (4 mm)
• For a 5 bars pressure, unscrews the screw (B) of 2 rounds (3 mm)
• For a 6 bars pressure, unscrews the screw (B) of 1 1/3 rounds (2 mm)
• Screw the nut (C) of each electrovalve.
According to the standard EN1717
The closing sheet (A) is normaly mounted on the machine. If not, ste the side sheet supplied with the machine(ref.
31105197 or ref. 31105124); this allow to reduce the water filling time.
If you must be comply with the standard EN1717, remove this sheet and reduce the water pressure to limit the
splashes by the side hole.
Summary of Contents for WP4 1100H
Page 2: ......
Page 4: ......
Page 25: ...Installation manual 25 6 3 Washer extractor type 900 One door WP4 900H Drawing 07100138 ...
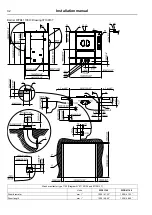
Page 31: ...Installation manual 31 6 5 Washer extractor type 1100 One door WP4 1100H Drawing 07100136 ...
Page 53: ...Installation manual 53 ...
Page 66: ......
Page 67: ......
Page 68: ...Electrolux Professional AB 341 80 Ljungby Sweden www electroluxprofessional com ...

