background image

This document is a property of ElectroFlip LLC No unauthorized reproduction is allowed.


6


INSERTING A MICROSD MEMORY CARD 


1.


Please make sure that the MicroSD card is facing the correct direction before you insert it into the 

ejection loading slot. Inserting the MicroSD card in the wrong direction might cause damage to the 

product and to the MicroSD card. You’ll easily identify which direction by gently inserting it to see 

which way it fits best. 

2.


It's a spring loaded slot which requires the memory card to be pushed down until it locks into 

place. Do not exert too much force when you push in the memory card it will lock it self into place 

on its own. 

3.


To remove the memory card, gently push in the memory card for it to eject and release. 


NOTE: If the MicroSD card is not compatible with the iSpyHD, your iSpyHD will power up for a few second 

then automatically power down. Check the specifications for memory type compatibility  or seek further 

support from your vendor.


TURNING ON THE ISPYHD 


1.


Press and hold the POWER button for 3 second to power up the iSpyHD.  

2.


A blue indicator LED will light up once the iSpyHD has completely powered up. 


TURNING OFF THE ISPYHD 


1.


Press and hold the POWER button for 3 seconds to power down the iSpyHD. 

2.


The blue indicator LED will go out once iSpyHD has powered off. 


RECORDING A VIDEO 


1.


Power up the iSpyHD. 

2.


The iSpyHD automatically enters standby video mode once powered on. 

3.


Simply press RECORD button once to begin a video recording. Both blue and red LED indicators 

remain solid to indicate that the iSpyHD is recording. 

4.


To stop the recording and close the file session, just press the RECORD button again. The red LED 

will go out and blue LED remain steady. (standby video mode)  


TAKING A PHOTO 


1.


Power up the iSpyHD. The iSpyHD will automatically go to video mode. 

2.


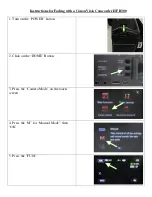
Press the MODE button once to enter Camera Mode. The blue LED will begin blinking, indicating 

its in standby camera mode.  

3.


Press the RECORD button once to take a photo. The red LED will light up for a few second, then 

go out. Indicating it has taken a photo. 


Summary of Contents for iSpyHD

Page 1: ...TrueHD glass lens which no other pocket camera currently offers All information and instructions included in this manual are current as of April 10 2016 However due to the fluid nature of advancing technology some characteristics may change or need modifications in the future Should you encounter any problems or have any further questions about your purchase please visit our website www ElectroFli...

Page 2: ...ode and Menu Settings 4 Product Specification 5 Inside the Package 5 GETTING STARTED 5 Charging the ISpyHD 5 Inserting a Memory Card 6 Turning On the ISpyHD 6 Turning Off the ISpyHD 6 Recording a Video 6 Taking a Photo 6 Preview Mode 7 Deleting While In Video Photo Preview 7 Preview Video Photo Through PC 7 Preview Video Photo Using the Memory Card 7 Mode Setting 8 TROUBLESHOOTING 8 ...

Page 3: ...This document is a property of ElectroFlip LLC www ElectroFlip com No unauthorized reproduction is allowed 3 PRODUCT INFORMATION HARDWARE PARTS ...

Page 4: ...video or picture BACKWARD MODE AND MENU SETTING MENU VIDEO SETTING VIDEO MENU PHOTO SETTING PHOTO Size 1280x720 848x480 640x480 320x240 Size 8M 5M EV 0 0 3 0 7 1 1 3 1 7 2 2 1 7 1 3 1 0 7 0 3 EV 0 0 3 0 7 1 1 3 1 7 2 2 1 7 1 3 0 7 0 3 Whire B Auto Sunny Cloudy Tungsten Fluorescent Quality Fine good normal Contrast Standard Hard Soft Whire B Auto Sunny Cloudy Tungsten Fluorescent Sharpness Standard...

Page 5: ...x720 30fps MOV WORKING TEMPERATURE 15 C 50 C PHOTO Photo format 200x2400 JPEG WORKING HUMIDITY 15 85 VIDEO OUTPUT HDMI support 720P output mode PRODUCT WEIGHT 36g STORAGE Internal External supports up to 32GB Max Class 4 PRODUCT SIZE 108m L x 28mm W x 18mm H Approx INTERFACE HDMI USB 2 0 INSIDE THE PACKAGE Retail iSpyHD unit memory card not included USB Charging Cable USB Wall Adapter HDMI Cable G...

Page 6: ...mpatibility or seek further support from your vendor TURNING ON THE ISPYHD 1 Press and hold the POWER button for 3 second to power up the iSpyHD 2 A blue indicator LED will light up once the iSpyHD has completely powered up TURNING OFF THE ISPYHD 1 Press and hold the POWER button for 3 seconds to power down the iSpyHD 2 The blue indicator LED will go out once iSpyHD has powered off RECORDING A VID...

Page 7: ... DELETING WHILE IN VIDEO PHOTO PREVIEW 1 While viewing a video press MODE button for 3 seconds to enter Setting Mode 2 Press MODE button to go to deleting display 3 Press DIRECTION button to choose the deleting option 4 Press MODE button to exit PREVIEW VIDEO PHOTO ON PC 1 Power up your iSpyHD ensure you have battery power available connect iSpyHD to the computer through the USB Cable 2 Open My Co...

Page 8: ...At any menu mode press the DIRECTION button to go to the menu setting options You can then choose your desired settings 4 Press MODE button to confirm the changes 5 Press the RECORD button to exit the current menu setting and to go back to original mode TROUBLESHOOTING Below are possible issues that you may encounter when using the iSpyHD If the issue you are having is not on the list you may visi...

Reviews: