


21
Troubleshooting
Please read this instruction manual carefully before you send the robot to the
service centre
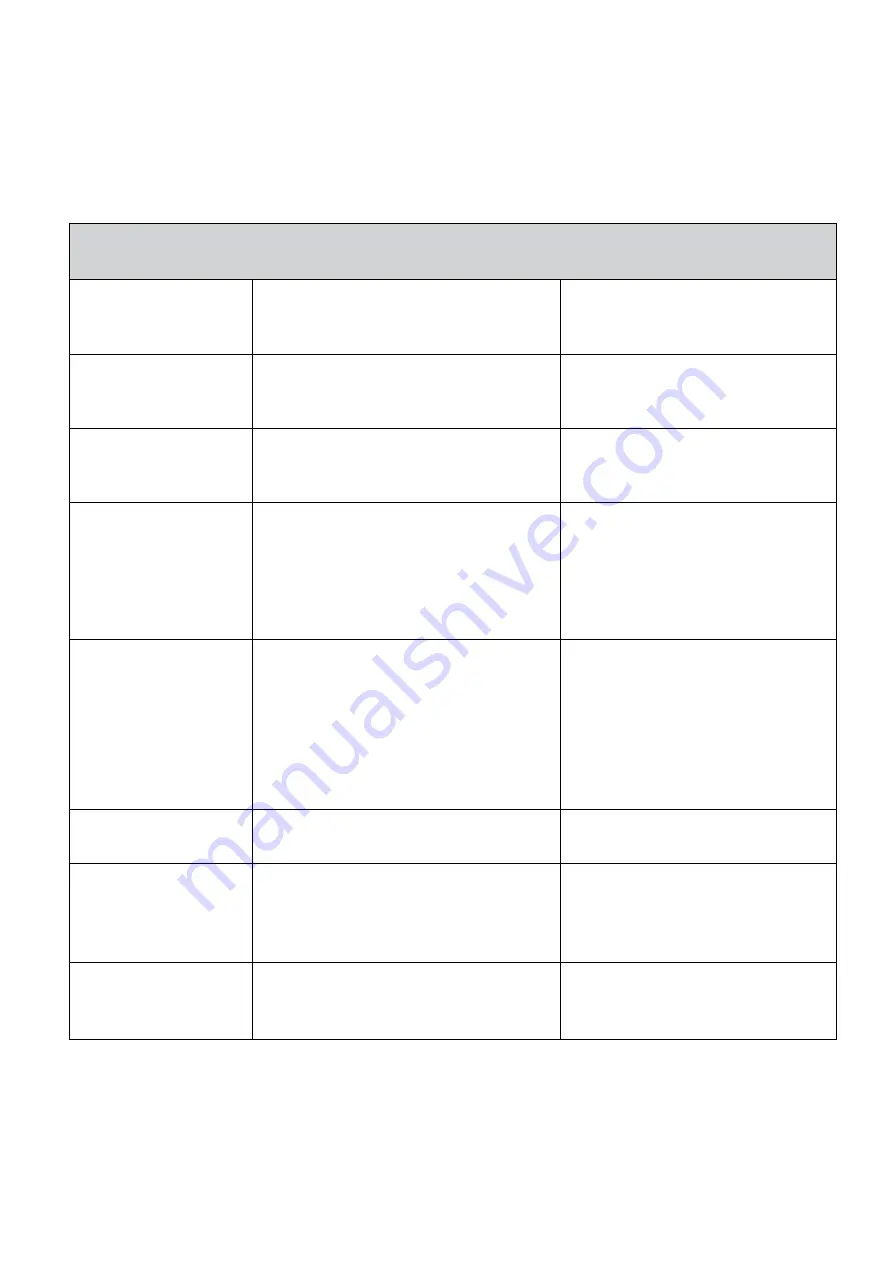
Problem
Cause
Solution
Error message
Sensor malfunction or system jammed
Check the error messages on next
section for correct action
The Robot cannot
power on
The battery is not installed or installed
incorrectly
Check if the battery is still in good
condition and installed correctly
Remote control
malfunction
The transparent film is not taken off
The battery is not correctly installed
or the battery strength is too low
Tear off the transparent film
Check the installation of the
battery or replace the battery
The robot fails to
return to the dock
The dock is not properly placed
There are obstacles between the dock
and the Robot
The robot is stuck or jammed
Place the dock in a proper location
and leave sufficient clearance space
for the Robot to return to it
Remove any obstacles in front of the
dock
Check and clean the Robot’s wheels
The Robot does not
charge
AC power is not plugged in.
The Robot is not correctly docked
The battery is over-heating
PIug the AC jacket onto the dock
firmly.
When the robot is docked, please
make sure the Robot is properly
placed.
Do recharge for at least 60 minutes
until battery cooled down.
Rolling brush or side
brush do not work
Brushes get stuck by debris or hair
Clean the brushes
The Robot does not
start cleaning after it is
fully recharged
The "Auto" function is not set correctly.
The battery is over-heating
Check the schedule setting section
and reset the "Auto" function
Do recharge for at least 60 minutes
until battery cooled down.
The Robot keeps
moving backward or
turning around
Cl
iff sensors are blocked or covered by dust
Wipe all sensors with a dry clean
cloth.
Summary of Contents for eiQ-R900M
Page 6: ...6 Functions...
Page 20: ...20...


