


- 2 -
Using this Product with Windows
®
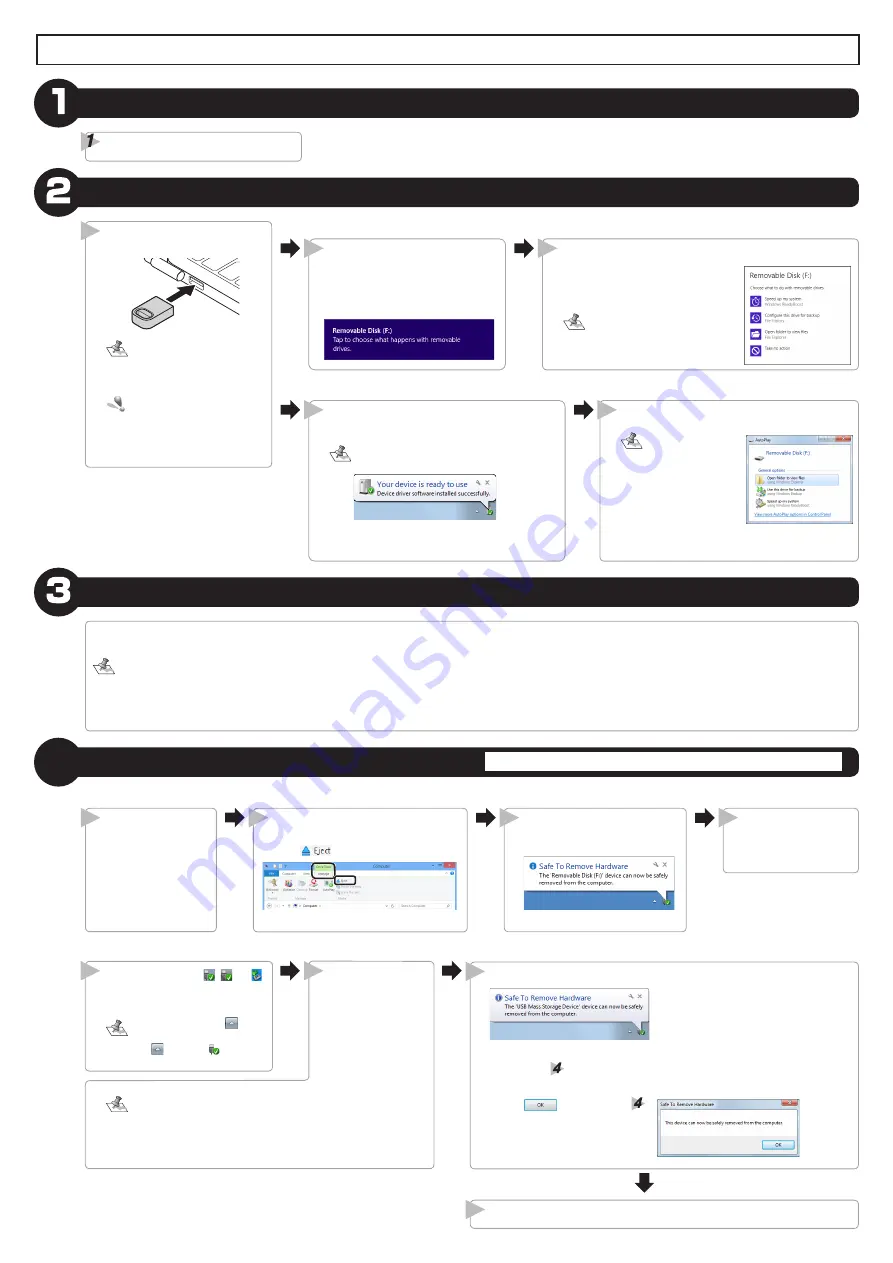
Connect to the PC
Connect the product to a USB
port on the PC.
Carefully check the orientation
of the product’s USB connec-
tor and the USB port before
connecting.
Do not connect the product
to a USB hub or a keyboard
USB port. The product may
not function correctly.
1
Disconnect from the PC
4
Do not disconnect the product while data is being written or read.
The product is detected auto-
matically.
A pop-up appears at the top
right of the screen.
2
Access the product.
If an AutoPlay win-
dow appears, select
an action.
*
If the product is
empty, a removable
disk opens directly.
3
Read and write files
The product can be formatted (initialised) and can be used to move, copy, and delete files like a floppy disk or similar media device.
●
Normally, there is no need to format (initialise) the product.
●
To transfer data between a Windows
®
PC and a Mac, do not format the product on the Mac; format it as FAT or FAT32 on the Windows
®
PC.
If the product is formatted as NTFS or exFAT on the Windows
®
PC, it will not be possible to read or write files to with the Mac.
If the product is formatted as Mac OS Standard or Mac OS Extended on the Mac, it will not be possible to read or write files to with the Windows
®
PC.
Start the PC
Turn on the PC.
Windows
®
8
Click the pop-up. A window appears prompting you
to select an action.
To display the content of the product,
select “Open folder to view files”.
If the product is empty, a remov-
able disk opens directly on the
desktop.
3
The product is detected automatically.
The connection procedure is now complete.
A message confirming that the installation is com-
plete appears in the task tray or notification area.
From the second time onwards, it is possible to
use the product simply by inserting it.
2
Windows
®
7, Windows Vista
®
, and Windows
®
XP
Windows
®
8
D i s c o n n e c t t h e
product from the PC
USB port.
4
Open “Computer”.
* For details on the proce-
dure to open the “Com-
puter” window, refer to
“Accessing the drive in
Windows
®
8” (page 3).
1
Select the removable disk, and in
File Explorer, on the [Manage] tab,
click
.
2
A “Safe to Remove Hard-
ware” message appears.
3
Windows
®
7, Windows Vista
®
, and Windows
®
XP
Click the message
that appears.
If a USB device or PC Card is being used in addition to this prod-
uct, both names are displayed.
In this case, click the message that refers to this product (“USB
Mass Storage Device” or “USB disk”).
Left-click the icon ( , , or )
in the task tray or notification
area.
In Windows
®
7, when is dis-
played in the notification area,
click to display .
1
2
A “Safe to Remove Hardware” message appears.
•
Windows
®
7 and Windows
®
XP
Go to step
.
•
Windows Vista
®
Click
, and go to step
.
3
Disconnect the product from the PC USB port.
4


