s h e r w o o d
™
W O O D - B U R N I N G F I R E P L A C E
Page 1: ...s h e r w o o d W O O D B U R N I N G F I R E P L A C E...
Page 2: ...ERN ASSEMBLY GUIDELINES 9 BROKEN COMPONENTS 9 LEVELING ALIGNING COMPONENTS 9 NOTES 9 RECOMMENDED TOOLS 10 FIREPLACE INSTALLATION STEPS 10 FIREBRICK INSTALLATION 19 FINISHING FIREPLACE EXTERIOR 20 OPER...
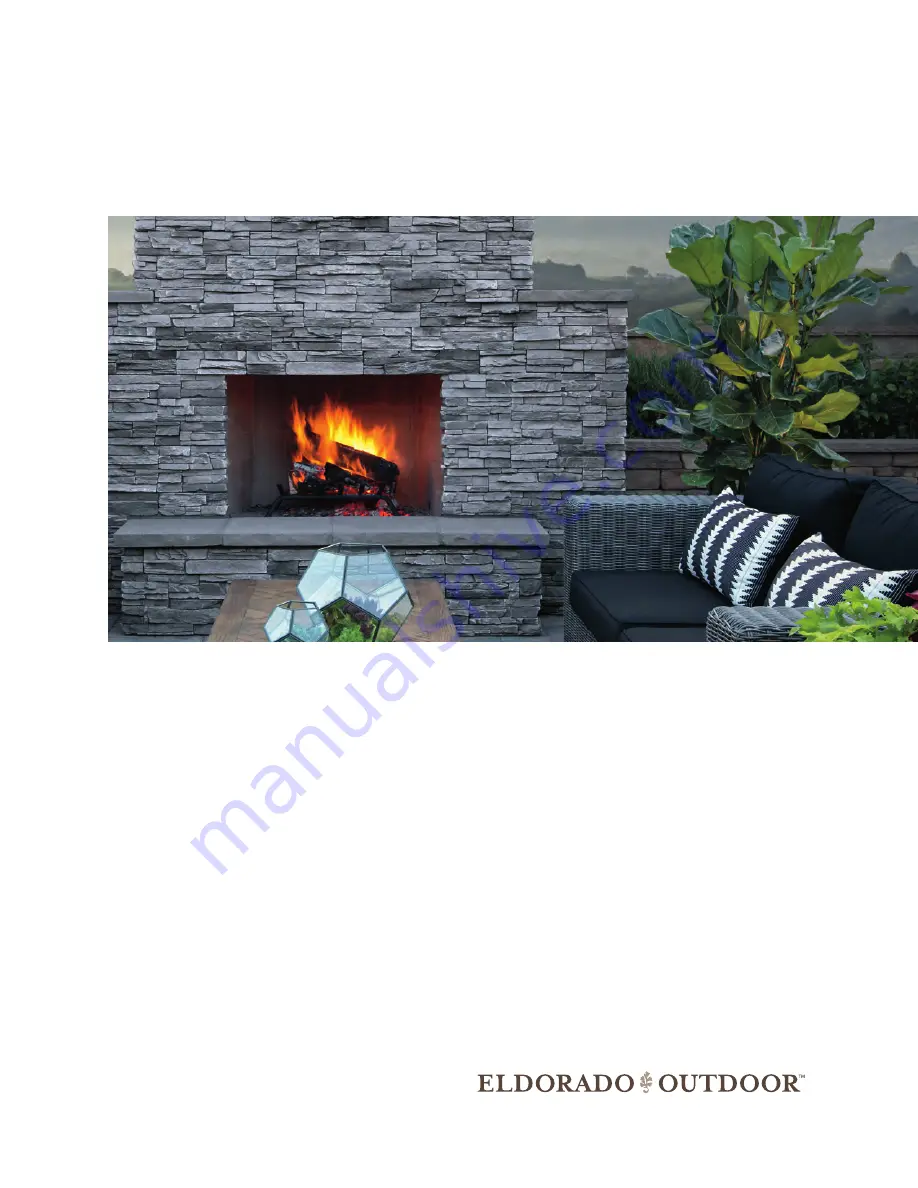
Page 3: ...ne Since its discovery fire has become much more than an essential element in our lives it can set the mood in any environment Now you can command the element of fire to enjoy its comfort and ambiance...
Page 4: ...sidue accumulates on the flue lining When ignited this creosote makes an extremely hot fire Because of creosote and soot buildup it is necessary to inspect and clean the fireplace and chimney prior to...
Page 5: ...e fireplaces M A N T E L C L E A R A N C E S A decorative mantel may be installed above the firebox opening of the Sherwood Fireplace provided the front edge of the mantle extends no more than 10 from...
Page 6: ...6 800 925 1491 eldoradostone com outdoor D I M E N S I O N S 96 52 32 47 16 16 64 93 25 5 38 64 21 52 14 15 27 27 40 40 16 12 8...
Page 7: ...nt 1 K ChimneySleeve Back 1 M FireplaceSideExtension Right 1 N FireplaceSideExtension Left 1 O ChimneyCap 1 Bolts 75 3 5 36 Washers 76 Nuts 36 CavityPlugs 36 ITEM PART QTY A BaseSupport 1 B BaseSleeve...
Page 8: ...DamperSupport 2 6 SmokeDome 2 7 SmokeDomeSlopingSides 2 ITEM PART QTY 8 SmokeDomeTopPlate 1 9 ChimneyCasingBlock 1 10 6 InteriorChimneyLiner 1 11 12 InteriorChimneyLiner 1 IsokernMortar 5Gallons Alse...
Page 9: ...out along the face of the entire joint as a sign of complete and proper sealing of the joint On broader contact surfaces it is advisable to apply several additional beads of the Isokern Mortar to the...
Page 10: ...nst the underlying Base Support surface P L A C E I S O K E R N F I R E B O X B A S E 2 Parts Base Sleeve Part B Mortar Type N A a Place the Base Sleeve over the Base Support and Plate assembly with a...
Page 11: ...dhesive a Place Left Side Unit on base assembly b Apply construction adhesive to the bottom of the Left Side Unit and slide into position along the left edge of Base Sleeve making sure to line up the...
Page 12: ...ortar a Dry set the first level of Firebox Side Back Walls on top of the Base Plate of the base assembly Set the outside edges flush with the Isokern base plate b Trace the position of all 3 pieces in...
Page 13: ...rebox for level c If necessary adjust the top surface of the firebox assembly for level by inserting a shim between the lowest wall component and the top surface of the base plate d Any gap created un...
Page 14: ...ion Sleeve Part G 4 qty Bolts 8 qty Washers 4 qty Nuts Mortar Type Construction Adhesive a Lift the Cross Section Sleeve up and over damper assembly and set in place on top of the Fireplace Left Part...
Page 15: ...the Smoke Dome Sloping Sides at each end of the Smoke Dome components The Sloping Sides have a beveled bottom to fit flat on the top of the damper assembly B E G I N I S O K E R N S M O K E D O M E A...
Page 16: ...Tighten with a turn past snug B U I L D S M O K E D O M E S L E E V E 16 Parts Isokern Chimney Casing Block Part 9 Isokern 6 Interior Chimney Liner Part 10 Isokern 12 Interior Chimney Liner Part 11 M...
Page 17: ...Sleeve Front and Back together and to the Smoke Dome Sleeve underneath using 4 bolts using 2 washers and a nut for each bolt Tighten with a turn past snug B U I L D C H I M N E Y S L E E V E 18 Parts...
Page 18: ...h cap before pushing in place A D D C A V I T Y P L U G S 20 Parts Chimney Cap Mortar Type N A a Set the stainless steel Chimney Cap on top of Chimney Sleeve and position over the center of the Isoker...
Page 19: ...cles from the interior before installing firebrick 2 Determine your pattern and face joint dimensions Face joint dimensions of to in the brickwork is recommended and has the best appearance Other face...
Page 20: ...tration below Then lay one split section of log across each side of the kindling B placing the pieces of wood so that the ends nearer to the back of the fireplace C are closer together than the ends a...
Page 21: ...tsareincorporated orworkmanshipinvolvedinthe applicationofanyESproductswarrantedhereunder TheES productisnotwaterproof TheESproductmustbeincorporated intoacladdingdesignedbyabuildingprofessionalthatco...
Page 22: ...erpriortocommencinginstallation Upon receiptofawrittencomplaint ESwillexamineitsproduction recordsandcomparethemwithapprovedsamplesandinthe eventofamanufacturingdiscrepancy willprovidearemedyin accord...
Page 23: ...800 925 1491 eldoradostone com outdoor 2017 Eldorado Stone LLC 012517...