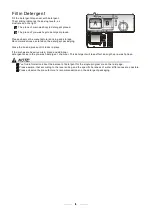
background image

1. The salt containe r mu st only be refilled when the salt warning light in the control panel com es on.

Depending on how well the salt dissolves, the s alt warning light may still be on even though the salt con tainer
is filled.
If there is no salt warning light in the control panel (for some Models),you can estimate wh en to fill the salt
into the softener by the cycles that the dishwasher has run.

2. If th ere are spills of the salt, a soa k or a rap id program s hould be run to re move the excessive salt.

Always use the salt intended for use with dishwasher.
The salt c ontain er is located beneath the lower basket and should be fill ed as explained in the
following:

Attention!

Only use salt spe cif ically desi gne d for t he use i n dishwashers! Every other type of sal t not
specificall y desi gned for the use in a dishwas her, es pecially table salt, will damage the water

softener. In case o f damage s caused by the use o f unsuitable salt the m anu fa ctu rer
does not g ive any w arranty nor is liable for any damages caused.

Only fil l wi th salt just b efore starting one of the co mp let e washing p rograms.
Th is wi ll pre vent any grains of sa lt o r salty w ater, whi ch may ha ve b een spilled,r emaining on the

bottom of the machi ne fo r any period of time, which may cau se corro sion .

The rinse aid is released d uring the final rinse to prevent water from forming droplets on your dishes, which can leave spots
and streaks. It also improves drying by allowing water to roll o ff the dishes. Your dishwasher is designed to use
liquid rinse aids. The rinse aid dispenser is located inside the door nex t to the detergent dispenser.
To fill the dispenser, open the cap and pour the rinse aid into the dispenser until the level indicator turns completely
black. The volume of the rinse aid container is about 110ml.

Rinse Aid Dispenser

Function of Rinse Aid

Rinse aid is automatically added during the last rinse, ensuring thorough rinsing, and spot and streak free drying.

Attention!

Only use branded rinse aid for dishwasher. Never fill the rinse aid dis penser with any o ther substances

(e.g. Dishwasher cleaning agent, liquid detergent). This would damage the appliance.

3. If the machine ne eds to be dumped for the reasons of tra nsit, rep air and so on, please use the bibul ous cloth or
analog to blot up th e water in the salt con taine r, and screw the cap tightly, afterw ard, transit or repair the m achine.
After transiting or repairing the mach ine and c onf irmin g it in order, load the salt into the softe ner according to the
process of

B. Loading the salt into the S oftener

. Otherwise , it c ould be make the big damage to the ma chin e, for

examp le, rustiness , conk and so on. Such problems are out of the warranty range.

Fu ll fil l the salt container with wa ter,It is normal for a small amount o f water to come out of the
sal t containe r.

A

After the lower basket has been removed, unscrew and remove the cap from the salt container.

B

Pl ace the end of the funnel (supplied) into the hole and introduce about 1.5kg of dishwasher salt.

C

D

After fil ling the container , screw the cap tightly back clockwise.

E

The salt warning ligh t will stop being after th e sa lt co ntain er has be en fill ed with sa lt.

F

Immediately after filling the salt into the salt container, a washing program should be started

program

Otherwise the filter system, pump or other important parts of the machine may be damaged by salty water.

this is out of warranty.

(We su ggest to use a short

).

Summary of Contents for EDW-B1461

Page 1: ...s Manual Please read this manual carefully before operating your set Retain it for future reference Record model number and serial number of the set See the label attached on the set and quote this information to your dealer when you require service DISHWASHER MODEL EDW B1461 WH ...

Page 2: ...d it must be replaced by the service centre or a qualified service technician to avoid hazard 6 Any electrical work required to install this appliance should be carried out by a qualified technician or competent personnel WARNING to reduce the risk of fire or injury to persons or property please read and follow below instructions carefully Do not operate this appliance if it has malfunctioned dama...

Page 3: ...efer to the dishwasher loading instructions Press the Programme Button until the selected programme lights up See the section entitled Operationg instruction When the working cycle has finished the buzzer of the dishwasher will sound 8 times then stop Turn off the appliance using the On Off Button If the appliance is switched off during a wash cycle Open the door carefully Hot steam may escape whe...

Page 4: ...for the Dishwasher 16 B Loading the Salt into the Softener 5 C Fill the Rinse Aid Dispenser 5 D Function of Detergent 6 Loading the upper Basket 10 Loading the Lower Basket 10 Cutlery Basket 11 The recommended method loading big dishware 12 6 Starting a washing programme 13 6 Starting a washing programme 13 Wash Cycle Table 13 Turning on the Appliance 14 Change the Programme 14 At the Ene of the W...

Page 5: ...t This instruction is only applicable to machines with a visual heating element If the supply cord is damaged it must be replaced by the manufacturer or its service agent or a similarly qualified person in order to avoid a hazard Please dispose of packing materials properly Use the dishwasher only for its intended function Dishwasher detergents are strongly alkaline they can be extremely dangerous...

Page 6: ...e Therefore cut off the power supply cable and make the door closing device unusable Cardboard packaging is manufactured from recycled paper and should be disposed in the waste paper collection for recycling By ensuring this product is disposed of correctly you will help prevent potential negative consequences for the environment and human health which could otherwise be caused by inappropriate wa...

Page 7: ...11 12 ...

Page 8: ... 0 5 0 0 94 H1 Soak light bright 0 10 20 6 11 1 0 2 0 20 60 21 30 12 17 2 1 3 0 30 50 H4 ECO Light bright 40 40 fH 0 6 7 14 15 21 Clarke WATER HARDNESS Selector Position Salt consumption gram cycle Auto nomy cycles 1kgs Please follow the steps below for adjustment in salt consumption 18 22 31 40 22 28 3 1 4 0 If your model does not have any water softener you may skip this section Clark British de...

Page 9: ...o fill the dispenser open the cap and pour the rinse aid into the dispenser until the level indicator turns completely black The volume of the rinse aid container is about 110ml Rinse Aid Dispenser Function of Rinse Aid Rinse aid is automatically added during the last rinse ensuring thorough rinsing and spot and streak free drying Attention Only use branded rinse aid for dishwasher Never fill the ...

Page 10: ...the black dot on the rinse aid level indicator changes as illustrated below Full 3 4 full 1 2 full 1 4 full Should refill to eliminate spotting Empty When to Refill the Rinse Aid Dispenser If there is no rinse aid warning light in the control panel you can estimate the amount from the colour of the optical level indicator C located next to the cap When the rinse aid container is full the whole ind...

Page 11: ...lve properly Concentrated Detergent Detergent Tablets Detergent Dispenser conventional alkaline detergents with caustic components low alkaline concentrated detergents with natural enzymes Normally new pulverised detergent is without phosphate Thus the water softener function of phosphate is not given In this case we recommend to fill salt in the salt container even when the hardness of water is o...

Page 12: ... Close the lid and press until it locks in place If the dishes are heavily soiled place an additional detergent dose in the pre wash detergent chamber This detergent will take effect during the pre wash phase A B Fill in Detergent You find information about the amount of detergent for the single programme on the last page Please aware that according to the level soiling and the specific hardness o...

Page 13: ...ups glasses pans etc With the opening facing downwards so that water cannot collect in the container or a deep base Consider buying utensils which are identified as dishwasher proof Use a mild detergent that is described as kind to dishes If necessary seek further information from the detergent manufacturers For particular items select a program with as low a temperature as possible To prevent dam...

Page 14: ...be reminded that The Bottom Basket features folding spikes so that larger or more pots and pans can be loaded Folding Spikes of Lower Basket For better stacking of pots and pans the spikes can be shown in the picture below Adjusting the Upper Basket The height of the upper basket can be adjusted in order to create more space for large utensils both for the upper lower basket The height of the uppe...

Page 15: ...shwasher begins to start On Off Normal Eco Soak Intensive Glass 60 min 1 2 3 4 5 Means need to fill rinse into the Rinse Aid Dispenser Eco Intensive Normal or 3in1 5 30g Soak Pre wash 50 Pre wash Wash 65 Rinse Rinse 55 Drying Pre wash 45 Wash 50 Rinse Rinse 60 Drying Wash 50 Rinse Drying Pre wash Rinse 60 Rinse 180 175 165 8 1 25 1 04 1 5 0 1 20 16 12 5 4 60 min Wash 60 Rinse 60 Drying Pre wash 50...

Page 16: ...seconds during a wash cycle Premise A cycle that is underway can only be modified if it has only been running for a short time Otherwise the detergent may have already been released and the appliance may have already drained the wash water If this is the case the detergent dispenser must be refilled see the section entitled Loading the Detergent Press the On Off button to stop washing press this b...

Page 17: ...le Main filter 1 Coarse filter2 Fine filter 3 2 3 1 Filter assembly The filter efficiently For best performance and results the filter must be cleaned regularly this reason it is recommended to remove the larger food particles trapped in the filter after each wash cycle by rinsing the semicircular filter and cup under running water To remove the filter device pull the cup handle in the upward dire...

Page 18: ...pray cleaner of any kind Never use a spray cleaner to clean the door panel as it may damage the door lock and electrical components Abrasive agents or some paper towels should not be used because of the risk of scratching or leaving spots on the stainless steel surface Cleaning the Spray Arms If your dishwasher cannot work because of the ice please contact professional service persons It is necess...

Page 19: ...ter supply and drain hoses that can be positioned either to the right or the left sides to facilitate proper installation Once the appliance is positioned for levelling the height of the dishwasher may be altered via adjustment of the screwing level of the feet In any case the appliance should not be inclined more than 2 For personal safety DO NOT USE AN EXTENSION CORD OR AN ADAPTER PLUG WITH THIS...

Page 20: ... of 40mm or let it run into the sink making sure to avoid bending or crimping it The top of the hose must be less than 1000mm for personal safety DO NOT USE AN EXTENSION CORD OR AN ADAPTER PLUG WITH THIS APPLIANCE DO NOT UNDER ANY CIRCUMSTANCES CUT OR REMOVE THE FROM THE POWER CORD EARTHING CONNECTION Improper connection of the equipment earthing conductor can result in the risk of an electric sho...

Page 21: ...nsion make sure to use a similar drain hose It must be no longer than 4 metres otherwise the cleaning effect of the dishwasher could be reduced Water Outlet Connect the water drain hose The drain hose must be correctly fitted to avoid water leaks Ensure that the water drain hose is not kinked or squashed If the sink is 1000 higher from the floor the excess water in hoses cannot be drained directly...

Page 22: ...ramme and rearrange the items of crockery This has no influence on the dishwasher function if in doubt contact a suitably qualified plumber Detergent with colourant was used Make sure that the detergent is the one without colourant Improper detergent Make sure the dishwasher is turned on and the door is closed securely Check that the water supply is connected properly and the water is turned on Ma...

Page 23: ...inse aid refill the rinse aid dispenser Do not empty your dishwasher immediately after washing Open the door slightly so that the steam can escape Begin unloading the dishwasher only once the dishes are barely warm to the touch Empty the lower basket first This prevents water form dropping off dishes in the upper basket In short program the washing temperature is lower This also lowers cleaning pe...

Page 24: ...e 0 04 1 0MPa Power supply 220 240V 50Hz Capacity 14 place settings If overflow occurs turn off the main water supply before calling a service If there is water in the base pan because of an overfill or small leak the water should be removed before restarting the dishwasher ...

Page 25: ......

Page 26: ......

Reviews: