Operation Guide
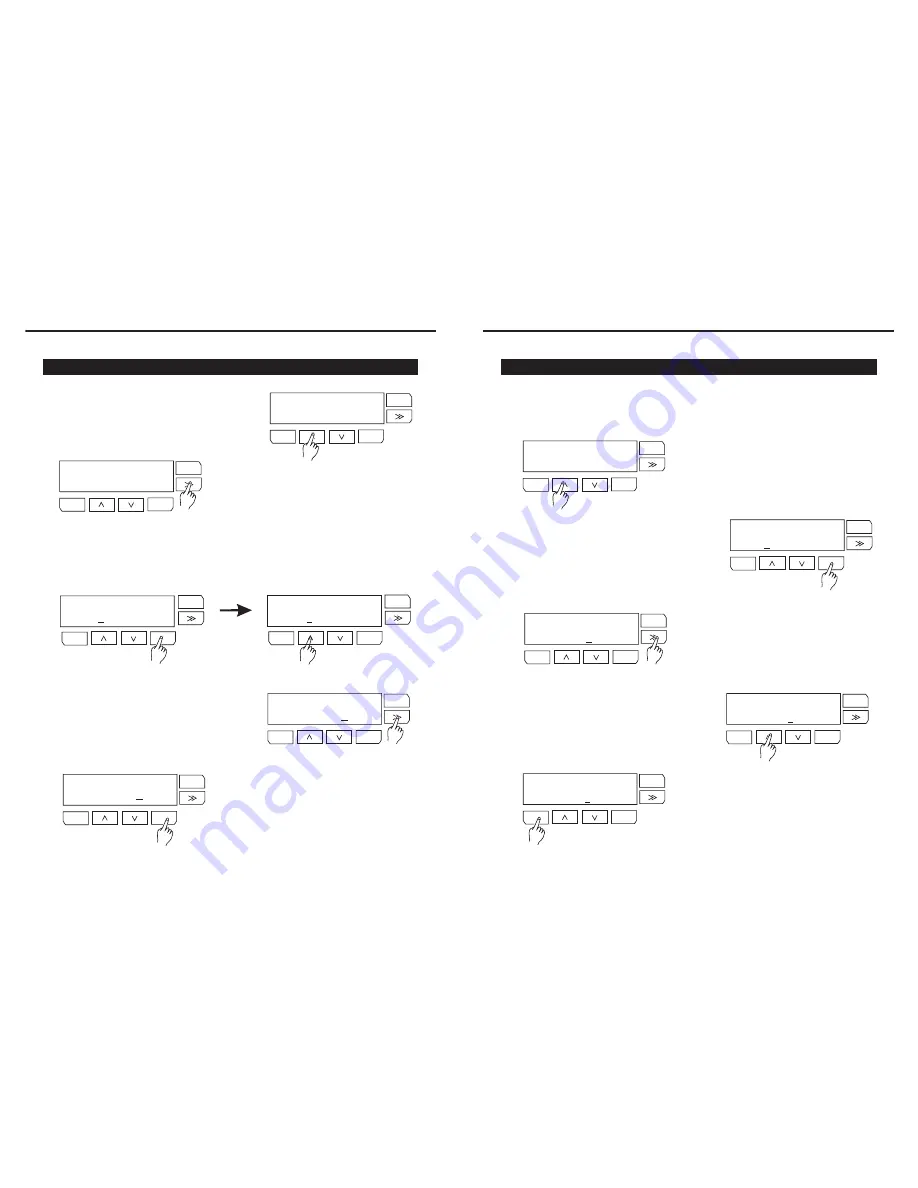
4) Scenes REC
1. Tap UP/DOWN button to scroll to
SCENES REC menu.
2. Tap >> button to swap sub-menu between
Copy and Assign.
3. Tap ENTER button to enter the Sub-menu you selected, and tap UP/DOWN
button to scroll scene number. In this mode, there are total 99 scenes, scene71~
scene 99 are build in patterns which can be covered with new scene, you can set
default to resume them.
4. Tap >> button move cursor to blinking
"ENTER" and ready to record.
-12-
ENTER
MENU
ESC
ENTER
MENU
ESC
ENTER
MENU
ESC
ENTER
MENU
ESC
ENTER
MENU
ESC
SCENE REC
Copy
SCENE REC
Assign
SCENE: [Copy]
Scene0 :ENTER
1
SCENE: [Copy]
Scene0 :ENTER
6
SCENE: [Copy]
Scene06:ENTER
5.Tap ENTER button to record input DMX signal
to current Scene. This page Scene number
will increase 1 after signal record. For example,
the Scene06 increased to Scene07 once Scene06
was recorded the input singal..
ENTER
MENU
ESC
SCENE: [Copy]
Scene07:ENTER
1. Use MENU button to enter set-up menus.
Tap UP/DOWN button to scroll to LOCAL
CONTROL menu.
Operation Guide
2) LOCAL CONTROL
2. Tap ENTER button to enter LOCAL CONTROL
menu. The selected channel will keep blinking.
-9-
ENTER
MENU
ESC
ENTER
MENU
ESC
LOCAL COTROL00%
LIVE 123456789012
LOCAL COTROL00%
LIVE 23456789012
1
4. You can use UP/DOWN button to adjust the
parameter(xx%) for the channel you last
selected.
3. You can use >> button move cursor to
to select the channel you want to adjust.
ENTER
MENU
ESC
LOCAL COTROL00%
LIVE 12345 789012
6
ENTER
MENU
ESC
LOCAL COTROL03%
LIVE 12345 789012
6
5.Tap ESC button to exit.
ENTER
MENU
ESC
LOCAL COTROL03%
LIVE 12345 789012
6
Local Control menu is to set the output level for the selected dimmers.


