/ 11 /
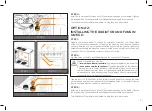
STEP 6
Align the water block over the mounting screws on the LGA-115x motherboard with
pre-installed CPU.
Before proceeding with the installation It is mandatory to remove the pro-
tective foil from the backside of the water block.
Place an enclosed coiled spring and thumb nut over each M4 thumb screw. Start
fastening two thumb nuts at a time, preferably in cross pattern and do not tighten
them fully until all of them are partially screwed in. Then – using your fingers only
screw in all four thumb nuts until you reach the end of the thread.
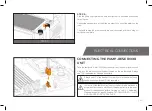
STEP 7
With EK-Supremacy Mx series water blocks it is mandatory to use the port
that is nearest to the center of the water block as INLET port. Mixing the
ports may result in poor thermal performance of the water block.
Tighten the fitting barbs in clockwise direction until the gasket underneath is com-
pressed.
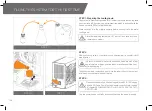
STEP 8
Install the CPU water block along with the motherboard back into the computer chassis.
The installation of the CPU water block is now complete.
STEP 5
Non-abrasive
cloth
Th
er
m
al g
re
as
e
IHS
STEP 5
Cleaning the CPU:
Wipe the CPU’s contact surface (by using non–abrasive cloth
or Q-tip, as shown on sample photo).
Applying thermal compound:
EK recommends blob or line method of applying the
enclosed EK-TIM Ectotherm thermal compound to the CPU heat spreader (IHS) -
see sample photo on right.
The quantity of about two rice grains is just about right. There is no need to
cover the whole IHS. Applying too much thermal grease will have negative
impact on the cooling performance!
STEP 6
STEP 7
Thumb nut
Coiled
spring
Fitting
Ring
Fitting Barb
Inlet port
Outlet
port
STEP 8


