background image

9

Chapter 2 Adjusting Screens

Mac OS X

1.  Select “System Preferences” from the Apple menu.
2.  When the “System Preferences” dialog box is displayed, click “Displays” for “Hardware”.
3.  On the displayed dialog box, select the “Display” tab and select desired resolution in the 

“Resolutions” field.

4.  Your selection will be reflected immediately. When you are satisfied with the selected resolution, 

close the window.

2-2.  Adjusting Color


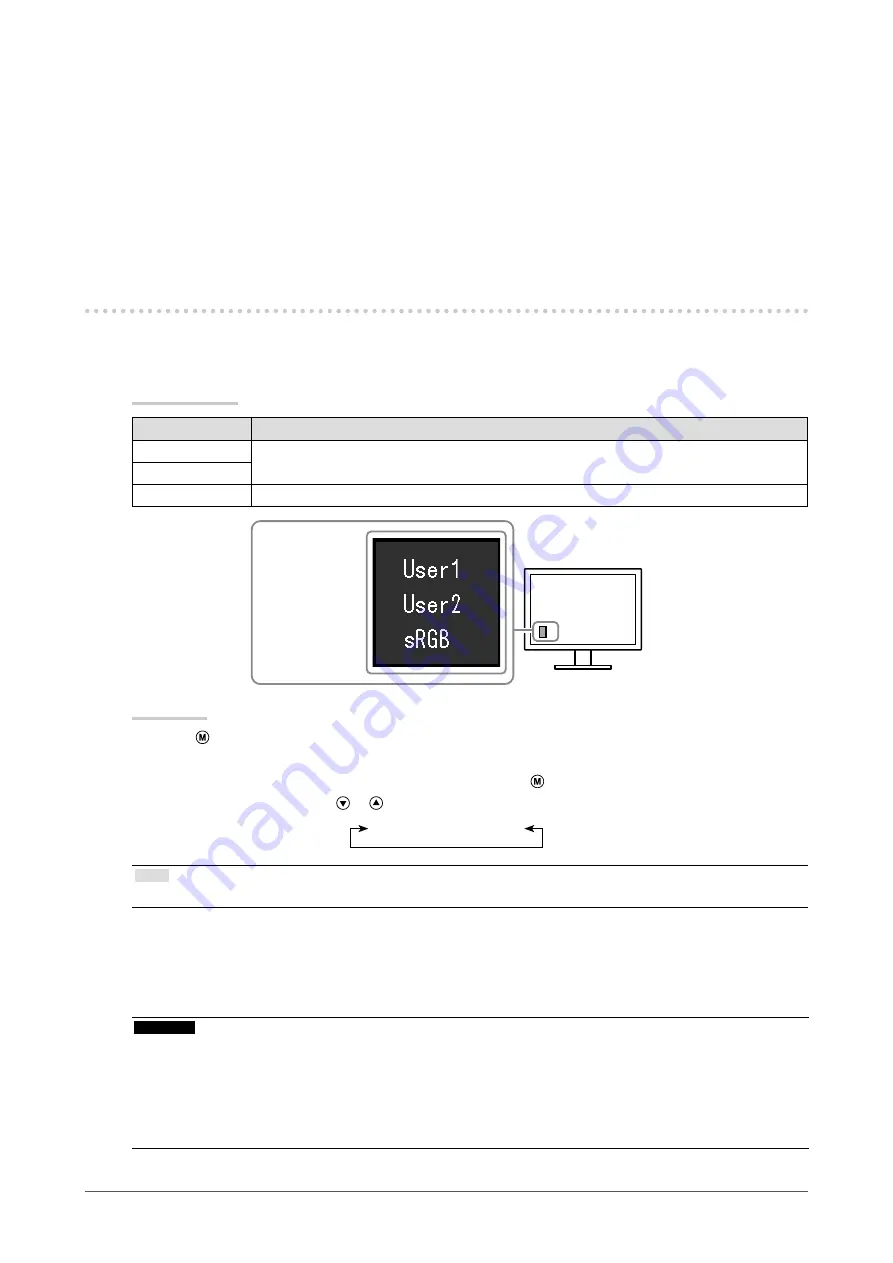
To select the display mode (Color Mode)

This function allows easy selection of a desired mode according to monitor application.

Display Modes

Mode

Purpose

User1

Select this to define a desired set of parameter settings. 

User2
sRGB

Suitable for color matching with sRGB compatible peripherals.

The mode menu 

appears.

Procedure

1. 

Press 

.

The mode menu appears at the bottom left of the screen.

2.  The mode among the list is highlighted in turn each time   is pressed.

You can switch the mode with 

 or 

 while the mode menu is displayed.

User1←→User2←→sRGB

Note

• 

The Setting menu and the Mode menu cannot be displayed at the same time.


To perform advanced adjustments

The “Color” menu of the Setting menu allows you to set and save the independent color adjustment 
for each mode.

Attention

• 

It takes about 30 minutes for the performance of electrical parts to stabilize. Please wait 30 minutes or more 
after the monitor power has been turned on, and then adjust the monitor.

• 

Perform the range adjustment first when adjusting color for analog signals (see 

“To adjust color gradation 

automatically” (page 16)

).

• 

The same image may be seen in different colors on multiple monitors due to their monitor-specific 
characteristics. Make fine color adjustment visually when matching colors on multiple monitors.

Summary of Contents for DuraVision FDX1003

Page 1: ...yourself with safe and effective usage Please refer to the Setup Manual for basic information ranging from monitor installation to using the monitor The latest User s Manual is available for download...

Page 2: ...y form or by any means electronic mechanical or otherwise without the prior written permission of EIZO Corporation EIZO Corporation is under no obligation to hold any submitted material or information...

Page 3: ...ion 17 3 2 Enabling Disabling DDC CI communication 17 3 3 Locking Operation Buttons 17 3 4 Showing and hiding the EIZO logo 17 3 5 Setting Language 18 3 6 Resetting the Monitor to the Default Settings...

Page 4: ...missions This product is equipped with power saving function Eco Timer This function allows you to set the monitor to turn off automatically after a specified time has passed in the power saving mode...

Page 5: ...tware startup procedures or file access procedures Item Overview Windows Macintosh Screen adjustment pattern files Used when adjusting the image of analog signal input manually Touch panel driver 1 Dr...

Page 6: ...just set with and then press The Sub menu appears 2 Choose an item to adjust set with and then press The adjustment setting menu appears 3 Adjust set the selected item with and then press 3 Exiting 1...

Page 7: ...Setting Power Saving page 19 Eco Timer 4 3 Enabling Disabling Auto Power OFF page 20 Monitor Settings Input Signal To set input signal selection page 25 Power Indicator 4 2 Setting Power Indicator pag...

Page 8: ...to display the desktop 2 Right click the mouse anywhere on the desktop except for icons 3 From the displayed menu click Screen resolution 4 On the Screen Resolution dialog box select the monitor 5 Cl...

Page 9: ...ss The mode menu appears at the bottom left of the screen 2 The mode among the list is highlighted in turn each time is pressed You can switch the mode with or while the mode menu is displayed User1 U...

Page 10: ...t brightness The screen brightness is adjusted by changing the brightness of the backlight light source from the LCD back panel Adjustable range 0 to 100 Procedure 1 Press The brightness adjustment sc...

Page 11: ...ess The Temperature menu appears 3 Use or for adjustment 4 Press to exit Note Gain allows you to perform more advanced adjustment see To adjust gain page 12 If you set to Off the image is displayed in...

Page 12: ...djust gain The brightness of each color component red green and blue is called Gain You can change the hue of white by adjusting gain Adjustable range 0 to 100 Procedure 1 Choose Color in the Setting...

Page 13: ...nnot work properly in some graphic boards The monitor screen adjustment is used to suppress flickering of the screen or adjust screen position and screen size correctly according to the PC to be used...

Page 14: ...tment menu and press 5 Select Yes with or and press Flickering screen position and screen size are corrected by the auto adjustment function If the screen is not displayed correctly even after perform...

Page 15: ...n Attention Flickering or blurring may not be eliminated depending on your PC or graphics board To correct the screen position Note Since the number of pixels and the pixel positions are fixed on the...

Page 16: ...g Adjustment menu and press 5 Select Yes with or and press The output range is set automatically 6 Close Pattern 2 6 Modify blurred characters or lines To modify blurred characters lines When an image...

Page 17: ...ct On or Off with or 4 Press to exit 3 3 Locking Operation Buttons This function allows you to lock the settings to prevent them being changed Procedure 1 Press to turn off the monitor 2 Hold down whi...

Page 18: ...ter resetting you cannot undo the operation Note Regarding the default setting see Main default settings in the Setup Manual To reset the color adjustments This function only resets the color adjustme...

Page 19: ...System Analog Signal Input This monitor complies with the VESA DPM standard PC Monitor Power Indicator On Operating Blue Power saving mode STAND BY SUSPENDED OFF Power saving mode Orange Power Off Po...

Page 20: ...f the monitor automatically after a specified time has passed in the power saving mode Adjustable range Off 0 1 2 3 5 10 15 20 25 30 45 min 1 2 3 4 5 h Procedure 1 Choose PowerManager in the Setting m...

Page 21: ...se or pressing any key on the keyboard turn the monitor off and on using its power button When the screen is displayed execute the following procedure The problem may be improved 1 Press to turn off t...

Page 22: ...er or power save function to avoid displaying the same image for extended periods of time 4 Green red blue white dots or defective dots remain on the screen This is due to LCD panel characteristics an...

Page 23: ...use and remedy 1 Cursor position is not correct Cursor jumps Turn off and on the monitor If the symptom is not improved perform the calibration on the monitor Touch with one finger only Connect the mo...

Page 24: ...connections for display Connection examples Signal cable option FD C39 DVI D connector DVI connector D Sub connector Signal cable supplied MD C87 D Sub mini 15 pin connector To switch among input sig...

Page 25: ...gs from the Adjustment menu and press 2 Choose Input Signal from Monitor Settings and press 3 Select Auto or Manual with or 4 Press to exit Note If you select Auto the monitor enters the power saving...

Page 26: ...incorrect even after the adjustment When interlace signals are used the screen cannot be displayed correctly even after screen adjustment using the Setting menu Resolution Frequency Dot Clock MHz Hor...

Page 27: ...for DVI DMPM as the monitor s power mode Gain This is used to adjust each color parameter for red green and blue An LCD monitor displays the color by the light passing through the panel color filter R...

Page 28: ...reception devices Temperature Color temperature is a method to measure the white color tone generally indicated in degrees Kelvin The screen becomes reddish at a low temperature and bluish at a high...

Page 29: ...e trademarks of NEC Corporation NextWindow is a trademark of NextWindow Ltd Intel Intel Core Pentium and Thunderbolt are registered trademarks of Intel Corporation in the United States and other count...

Page 30: ...nd or regulations c Any deterioration of the sensor d Any deterioration of display performance caused by the deterioration of expendable parts such as the LCD panel and or backlight etc e g changes in...

Page 31: ...eleuchtung usw hervorgerufen werden z B Ver nderungen von Helligkeit oder Helligkeitsverteilung Ver nderungen von Farbe oder Farbverteilung Pixeldefekte einschlie lich von durchgebrannten Pixeln usw e...

Page 32: ...onsommables tels que le panneau LCD et ou le r tro clairage etc par exemple des changements de luminosit des changements de l uniformit de la luminosit des modifications de couleur des changements de...

Page 33: ...recta desastre mantenimiento incorrecto y o reparaci n indebida realizada por un tercero que no sea EIZO o sus Distribuidores b Cualquier incompatibilidad del Producto debida a posibles innovaciones t...

Page 34: ...zioni dello schermo causato dal deterioramento delle parti consumabili come il pannello LCD e o la retroilluminazione ecc per esempio i cambiamenti di luminosit cambiamenti di uniformit della luminosi...

Page 35: ...yrka f rg f rgj mnhet defekta pixlar och eller fast lysande pixlar etc e Alla defekter hos Produkten som orsakats av extern utrustning f Alla defekter hos Produkten p vilken det ursprungliga serienumr...

Page 36: ...36 Appendix EIZO Corporation EIZO EIZO EIZO EIZO 2 EIZO EIZO 7 EIZO EIZO EIZO EIZO LCD pixel pixel LCD EIZO EIZO EIZO EIZO EIZO EIZO...

Page 37: ...37 Appendix EIZO Corporation EIZO EIZO EIZO EIZO 2 EIZO EIZO 7 EIZO QC EIZO EIZO EIZO EIZO EIZO EIZO EIZO EIZO EIZO...

Page 38: ...38 Appendix EIZO Corporation EIZO EIZO EIZO EIZO 2 EIZO 7 EIZO EIZO EIZO EIZO a EIZO b c d LCD e f g h i LCD EIZO EIZO EIZO EIZO EIZO EIZO...

Page 39: ...ne soci t affili e de votre pays Les adresses des distributeurs sont r pertori es sur le site Web EIZO ci dessous http www eizoglobal com Pour les clients en Suisse veuillez consulter le site Web suiv...

Page 40: ...enbrug Dette produkt forventes ved bortskaffelse at blive indsamlet og genbrugt i overensstemmelse med lovgivningen i dit land for at reducere belastningen af milj et N r du bortskaffer denne produkt...

Page 41: ...za recikliranje v skladu z okoljevarstveno zakonodajo va e dr ave Prosimo da se pri odstranjevanju izdelka obrnete na lokalnega distributerja ali podru nico Kontaktni naslovi so objavljeni na spodaj...

Page 42: ...at al rii respective Adresele de contact le g si i pe pagina de web al EIZO http www eizoglobal com http www eizoglobal com http www eizoglobal com Geri D n m Bilgisi Bu r n n at laca zaman lkenizin e...

Page 43: ...3rd Edition May 2016 03V25221C1 U M FDX1003 Copyright 2014 2016 EIZO Corporation All rights reserved...

Reviews: