GB
- 24 -
Charging the battery (Fig. 11)
The battery charger can be used to charge either
1 or 2 rechargeable batteries. By charging inde-
pendently you can also charge di
ff
erent batteries
(e.g.: 2.0 Ah and 4.0 Ah) simultaneously for the
charging times stated on the charger.
1. Take the battery pack out of the equipment.
To do so, press the pushlock button (Fig. 12/
Item C).
2. Check that your mains voltage is the same as
that marked on the rating plate of the battery
charger. Insert the power plug of the charger
(19) into the socket outlet. The green LED will
then begin to
fl
ash.
3. Slot the battery pack or packs (18) onto the
battery charger (19).
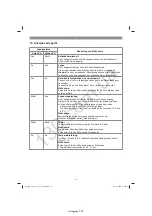
4. In the section entitled „Charger indicator“ you
will
fi
nd a table with an explanation of the LED
indicator on the charger.
The battery pack can become a little warm during
the charging. This is normal.
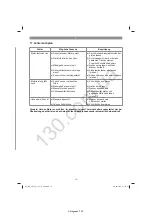
If the battery pack fails to charge, check:
•
whether there is voltage at the socket outlet
•
whether there is good contact at the charging
contacts
If the battery pack still fails to charge, send
•
the charging unit
•
and the battery pack
to our customer service center.
To ensure that the battery pack provides long ser-
vice, you should take care to recharge it promptly.
You must recharge the battery pack when you
notice that the performance of the device drops.
Never allow the battery pack to become fully di-
scharged. This will cause it to develop a defect.
Battery capacity indicator (Fig. 12)
Press the switch for the battery capacity indicator
(Item A). The battery capacity indicator (Item B)
shows the charge status of the battery using 3
LEDs.
All 3 LEDs are lit:
The battery is fully charged.
2 or 1 LED(s) are lit:
The battery has an adequate remaining charge.
1 LED
fl
ashes:
The battery is empty, recharge the battery.
All LEDs
fl
ash:
The battery pack has undergone exhaustive di-
scharge and is defective. Do not use or charge a
defective battery pack.
Installing the battery (Fig. 13)
Open the battery cover. Then insert the batteries
in the mounts as shown in Fig. 13.
Important!
The equipment‘s operating time depends on
the battery with the lower charge level or lower
capacity (Ah). Therefore, only use rechargeable
batteries which are charged to the same level and
have the same capacity (Ah). Never combine full
and half-full batteries or batteries with di
ff
erent
capacities (Ah). Always charge the two batteries
simultaneously before starting to use them.
Close the battery cover by
fl
ipping the cover
down.
6. Operation
Caution!
The lawn mover is equipped with a safety circuit
to prevent unauthorized use. Directly before star-
ting up the lawn mover insert the safety plug (Fig.
14/Item 17) and remove the safety plug again
whenever you interrupt or terminate your work.
Important!
To prevent the equipment switching on acciden-
tally, the lawn mower is equipped with a safety
switch (Fig. 15/Item 2) which must be pressed be-
fore the switching bar (Fig. 15/Item 3) can be ac-
tivated. The lawn mower switches itself o
ff
when
the switching bar is released. The start time can
amount to several seconds. Repeat this process
several times so that you are sure that the ma-
chine functions properly. Before you perform any
repair or maintenance work on the equipment,
ensure that the blade is not rotating and that the
safety plug is disconnected.
Caution! Never open the chute
fl
ap when the
grass bag has been detached (to be emptied)
and the motor is still running. A rotating bla-
de can cause serious injuries!
Always carefully fasten the chute
fl
ap and grass
basket. Switch o
ff
the engine before emptying the
grass basket.
Anl_GE_CM_36_37_Li_SPK9.indb 24
Anl_GE_CM_36_37_Li_SPK9.indb 24
29.10.2018 13:57:04
29.10.2018 13:57:04
Autogoods “130”
130.com.ua

