background image

17

I

ed il bordo del pezzo da lavorare. 
Fissate le parti con la vite da legno a testa quadra (b)
ed il dado ad alette (c). 

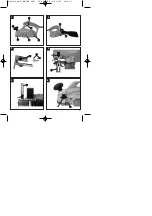
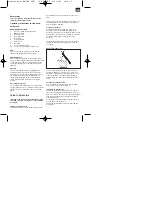
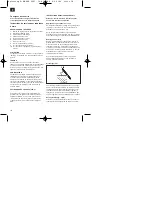
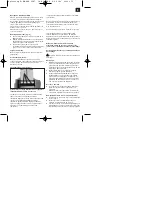
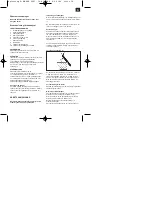
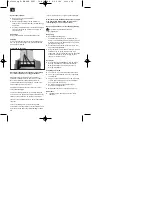
Piallatura di diversi livelli (Fig. 6)

Con l’aiuto della guida parallela potete piallare 
livelli diversi. 

Montate la guida parallela (9) sulla parte sinistra 
dell’apparecchio e l’astina di misurazione della 
profondità del livello (10) sulla parte destra. 

Posizionate l’astina in modo tale che venga 
indicata la profondità del livello desiderata. 
Fissate i pezzi sull’apparecchio con la vite ad 
alette (a). 

Larghezza del livello

La larghezza del livello può venire impostata con la
guida parallela (9).

Profondità del livello

Consigliamo di impostare una profondità di passata
di 2 mm e poi di piallare così il pezzo da lavorare
tante volte fino a quando non venga raggiunta la
profondità di livello desiderata. 

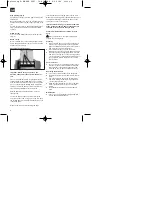
Sostituzione delle lame

Attenzione: prima di eseguire lavori
all’apparecchio staccare sempre la spina dalla
presa di corrente!

Il pialletto è dotato di due lame ribaltabili di metallo
duro. Le lame ribaltabili hanno due taglienti e
possono venire ribaltate. Grazie alla scanalatura di
guida delle lame ribaltabili si mantiene la stessa
regolazione dell’altezza anche quando vengono
sostituite. Le lame consumate, senza filo o
danneggiate devono venire sostituite.

Le lame ribaltabili in metallo duro non possono
venire riaffilate.

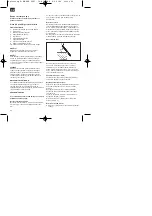
Allentate le tre viti a testa esagonale (1) con la
chiave fissa allegata e con un pezzo di legno
spingete da un lato la lama ribaltabile fuori dall’albero
della pialla.

Prima di montare una nuova lama pulirne la sede.

Il montaggio delle lame viene eseguito nell’ordine
inverso. Accertatevi che la lama corrisponda alle due
estremità dell’albero della pialla. Sostituite sempre
tutte e due le lame per garantire un’asportazione
omogenea dei trucioli.

Attenzione: prima di accendere il pialletto
controllate che le lame siano montate in modo
corretto e siano ben fissate!

Pulizia, manutenzione e ordinazione dei pezzi di
ricambio 


Prima di qualsiasi lavoro di pulizia staccate la

spina dalla presa di corrente.

Pulizia

Tenete il più possibile i dispositivi di protezione, 
le fessure di aerazione e la carcassa del motore 
liberi da polvere e sporco. Strofinate 
l’apparecchio con un panno pulito o soffiatelo con 
l’aria compressa a pressione bassa.

Consigliamo di pulire l’apparecchio subito dopo 
averlo usato.

Pulite l’apparecchio regolarmente con un panno 
asciutto ed un po’ di sapone. Non usate 
detergenti o solventi perché questi ultimi 
potrebbero danneggiare le parti in plastica 
dell’apparecchio. Fate attenzione che non possa 
penetrare dell’acqua all’interno dell’apparecchio.

Spazzole al carbone

In caso di uno sviluppo eccessivo di scintille fate 
sostituire le spazzole al carbone da un 
elettricista.
Attenzione! Le spazzole al carbone devono 
essere sostituite solo da un elettricista.

Sostituzione della cinghia di trasmissione

Allentate la vite e togliete la carteratura laterale.

Togliete la cinghia di trasmissione consumata e 
pulite le due pulegge.

Mettete la nuova cinghia sulla puleggia piccola e 
fatela salire sulla puleggia più grande facendo 
ruotare l’albero della pialla.

Fate attenzione che le scanalature longitudinali 
della cinghia di trasmissione si trovino nelle 
scanalature di guida delle ruote motrici.

Riposizionare la carteratura e fissarla con la vite.

1

Anleitung E-HO 900 SPK7  18.01.2006  8:46 Uhr  Seite 17

Summary of Contents for 44.721.10

Page 1: ...Raboteuse électrique à main Gebruiksaanwijzing voor elektrische handschaaf Istruzioni per l uso per pialletto elettrico a mano Bruksanvisning för elhandhyvel Návod k použití pro elektrický ruční hoblík Návod na obsluhu elektrický ručný hoblík Art Nr 44 721 10 I Nr 01015 Anleitung E HO 900 SPK7 18 01 2006 8 46 Uhr Seite 1 ...

Page 2: ...ioni per l uso prima di eseguire il montaggio e la messa in esercizio Läs vänligen omsorgsfullt före montering och innan verktyget tas i bruk Před montáží a uvedením do provozu si prosím pozorně přečtěte návod k obsluze Pred uvedením do prevádzky si starostlivo prečítajte návod na obsluhu a bezpečnostné pokyny a dodržiavaj te ich Bitte Seite 2 ausklappen Please pull out page 2 Veuillez ouvrir les ...

Page 3: ...3 2 1 4 5 햳 햳 햲 햲 햷 햷 a d b 햺 햺 c 햶 햶 햴 햴 햵 햵 햹 햹 햸 햸 3 햺 햺 c 6 햺 햺 a 햻 햻 햻 햻 Anleitung E HO 900 SPK7 18 01 2006 8 46 Uhr Seite 3 ...

Page 4: ...echtsdrehung des Einstell und Führungsknopfes kann die Spantiefe von 0 3 mm eingestellt werden Nach Beendigung der Arbeit ist die Spantiefe so ein zustellen daß die Messer versenkt und somit vor Be schädigung geschützt sind Hobeln von Flächen Stellen Sie die gewünschte Spantiefe ein Den Elektro Handhobel mit der vorderen Grundplatte auf das zu bearbeitende Holzstück aufsetzen und den Hobel einscha...

Page 5: ...timmt Tauschen Sie immer beide Messer um eine gleichbleibende Spanabnahme zu gewähr leisten Achtung Vor der Inbetriebnahme des Elektro Handhobels sind die Messer auf eine korrekte Einbaulage und auf festen Sitz zu überprüfen Reinigung Wartung und Ersatzteilbestellung Ziehen Sie vor allen Reinigungsarbeiten den Netzstecker Reinigung 앬 Halten Sie Schutzvorrichtungen Luftschlitze und Motorengehäuse s...

Page 6: ...er des Gerätes 앬 Ersatzteilnummer des erforderlichen Ersatzteils Aktuelle Preise und Infos finden Sie unter www isc gmbh info TECHNISCHE DATEN Nennspannung 230 V 50 Hz Aufnahmeleistung 900 W Leerlaufdrehzahl n0 16 000 min 1 Spantiefe 0 3 mm Falztiefe 0 15 mm Hobelbreite 82 mm Schalldruckpegel LPA 87 6 dB A Schalleistungspegel LWA 98 6 dB A Vibration a w 3 61 m s2 Gewicht 3 kg schutzisoliert II 쏾 A...

Page 7: ...rkpiece Setting the planing depth The planing depth can be set between 0 and 3 mm by turning the setting and guide knob to the left or right When you have finished working with the plane set the planing depth so that the knife is lowered and protected against damage Planing flat surfaces Set the desired planing depth Place the front baseplate of the electric hand held plane on the workpiece and sw...

Page 8: ...t the same time to ensure even planing Important Before using your electric hand held plane for the first time make sure the knives are installed correctly and are firmly in place Cleaning maintenance and ordering of spare parts Always pull out the mains power plug before starting any cleaning work Cleaning 앬 Keep all safety devices air vents and the motor housing free of dirt and dust as far as p...

Page 9: ...number of the part required For our latest prices and information please go to www isc gmbh info TECHNICAL DATA Power supply 230 V 50 Hz Rating 900 W Idling speed ntr 16 000 rpm Planing depth 0 3 mm Planing width 82 mm Rebate depth 0 15 mm Noise pressure level LPA 87 6 dB A Noise power level LWA 98 6 dB A Vibrations äw 3 61 m s2 Weight 3 kg Earthing II 쏾 Anleitung E HO 900 SPK7 18 01 2006 8 46 Uhr...

Page 10: ...r ce faire glissez le sac récupérateur de poussière 8 dans l éjection de copeaux latérale 7 de la raboteuse électrique à main INSTRUCTIONS RELATIVES AU TRAVAIL Attention Ne commencez à raboter qu après avoir mis la raboteuse en marche Réglage de la profondeur de coupe En tournant le bouton de réglage et de guidage vers la gauche et vers la droite vous pouvez régler la profondeur de coupe de 0 à 3 ...

Page 11: ... et faites sortir latéralement la lame réversible en métal dur de l arbre de rabot à l aide d un morceau de bois Avant le montage nettoyez le logement de la lame Le montage des lames s effectue dans l ordre inverse Assurez vous que la lame de rabot ne dépasse pas les deux extrémités de l arbre de rabot Remplacez toujours les deux lames pour assurer un rabotage régulier Attention Avant de mettre la...

Page 12: ...de l appareil 앬 No d article de l appareil 앬 No d identification de l appareil 앬 No de pièce de rechange de la pièce requise Vous trouverez les prix et informations actuelles à l adresse www isc gmbh info CARACTERISTIQUES TECHNIQUES Tension nominale 230 V 50 Hz Puissance absorbée 900 W Vitesse de rotation au ralenti 16 000 tr mn Profondeur de coupe 0 3 mm Largeur de rabotage 82 mm Profondeur de ra...

Page 13: ...de stofzak 8 de zijdelingse spaanuitwerpopening 7 van de elektrische handschaaf in WERKWIJZE Let op De elektrische handschaaf mag slechts ingeschakeld naar het te bewerken stuk worden gebracht Afstellen van de verspaningsdiepte De verspaningsdiepte kan van 0 t m 3 mm worden afgesteld door de afstel en leiknop naar links of rechts te draaien Aan het einde van de werkzaamheden dient de verspaningsdi...

Page 14: ...verzekerd Versleten botte of beschadigde messen dienen te worden vervangen Hardmetaal keermessen kunnen niet worden bijgeslepen Draai de drie zeskantbouten 1 los dmv de bijgeleverde platte open sleutel en schuif het hardmetaal keermes zijdelings met een stuk hout uit de schaafas Maak de meszitting schoon alvorens het keermes te installeren Het installeren van het mes gebeurt in omgekeerde volgorde...

Page 15: ...re te onderhouden onderdelen Bestellen van wisselstukken Gelieve bij het bestellen van wisselstukken volgende gegevens te vermelden 앬 Type van het toestel 앬 Artikelnummer van het toestel 앬 Ident nummer van het toestel 앬 Wisselstuknummer van het benodigd stuk Actuele prijzen en info vindt u terug onder www isc gmbh info TECHNISCHE GEGEVENS Nominale spanning 230 V 50 Hz Opgenomen vermogen 900 W Stat...

Page 16: ... solo se già acceso Regolazione della profondità di passata Ruotando la manopola di regolazione e di guida verso destra o verso sinistra si può impostare la profondità di passata da 0 a 3 mm Al termine del lavoro la profondità di passata deve venire regolata in modo tale che le lame non sporgano e quindi siano protette da eventuali danni Piallatura di superfici Impostate la profondità di passata d...

Page 17: ...ne eseguito nell ordine inverso Accertatevi che la lama corrisponda alle due estremità dell albero della pialla Sostituite sempre tutte e due le lame per garantire un asportazione omogenea dei trucioli Attenzione prima di accendere il pialletto controllate che le lame siano montate in modo corretto e siano ben fissate Pulizia manutenzione e ordinazione dei pezzi di ricambio Prima di qualsiasi lavo...

Page 18: ...io 앬 numero del pezzo di ricambio del ricambio necessitato Per i prezzi e le informazioni attuali si veda www isc gmbh info CARATTERISTICHE TECNICHE Tensione nominale 230 50 Hz Potenza assorbita 900 W Numero di giri a vuoto n0 16 000 min 1 Profondità di passata 0 3 mm Larghezza di passata 82 mm Profondità di intaglio 0 15 mm Livello di pressione acustica LPA 87 6 dB A Livello di potenza acustica L...

Page 19: ... arbetsstycket då den är påkopplad Inställning av spåndjupet Genom att vrida inställnings och ledningsknappen åt vänster och höger kan spåndjupet på 0 3 mm ställas in Då arbetet avslutats bör spåndjupet ställas in så att järnen är indragna och inte kan skadas Hyvlande av ytor Ställ in det önskade spåndjupet Elhandhyveln med den främre grundplattan sätts på arbetsstycket av trä som ska bearbetas oc...

Page 20: ...digt ut båda järnen för att garantera en jämn spånavspjälkning Observera Innan elhandhyveln kan tas i bruk bör man kontrollera järnen ifråga om ett korrekt insättningsläge och en fast passning Rengöring underhåll och reservdelsbeställning Dra alltid ut stickkontakten inför alla rengöringsarbeten Rengöring 앬 Håll skyddsanordningarna ventilationsöppningarna och motorkåpan i så damm och smutsfritt sk...

Page 21: ...ervdel Aktuella priser och ytterligare information finns på www isc gmbh info TEKNISKA UPPGIFTER Märkspänning 230 V 50 Hz Effekt 900 W Tomgångsvarvtal n0 16 000 min 1 Spåndjup 0 3 mm Hyvelbredd 82 mm Falsdjup 0 15 mm Bullernivå LPA 87 6 dB A Bullereffekt LWA 98 6 dB A Vibration aw 3 61 m a2 Vikt 3 kg Skyddsisolerad II 쏾 _ S Anleitung E HO 900 SPK7 18 01 2006 8 46 Uhr Seite 21 ...

Page 22: ...ládán pouze zapnutý Nastavení hloubky záběru Otočením nastavovacího a vodicího knoflíku doleva a doprava je možné nastavit hloubku záběru 0 3 mm Po ukončení práce se hloubka záběru nastaví tak že se nože zapustí čímž jsou chráněny před poškozením Hoblování ploch Nastavte požadovanou hloubku záběru Elektrický ruční hoblík nasadit přední základovou deskou na dřevo které má být opracováno a hoblík za...

Page 23: ...ontážní poloha správná a jestli nože pevně sedí Čištění údržba a objednání náhradních dílů Před všemi čisticími pracemi vytáhněte síťovou zástrčku Čištění 앬 Udržujte bezpečnostní zařízení větrací otvory a kryt motoru tak prosté prachu a nečistot jak jen to je možné Otřete přístroj čistým hadrem nebo ho profoukněte stlačeným vzduchem při nízkém tlaku 앬 Doporučujeme přímo po každém použití přístroj ...

Page 24: ...kon 900 W Otáčky naprázdno n0 16 000 min 1 Hloubka záběru 0 3 mm Šířka hoblování 82 mm Hloubka drážky 0 15 mm Hladina akustického tlaku LPA 87 6 dB A Hladina akustického výkonu LWA 98 6 dB A Vibrace aw 3 61 m s2 Hmotnost 3 kg Ochranná izolace II 쏾 24 CZ Anleitung E HO 900 SPK7 18 01 2006 8 46 Uhr Seite 24 ...

Page 25: ...hoblíka PRACOVNÉ POKYNY Pozor Elektrický ručný hoblík môže byť priložený k obrábanému materiálu len v zapnutom stave Nastavenie hĺbky triesok Otáčaním doľava a doprava nastavovacej a vodiacej skrutky sa môže nastaviť hĺbka triesky medzi 0 3 mm Po ukončení práce sa musí nastaviť hĺbka triesky tak aby boli nože zasunuté a tým pádom chránené proti poškodeniu Hobľovanie plôch Nastavte hoblík na požado...

Page 26: ...acie nože na obidvoch koncoch zarovnané s hobľovacím hriadeľom Vymeňte vždy obidva nože aby ste tak zabezpečili rovnomerné oddeľovanie triesok Pozor Pred uvedením elektrického ručného hoblíka do prevádzky sa musí skontrolovať či sú nože zabudované v správnej polohe a pevne sedia Čistenie údržba a objednanie náhradných dielov Pred všetkými údržbovými a čistiacimi prácami vytiahnite kábel zo siete Č...

Page 27: ...álne ceny a informácie nájdete na www isc gmbh info TECHNICKÉ ÚDAJE Menovité napätie 230 V 50 Hz Príkon 900 W Otáčky pri voľnobehu n0 16 000 min 1 Hĺbka triesky 0 3 mm Šírka hobľovania 82 mm Hĺbka drážky 0 15 mm Hladina akustického tlaku LPA 87 6 dB A Hladina akustického výkonu LWA 98 6 dB A Vibrácia a w 3 61 m s2 Hmotnosť 3 kg S ochrannou izoláciou II 쏾 27 SK Anleitung E HO 900 SPK7 18 01 2006 8 ...

Page 28: ... ÌÊˆÓ Û ÌÊˆÓ Ì ÙËÓ ËÁ Î È Ù ÚfiÙ Ô ÁÈ ÙÔ ÚÔ fiÓ I dichiara la seguente conformità secondo la direttiva UE e le norme per l articolo attesterer følgende overensstemmelse i henhold til EU direktiv og standarder for produkt prohlašuje následující shodu podle směrnice EU a norem pro výrobek H a következő konformitást jelenti ki a termékek re vonatkozó EU irányvonalak és normák szerint pojasnjuje sledeč...

Page 29: ...ľa návodu na obsluhu ako aj používanie prístroja výlučne len na tie účely na ktoré bol určený Samozrejme Vám ostávajú zachované zákonom predpísané práva na záruku vpo dobu trvania týchto 2 rokov Záruka platí pre oblasť Spolkovej republiky Nemecko alebo príslušných krajín regionálneho hlavného distribučného partnera ako doplnenie k lokálne platným zákonným predpisom Prosím informujte sa u Vášho kon...

Page 30: ...desrepublik Deutschland oder der jeweiligen Länder des regionalen Hauptvertriebspartners als Er gänzung der lokal gültigen gesetzlichen Vorschriften Bitte be achten Sie Ihren Ansprechpartner des regional zuständigen Kun dendienstes oder die unten aufgeführte Serviceadresse ISC GmbH International Service Center Eschenstraße 6 D 94405 Landau Isar Germany Info Tel 0180 5 120 509 Telefax 0180 5 835 83...

Page 31: ...ernative to returning the electrical device the owner is obliged to cooperate in ensuring that the device is properly recycled if ownership is relinquished This can also be done by handing over the used device to a returns center which will dispose of it in accordance with national commercial and industrial waste management legislation This does not apply to the accessories and auxiliary equipment...

Page 32: ...oi allo smaltimento secondo le norme nazionali sul riciclaggio e sui rifiuti Non ne sono interessati gli accessori e i mezzi ausiliari senza elementi elettrici forniti insieme ai vecchi apparecchi S Endast för EU länder Kasta inte elverktyg i hushållssoporna Enligt det europeiska direktivet 2002 96 EG om avfall som utgörs av eller innehåller elektriska eller elektroniska produkter och dess tillämp...

Page 33: ...ace k zaslání zpět Vlastník elektrického přístroje je alternativně namísto zaslání zpět povinen ke spolupráci při odborné recyklaci v případě že se rozhodne přístroj zlikvidovat Starý přístroj může být v tomto případě také odevzdán do sběrny která provede likvidaci ve smyslu národního zákona o hospodářském koloběhu a zákona o odpadech Toto neplatí pro ke starým přístrojům přiložené části příslušen...

Page 34: ...roducten geheel of gedeeltelijk enkel toegestaan mits uitdrukkelijke toestemming van ISC GmbH La ristampa o l ulteriore riproduzione anche parziale della documentazione o dei documenti d accompagnamento dei prodotti è consentita solo con l esplicita autorizzazione da parte della ISC GmbH Eftertryck eller annan duplicering av dokumentation och medföljande underlag för produkter även utdrag är endas...

Reviews: