8
eltric K. Heckel GmbH
Weiherstraße 29
D-95448 Bayreuth
www.eltric.com
D
EN
NL
Operation of daylight sensor
1. During remote control settings, press the icon to activate the additional daylight mode.
2. Change the lux value
to set when the product should turn on during the day.
3. Change the lux value
to set when the product should automatically go out.
4. Press to save the settings
5. Press to send the stored setting to the sensor, the product that contains the sensor will
blink 1x to confirm receipt.
Note!
This feature is turned off by default and can only be changed when you press the button during
settings view.
During activation of this setting, only a standby dim time of indefinite time is possible.
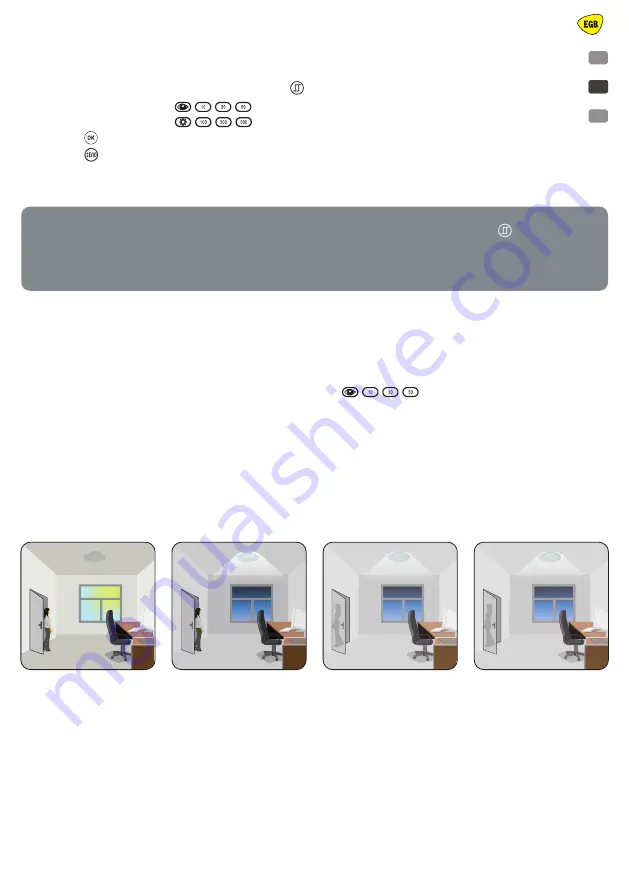
See image 02 for clarification of this function.
Difference between Daylight sensor mode and corridor mode
The difference lies in turning on and off. In the corridor mode, the sensor will trigger (turn on) the
product whenever motion is detected, while in the daylight sensor mode the amount of light deter-
mines when to trigger the product. In the daylight sensor Mode, the product will therefore turn on
when it gets dark, even though there is no movement detection. See image 03 and 04 for a graphic
explaining the difference.
With insufficient natural light,
the sensor switches on the light
automatically when presence is
detected.
When no presence is detected
anymore and after the hold-
time expired, the light dims to
stand-by level if the surrounding
natural light is below the daylight
threshold.
Light switches off automatically
after the stand-by period
elapses.
Daylight sensor fuction (img.03)
Settings on this demonstration:
Hold-time: 30min,
Daylight sensor turn on threshhold: 50lux
Stand-by Dim: 10%
Stand-by period: +
∞
Daylight sensor turn off threshhold: 300lux
(when the Daylight sensor is activated,
the stand-by time is
∞
)
night time cycle
100% on when
motion is
detected, and
dims to 10% during
absence.
The light switches on
at 100% when there is
movement detected.
1
21:00
Corridor fuction (img.02)
With sufficient natural light, the
light does not switch on, even
when
presence is detected.
Corridor fuction (img.02)
This is a 3step dimming function within the sensor and works as follows:
1. Lamp is off because there is enough ambient light (even if motion is detected).
2. If there is less ambient light than the set lux value
then the product will
turn on at the selected brightness level (brightness %) and stays on as long as it detects
movement.
3. When the product detects no movement anymore and the selected hold time expires, it
switches to standby mode (set “standby” time and dimming level)
4. After the selected “standby” period elapses, the product will turn off.
MODE SETTINGS (img.05)
Pre-programmed settings (modes 1 through 4)
The remote control has 4 pre-programmed settings available which can be sent directly to the sen-
sor. Below the schedule (see Img.05 with the default settings.)
By pressing 1 of the 4 mode buttons, you activate the corresponding mode with programmed set-
tings. These settings can then be sent directly to the sensor(s) with the <send> button.
The saved settings can be changed as desired by following step 2/3 of “ Change sensor settings “.
After that, these settings are stored under the relevant mode button.
APPLICATION
MODE
BRIGHTNESS
SENSITIVITY
HOLD TIME
STAND-BY
TIME
STAND-BY
DIM
DAYLIGHT
SENSOR
INDOOR
MODE1
100%
75%
5min
30min
30%
INDOOR
MODE2
100%
75%
1min
∞
min
30%
INDOOR
MODE3
100%
75%
5min
30min
30%
30LUX
OUTDOOR
MODE4
100%
75%
1min
∞
min
30%
(30LUX/300LUX)
2400340_1EGB_Manual_200929_EGB_683_625 - Complete Book A5.indb 8
29-9-2020 14:14:43


