


25
If the upgrade process is not
started, it is possible to exit
the ‘Auto Upgrade’ menu by
pressing the
EXIT button
.
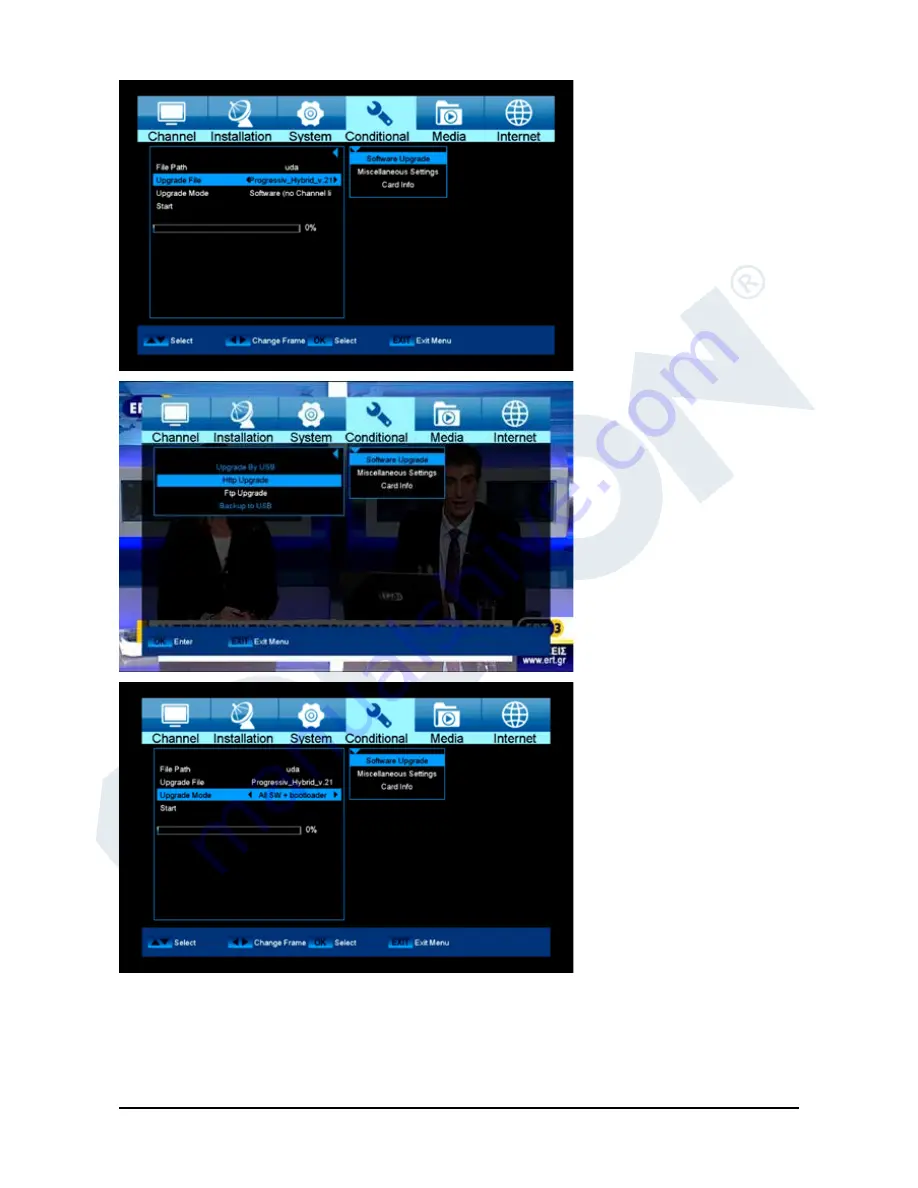
Update from USB/HDD
Standard:
This menu is only
accessible if a suitable USB
data storage is connected and
recognised by the receiver.
Otherwise, this menu is not
accessible.
Another prerequisite for a
‘USB/HDD Update’ is that
the appropriate software file
is located on the USB data
storage. This file with the
‘.abs’ file extension can be
downloaded from the Edision
website via a PC with Internet
connection.
http://www.edision.gr
Save the downloaded file from
your PC onto the USB data
storage and plug this USB data
storage device into the USB port
of “Progressiv HD C nano plus”.
Note:
In these circumstances,
the upload speed via USB
depends on the data in the USB
memory. It is recommended to
prepare the USB memory device
first via the «HDD formatting»
(ALL data will be deleted) item in
the ‘USB’/’Memory Information’
menu (to format, start with the
yellow button) and then save the
software file (.abs) inside.
Functions and settings in the
menu:
Open file:
If the receiver has
found files to be updated on the
USB memory device, they will
be displayed. Specify the file
to be updated with the
arrow
buttons
or
OK button
. If no files
were found, it will be indicated
with ‘No File’.
Update Mode:
Use the
arrow buttons
or
OK button
to
set the parts of the software to be updated.
Start:
If the software file and Update Mode are specified, navigate with the
up/down
arrow buttons to the
‘Start’ item. Press the
OK button
and the Update process starts.
Attention:
The software update starts immediately after pressing the OK button and must not be interrupted.


