


Version of November 22th, 2021
21
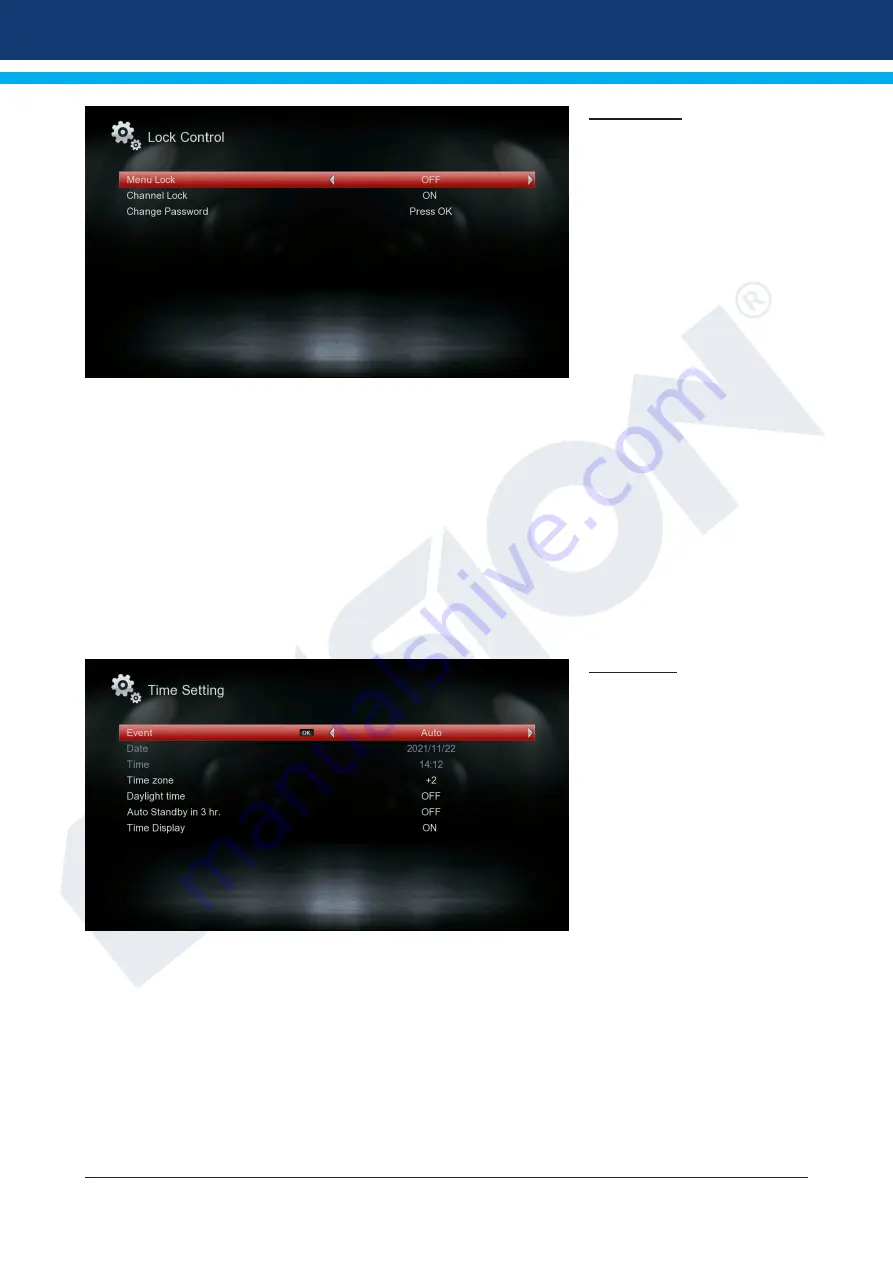
Lock Control
This menu is only available after
entering a PIN code. The default
password (PIN) is: 0000.
Menu Lock:
Here you can choose whether
you want to allow or deny ac-
cess to the menu. If you have
selected ‘On’ at this point, ac-
cess to the menu is only allowed
with enter a PIN code. Excludes
channel bar, EDIVISION and fa-
vourite lists.
Channel Lock:
Here you can specify whether channels can generally be locked or not.
Change Password:
Here you can choose a new password.
Password Verification:
Repeat the new password here.
Exit the “Minor Protection” menu by pressing the EXIT key.
The EXIT key exits the timer menu. If you have made changes and you want to save them, confirm your se-
lection with ‘Yes’ in the dialog box that appears.
Note:
In some cases it is possible that an error message is displayed. This usually happens when you have
chosen the wrong time or start date. Check your settings!
Note:
Note that recording is successful only when a suitable USB memory device is connected to the re-
ceiver at the scheduled time.
Time setting
Event:
Select “Auto” here and the re-
ceiver automatically obtains
the current time and date (via
signal).
If you select “Manual” here, you
can set the date and time your-
self at the point below.
Time zone:
This point is only available if you
have selected “On” under “User
GMT”. You can then specify it
here difference between your local time and GMT (Greenwich Mean
Time). For Germany/Austria/Switzerland/Luxembourg valid: UTC +
01:00. For Athens/Bucharest/Istanbul valid: UTC + 02:00. Move left/
right with the arrows to the value you want to set.
Daylight time:
Here you can specify whether daylight saving time will be taken into
account.
Date:
This point is only available if you have selected “Off” in the “User
GMT” point. Enter the date using the number keys.
Time:
This point is only available if you have selected “Off” in the “User
GMT” point. Enter the time using the number keys.
Exit the “Time Setting” menu by pressing the EXIT key.


