background image

109

Applying effects

7.

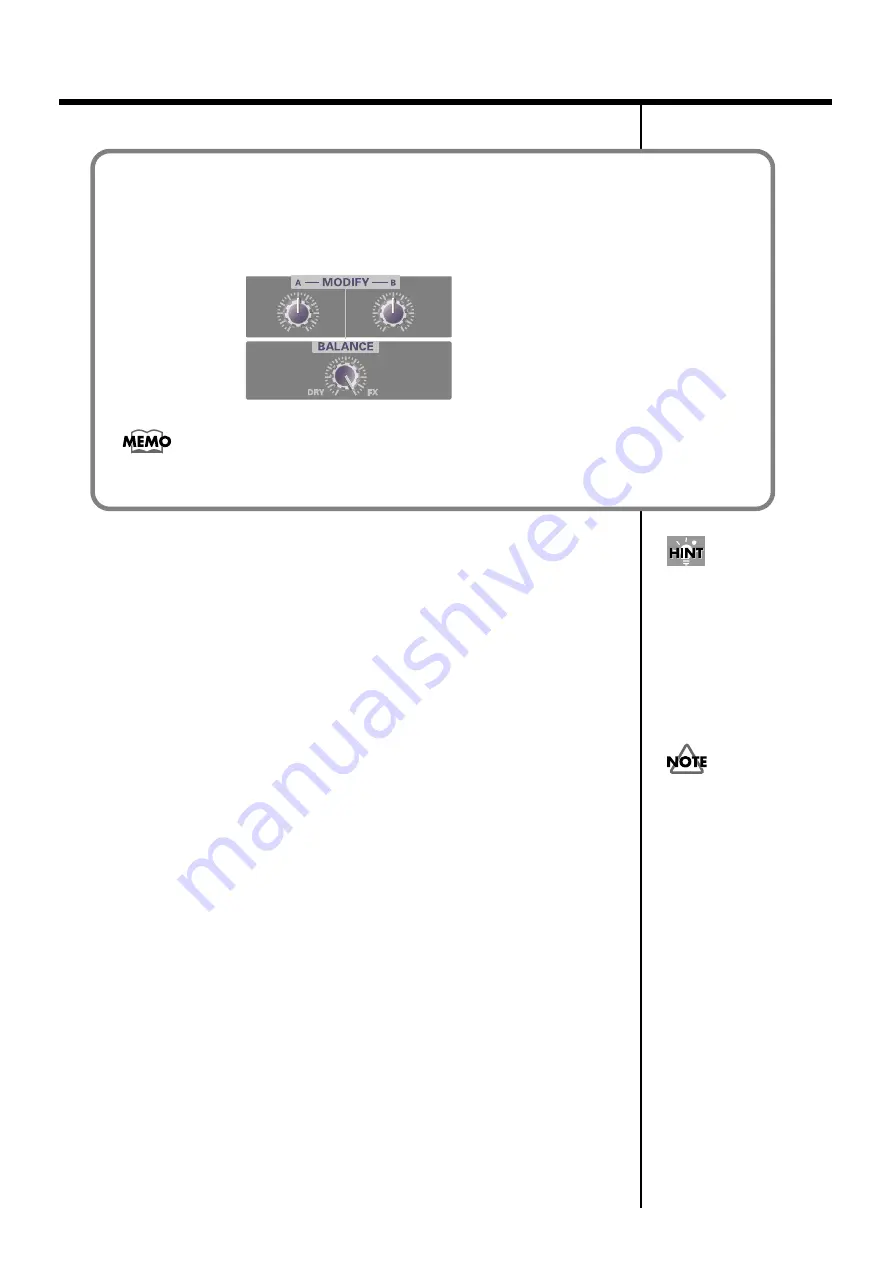
Set 

effect knobs A and B

 and the 

effect balance knob

 to the default 

positions shown in the diagram above.

8.

While you speak into the mic, slowly adjust 

effect knobs A and B

 to 

adjust the effect to your liking.

You may wish to practice your narration while watching the actual video.

9.

Begin editing your video while you add the narration.

You will probably want to use the following procedure.

Start recording on your video deck

Start playback on your video camera

Start recording your narration

Immediately after you have set the 

audio/voice effect knob

 to 

[1] NARRATION ENHANCER

the effect will have the default settings (see diagram below, or p. 113) regardless of the actual 
positions of 

effect knobs A and B

 and the 

effect balance knob

.

Default settings for [1] NARRATION ENHANCER

fig.narration-1_70

fig.MEMO

Other effects can also be used to modify the character of the voice. For details on each 
effect, read

Effect types

 (p. 32). You can also try out many other possibilities as 

described in 

Effect applications

 (p. 113).

The sound will become 
clearer as you turn 

effect 

knob A

 and 

effect knob B


toward the right. For 
details on effects, refer to 

Effect types

 (p. 32).

For details on operating 
your video camera and 
video deck, refer to the 
owner’s manual for your 
device.

Summary of Contents for M-100FX

Page 1: ... VENEZUELA Musicland Digital C A Av Francisco de Miranda Centro Parque de Cristal Nivel C2 Local 20 Caracas VENEZUELA TEL 212 285 8586 URUGUAY Todo Musica S A Francisco Acuna de Figueroa 1771 C P 11 800 Montevideo URUGUAY TEL 02 924 2335 DENMARK Roland Scandinavia A S Nordhavnsvej 7 Postbox 880 DK 2100 Copenhagen DENMARK TEL 3916 6200 FRANCE Roland France SA 4 Rue Paul Henri SPAAK Parc de l Esplan...

Page 2: ...n plug NEUTRAL LIVE For the U K USING THE UNIT SAFELY 001 Before using this unit make sure to read the instructions below and the Owner s Manual 002c Do not open or modify in any way the unit or its AC adaptor 003 Do not attempt to repair the unit or replace parts within it except when this manual provides specific instructions directing you to do so Refer all servicing to your retailer the neares...

Page 3: ...aptor should be located so their location or position does not interfere with their proper ventilation 102d Always grasp only the output plug or the body of the AC adaptor when plugging into or unplugging from this unit or an outlet 103b Any accumulation of dust between the AC adaptor and the power outlet can result in poor insulation and lead to fire Periodically wipe away such dust with a dry cl...

Page 4: ...l Precautions 553 Use a reasonable amount of care when using the unit s buttons sliders or other controls and when using its jacks and connectors Rough handling can lead to malfunctions 556 When connecting disconnecting all cables grasp the connector itself never pull on the cable This way you will avoid causing shorts or damage to the cable s internal elements 558a To avoid disturbing your neighb...

Page 5: ...rnal input output jacks AUX 28 Using the digital output jacks 30 Connecting monitor speakers that have digital input jacks 30 Connecting an MD recorder 30 Audio Voice effects 31 How to apply effects 31 Effect types 32 Effect parameters 33 Deutsch Grundlegende Bedienung 38 Anschluss von Monitor Lautsprechern oder Kopfhörern 38 Regelung der Lautstärke 38 Anschluss eines Mikrofons 39 Anschluss eines ...

Page 6: ...del guadagno e del livello volume 73 Collegamento degli apparecchi audio 74 Collegamento di uno stereo o di un MD 74 Collegamento dell apparecchio di registrazione 74 Regolazione del livello d ingresso volume 74 Collegamento dell M 100FX al computer 76 Regolazione del livello d ingresso volume 77 Effetti audio e voce 79 Applicazione degli effetti 79 Tipi di effetti 80 Parametri degli effetti 81 Es...

Page 7: ...king 131 Macintosh users 135 Deutsch Connecting the M 100FX to your computer 139 Windows XP 2000 Anwender 139 Einstellungen und Überprüfung 140 Macintosh Anwender 141 Français Connecting the M 100FX to your computer 145 Windows XP 2000 145 Configuration et contrôle 146 Utilisateurs Macintosh 147 Italiano Connecting the M 100FX to your computer 151 Utenti Windows XP 2000 151 Configurazione e verifi...

Page 8: ...ndows 163 Driver settings 166 Installing the special driver Macintosh 168 Settings for your software 169 Troubleshooting 170 Problems with the M 100FX 170 Problems related to the special driver 173 Deleting the special driver 175 Specifications 176 Index 179 ...

Page 9: ...ing vocal sources as well as reverb and delay making the M 100FX an ideal choice for video editing applications Easy connection to your personal computer The M 100FX can be connected to your computer via its USB connector and used as a high quality audio device to obtain audio material for use with your non linear video editing software 204 Microsoft and Windows are registered trademarks of Micros...

Page 10: ...e M 100FX since doing so can cause malfunction Computer connection cable USB cable Use this cable when connecting the M 100FX s USB connector to the USB connector of your computer Owner s manual This is the manual you are reading It explains the functionality and connections of the M 100FX and gives actual examples of how you can use it CD ROM special drivers This CD contains the special drivers y...

Page 11: ...11 Basic operation ...

Page 12: ...LR type phone type the signal from mic input jack 1 XLR type phone type will be ignored If a mic is connected to the plug in powered mic jack the input level knob GAIN will not adjust the input level fig panel1 1 2 4 3 7 6 8 9 10 11 5 fig jack 2 This instrument is equipped with balanced XLR TRS type input jacks Wiring diagrams for these jacks are shown at right Make connections after first checkin...

Page 13: ...put sound from the external output jack AUX SEND and process it with an external effects processor you can use these external input jacks to receive the sound from the effects processor You can also use these jacks to connect an external device in the same way as when using the line inputs Cables with phone plugs can be connected here If you are inputting a monaural signal connect it to the L MONO...

Page 14: ... These knobs adjust the level of the signal that is sent to the internal reverb and the external output jack If you are using the internal reverb use the reverb AUX send level knobs to adjust the depth of reverb 15 Pan balance knobs PAN BALANCE These knobs adjust the left right balance of the sound that is sent to the master output jacks For CH 1 and 2 these knobs adjust the pan When converting a ...

Page 15: ...l make the sound closer to the original sound and turning it toward FX right will increase the effect sound producing a stronger effect The audio voice effect can be applied only to the audio that is input from mic input jacks 1 and 2 CH1 2 20 Reverb type select knob This knob selects the type of reverb 21 Reverb time adjustment knob This knob adjusts the duration length of the reverberation What ...

Page 16: ...evel knob This knob adjusts the input level of the audio signal that is input to the external input jacks AUX RETURN 26 Headphone volume knob This knob adjusts the volume of the sound that is output from the headphone jack 27 Monitor volume knob This knob adjusts the volume of the sound that is output from the monitor output jacks 28 Master volume indicator This indicator progressively lights from...

Page 17: ...r details on installing the special driver refer to Using Advance mode p 163 33 USB mix down switch This switch selects whether audio signals sent from your computer via USB to the M 100FX will be returned to the computer Normally you will leave this in the OFF position If this is ON the same sound that is being output from the master output jacks will be sent to the USB connector If this is OFF t...

Page 18: ...er pipes may result in shock or electrocution Gas pipes may result in fire or explosion Telephone line ground or lightning rod may be dangerous in the event of lightning 37 Security Slot http www kensington com Block diagram The following diagram shows the signal flow within the M 100FX fig block M 100FX BLOCK DIAGRAM DIGITAL OUT PHONES PHONES LEVEL LEFT RIGHT MASTER OUT LEFT RIGHT AUX SEND AUX LE...

Page 19: ... monitor speakers or headphones so that you can hear the sound you are mixing Connect your monitor speakers to the monitor output jacks or headphones to the headphone jack fig basic The monitor output jacks provide both phone type and RCA phono type connectors The same signal is output from both types of connector Use the connectors that are suitable for the cables you are using with your monitor ...

Page 20: ...quires phantom power Malfunctions will occur if phantom power is supplied to a dynamic mic or an audio playback device For details on the specifications of your mic refer to the owner s manual supplied with your mic The M 100FX s phantom power supply is DC 48 V 10 mA maximum Before you connect a mic turn the input level knob GAIN to the minimum position in order to protect the circuitry Mic Video ...

Page 21: ... jack the input level knob GAIN will not adjust the input level About balanced and unbalanced connections fig 04 1a fig 04 1b Balanced input is a method of transmitting a signal using three conductors which are named hot cold and ground The plug is divided into three sections Plugs used for stereo signals are divided into three sections in the same way but are wired differently Do not mix these tw...

Page 22: ...ht fig mic1 3 Set the master volume fader to the center of the area shown in the panel illustration below fig mic2 4 Adjust the input level Adjust the input level fader so that the yellow LED 0 dB of the master volume indicator lights occasionally If you are simultaneously recording with more than one mic slowly raise the input level faders of all input channels to adjust their levels fig mic3 The...

Page 23: ... device you are using If you connect both types simultaneously only the sound from the phone plug connection will be sent to your recorder or other devices Adjusting the input level volume After you have made connections adjust the volume as follows Set the input level faders and master volume fader to the minimum position If you have connected monitor speakers or headphones turn the monitor volum...

Page 24: ...k channel and want to record them raise the input level faders for each input channel you are using and adjust them as desired fig mic3 1 3 If your recording device allows you to adjust the recording level adjust the level so that the peak indicator of your recording device does not light or so that the level meter stays within the appropriate recording level 4 If you have connected monitor speake...

Page 25: ...cable to the USB connector on the back of the M 100FX For details on connecting your monitor speakers or headphones refer to Connecting monitor speakers or headphones p 19 fig pc1 If you are using Windows and want to send the playback of an audio CD to the M 100FX via USB you will need to use Windows Media Player 7 or later If you are using Advanced mode on Mac OS9 you cannot send the playback aud...

Page 26: ... master volume indicator lights occasionally fig mic3a If you have connected devices to more than one line input jack channel and want to record them raise the input level faders of all these channels to adjust their levels 3 If you are recording the audio signal on your computer make adjustments in your software so that the recording level is appropriate The master volume fader adjusts the volume...

Page 27: ... you can either set your recording software to stop outputting to USB or turn the M 100FX s USB input level knob all the way to the left the 0 position The master volume fader controls the volume of the digital output and the level volume at which the mixed signal is sent to USB If you want to adjust the volume of your monitor speakers independently of the recording level connect your monitor spea...

Page 28: ...input jacks AUX RETURN Before you connect a device to the external input output jacks turn the reverb AUX send level knobs REV AUX SEND of each channel and the AUX input level knob all the way to the left minimum in order to protect the circuitry When you are finished making connections gradually turn the knobs toward the right Here are some ways in which you can use these jacks Send the external ...

Page 29: ...player Mic Monitor speakers If the reverb type select knob is not turned OFF the same signal as sent from the external output jack AUX SEND will also be sent to the internal reverb If you don t need to apply the internal reverb turn the reverb type select knob to OFF In order to connect a CD player or similar device to the external input jacks AUX RETURN you may need an adaptor to convert the RCA ...

Page 30: ...ion and noise Use the master volume fader to adjust the volume This allows you to adjust the volume even if your monitor speakers cannot adjust the volume of a digital input signal Connecting an MD recorder If you want to record the sound mixed by the M 100FX onto your MD or DAT recorder connect your MD recorder to the M 100FX s digital output jack Use the master volume fader to adjust the volume ...

Page 31: ...e pitch How to apply effects For details on connecting mics or other devices refer to the explanations in Basic operation p 19 1 For the channel to which your mic is connected press the effect switch to turn it on It will light in red 2 Use the audio voice effect select knob to select an effect 3 Use effect modify knobs A B to adjust the character parameters of the effect 4 Use the effect balance ...

Page 32: ...ned out by other sounds A BASS B COMPRESS 4 RICH CHORUS p 34 Gives spaciousness and depth to the sound Raising the Balance knob will add a sense of modulation producing a mysterious effect A RATE B DEPTH 5 NOISE REDUCER p 35 Reduces electronic hum and hiss noise A HUM CUT B NOISE CUT 6 RADIO p 35 Simulates the noise that is often produced by a radio or analog record creating the sensation of an ol...

Page 33: ...ied If you apply an excessive amount of this effect to a voice that is already clear the sound will become harsh or distorted 2 VOCAL ENHANCER This effect boosts or reduces the components of a sound that produce its basic character You can use this to emphasize or correct the character of a voice when recording dialog or a song A TONE Turning effect knob A toward the right will boost the frequency...

Page 34: ...e right sounds will tend to be adjusted to a higher level Unlike simply increasing the volume this prevents high volume sounds from distorting 4 RICH CHORUS This effect adds a chorus effect produced by adding a pitch modulated sound to the original sound creating a spacious sensation It can be used to produce fantasy like effects that have a reduced sense of direction or to add the impression of a...

Page 35: ...undesired effects such as distortion B NOISE CUT This cuts the background noise that is heard when the voice is silent The noise will be cut more significantly as you turn effect knob B toward the right If this setting is excessive the beginning and end of your vocal phrases will be cut off unnaturally and it may become difficult to understand the voice 6 RADIO This effect adds the noises characte...

Page 36: ...ou turn effect knob A toward the left the pitch of the voice will be lowered If the knob is turned all the way toward the right the voice will be at the original pitch B FORMANT Formants are features of a voice that determine its character Effect knob B adjusts the formants Turning the knob toward the left will produce a deeper voice as if the vocal cords were larger If the knob is turned all the ...

Page 37: ...the right the pitch of the voice will be raised If the knob is turned all the way toward the left the voice will be at the original pitch B FORMANT Formants are features of a voice that determine its character Effect knob B adjusts the formants Turning the knob toward the right will produce a more shrill voice as if the vocal cords were smaller If the knob is turned all the way toward the left the...

Page 38: ...m ersten Schritt werden wir die Geräte anschließen mit denen Sie sich den Sound anhören können Schließen Sie die Monitor Lautsprecher oder Kopfhörer an damit Sie den Sound hören können den Sie mischen Verbinden Sie Ihre Monitor Lautsprecher mit den Monitor Ausgangsbuchsen bzw Ihre Kopfhörer mit der Kopfhörerbuchse fig basic e Die Monitor Ausgangsbuchsen bieten Anschlüsse vom Typ Phone sowie vom Ty...

Page 39: ...omstrom versorgt wird treten Fehlfunktionen auf Weitere Informationen über die Spezifikationen Ihres Mikrofons erhalten Sie im Benutzerhandbuch das Ihrem Mikrofon beiliegt Die Phantomstromversorgung des M 100FX beträgt maximal DC 48 V 10 mA Anschluss eines Mikrofons S 39 Anschluss von Audiogeräten S 42 Anschluss des M 100FX an Ihren Computer S 44 Using the external input output jacks AUX S 28 Usin...

Page 40: ...r Eingangspegel nicht verändert werden Über symmetrische und unsymmetrische Anschlüsse fig 04 1a fig 04 1b Die symmetrische Eingabe ist eine Methode mit der ein Signal mit Hilfe von drei Leitern übertragen werden kann die als heiß kalt und Erde bezeichnet werden Der Stecker ist in drei Abschnitte unterteilt Stecker die für Stereosignale verwendet werden sind ebenfalls in drei Abschnitte unterteilt...

Page 41: ...euchtet fig mic1 3 Stellen Sie den Master Volume Fader in die Mitte des Bereichs der in der untenstehenden Abbildung des Bedienfelds gezeigt wird fig mic2 4 Regeln Sie den Eingangspegel Stellen Sie den Input Level Fader so ein dass die gelbe LED 0 dB der Master Volume Anzeige von Zeit zu Zeit aufleuchtet Wenn Sie mit mehreren Mikrofonen gleichzeitig aufnehmen sollten Sie die Input Level Fader alle...

Page 42: ...unden sind das Sie verwenden Wenn Sie beide Steckertypen gleichzeitig anschließen wird nur der Sound der Phone Steckerverbindung in den Recorder oder in andere Geräte gesendet Regelung des Eingangspegels Lautstärke Nachdem Sie die Verbindungen hergestellt haben regeln Sie die Lautstärke wie folgt Bringen Sie die Input Level Fader und Master Volume Fader in die Minimalposition Wenn Sie Monitor Laut...

Page 43: ...ten schieben Sie die Eingangspegelregler für jeden Eingangskanal den Sie verwenden nach oben um die Lautstärke entsprechend Ihren Wünschen anzupassen fig mic3 1 3 Wenn es Ihnen Ihr Aufnahmegerät ermöglicht den Aufnahmepegel anzupassen verstellen Sie ihn so dass die Peak Anzeige Ihres Aufnahmegeräts nicht aufleuchtet oder so dass die Pegel Messan zeige im Bereich einer angemessenen Aufnahmelautstär...

Page 44: ...Sie das USB Kabel mit dem USB Anschluss an der Rückseite des M 100FX Weitere Informationen zum Anschluss Ihrer Monitor Lautsprecher oder Kopfhörer erhalten Sie unter Anschluss von Monitor Lautsprechern oder Kopfhörern S 38 fig pc1 Wenn Sie mit Windows arbeiten und die Wiedergabe einer Audio CD via USB zum M 100FX senden möchten müssen Sie den Windows Media Player 7 oder später verwenden Wenn Sie u...

Page 45: ... den USB Input Level Schaltknopf nach rechts um die Lautstärke zu erhöhen Stellen Sie die Lautstärke so ein dass das gelbe Licht 0 dB der Master Volume Anzeige von Zeit zu Zeit aufleuchtet fig mic3a Wenn Sie mit mehreren Leitungseingangsbuchsen Kanälen Geräte verbunden haben und Aufnahmen erstellen möchten verschieben Sie für alle diese Kanäle die Input Level Fader um die Lautstärken anzupassen Nä...

Page 46: ...r Feedback Schleife wobei ein heulender Ton oder Verzerrung erzeugt werden kann Um das zu verhindern können Sie entweder Ihre Aufnahmesoftware so einstellen dass die Ausgabe nicht mehr am USB Anschluss erfolgt oder Sie drehen den USB Input Level Schaltknopf des M 100FX ganz nach links Position 0 Der Master Volume Fader steuert die Lautstärke der Digitalausgabe und den Pegel Lautstärke mit dem das ...

Page 47: ...den Sie Effekte an Weitere Informationen zum Anschluss von Mikrofonen oder anderen Geräten erhalten Sie unter Grundlegende Bedienung S 38 1 Drücken Sie für den Kanal mit dem Ihr Mikrofon verbunden ist den Effektschalter um es einzuschalten Der Schalter leuchtet anschließend rot 2 Verwenden Sie den Audio Voice Effektauswahlschaltknopf um einen Effekt auszuwählen 3 Verwenden Sie die A B Schaltknöpfe...

Page 48: ...SS 4 RICH CHORUS S 50 Verleiht dem Sound Raum und Tiefe Wenn Sie den Balance Schaltknopf nach oben verschieben wird der Klang leicht moduliert womit ein geheimnisvoller Effekt A RATE B DEPTH 5 NOISE REDUCER S 51 Reduziert elektrische Brumm und Zischgeräusche A HUM CUT B NOISE CUT 6 RADIO S 51 Simuliert das Rauschen das häufig von einer Radio oder Analogaufnahme erzeugt wird und vermittelt den Eind...

Page 49: ... auf eine Stimme die bereits klar ist übermäßig anwenden wird der Klang schrill oder verzerrt 2 VOCAL ENHANCER Dieser Effekt verstärkt oder reduziert die Komponenten eines Sounds die seinen grundlegenden Charakter ausmachen Sie können ihn verwenden um den Charakter einer Stimme zu unterstreichen oder zu korrigieren wenn Sie einen Dialog oder Song aufnehmen A TONE Wenn Sie den Effektschaltknopf A n...

Page 50: ...ts drehen erreichen die Klänge allmäh lich einen höheren Pegel Anders als bei der einfachen Erhöhung der Laut stärke wird damit verhindert dass laute Klänge verzerrt werden 4 RICH CHORUS Dieser Effekt fügt einen Chor Effekt hinzu der erzeugt wird indem der ursprüngliche Sound mit einem tonhöhenmodulierten Klang ergänzt wird wodurch eine raumfüllende Wirkung erzielt wird Er kann genutzt werden um f...

Page 51: ... kann zu weiteren unerwünschten Effekten wie z B Verzerrungen kommen B NOISE CUT Damit werden die Hintergrundgeräusche entfernt die zu hören sind wenn die Stimme stumm ist Die Geräusche werden stärker ausgeblendet wenn Sie den Effektschaltknopf B nach rechts drehen Wenn Sie diesen Effekt übermäßig einsetzen werden Anfang und Ende Ihrer Vokalphrasen unnatürlich ausgeblendet und es kann schwierig we...

Page 52: ...ie den Effektschaltknopf A nach links drehen wird die Tonhöhe der Stimme verringert Wenn der Schaltknopf ganz nach rechts gedreht wird weist die Stimme die ursprüngliche Tonlage auf B FORMANT Formanten sind Merkmale einer Stimme die ihren Charakter ausmachen Effektschaltknopf B passt die Formanten an Wenn Sie den Schaltknopf nach links drehen wird eine tiefere Stimme erzeugt als wären die Stimmbän...

Page 53: ...ehen wird die Tonhöhe der Stimme erhöht Wenn der Schaltknopf ganz nach links gedreht wird weist die Stimme die ursprüngliche Tonlage auf B FORMANT Formanten sind Merkmale einer Stimme die ihren Charakter ausmachen Effektschaltknopf B passt die Formanten an Wenn Sie den Schaltknopf nach rechts drehen wird eine schrillere Stimme erzeugt als wären die Stimmbänder kleiner Wenn der Schaltknopf ganz nac...

Page 54: ...d connecter un équipement vous permettant d écouter les sons Branchez des enceintes de contrôle ou un casque vous permettant d entendre le son que vous mixez Branchez les enceintes de contrôle sur les prises de sortie jack de contrôle ou un casque sur la prise casque fig basic Vous avez le choix entre des jacks RCA et casque Le même signal est envoyé sur ces deux sorties Utilisez les connecteurs c...

Page 55: ...tant cette alimentation Des dysfonctionnements peuvent se produire dans le cas contraire branchement d un micro dynamique ou appareil de lecture audio par exemple Pour plus de détails sur les caractéristiques de votre micro reportez vous à sa documentation propre L alimentation fantôme du M 100FX est du type 48 V 10 mA maximum Avant de brancher un micro tournez le bouton de niveau d entrée GAIN au...

Page 56: ...et sur le niveau d entrée A propos des connexions symétriques et asymétriques fig 04 1a fig 04 1b Les connexions symétriques permettent de transmettre un signal à l aide de trois conducteurs appelés hot cold et ground La prise est divisée en trois sections Les prises utilisées pour les signaux stéréo sont également divisées en trois sections mais elles sont câblées différemment Ne mélangez pas ces...

Page 57: ...c1 3 Montez le curseur de volume général au milieu de la zone voir illustration ci dessous fig mic2 4 Réglez le niveau d entrée Réglez le curseur de niveau d entrée de manière à ce que le voyant jaune 0 dB du témoin de volume général ne s allume que par intermittence Si vous enregistrez avec plusieurs micros montez lentement les curseurs de niveau d entrée de toutes les voies d entrée pour régler ...

Page 58: ...ndant au format des prises d entrée de votre appareil enregistreur Si vous branchez les deux types de fiches en même temps seul le son de la prise de type casque sera envoyé à l appareil branché Réglage du niveau d entrée volume Une fois réalisés les branchements réglez le volume de la façon suivante Baissez les curseurs de niveau d entrée et le curseur du volume général en position minimum Si vou...

Page 59: ...ppareils sur plus d une prise d entrée ligne et que vous voulez les enregistrer montez les curseurs de niveau d entrée des voies utilisées jusqu au niveau désiré fig mic3 1 3 Si votre appareil enregistreur vous permet de régler le niveau d entrée faites le de manière à ce que le voyant de crête de votre appareil enregistreur ne s allume pas et réglez le volume d enregistrement à un niveau adéquat ...

Page 60: ...anchez le câble USB au connecteur USB à l arrière du M 100FX Pour plus de détails sur le branchement d enceintes de contrôle ou d un casque reportez vous à la section Connexion d enceintes ou d un casque p 54 Si vous utilisez Windows et que vous voulez envoyer le son d un CD audio au M 100FX via USB vous avez besoin de Windows Media Player 7 ou supérieur Si vous utilisez le Mode avancé avec Mac OS...

Page 61: ... du casque jusqu à la position minimum 1 Réglez le curseur du volume général sur la position indiquée par le repère noir fig mic2 2 Après avoir lancé la lecture audio sur l ordinateur tournez lentement le bouton de niveau d entrée USB vers la droite pour monter le niveau Réglez le niveau de manière à ce que le voyant jaune 0 dB du témoin de volume général ne s allume que par intermittence USB cabl...

Page 62: ...baisser le niveau d entrée USB pendant l enregistrement Selon votre logiciel le signal entré peut être renvoyé directement vers la sortie USB Si tel est le cas une boucle se créera avec l entrée audio USB sur le M 100FX entraînant un bruit strident ou de la distorsion Pour éviter ce phénomène vous pouvez soit inhiber la sortie USB de votre ordinateur soit tourner le bouton de niveau d entrée USB e...

Page 63: ...effets Pour plus de détails sur la connexion de micros ou d autres appareils reportez vous à la section Fonctionnement de base p 54 1 Sur la voie sur laquelle le micro est branché appuyez sur l interrupteur d effets pour l activer Il s allume en rouge 2 Utilisez le bouton de sélection d effets audio voix pour sélectionner un effet 3 Utilisez les boutons de modification d effets A B pour régler les...

Page 64: ...es par les autres sons A BASS B COMPRESS 4 RICH CHORUS p 66 Donne de l espace et de la profondeur au son En tournant le bouton Balance vous obtiendrez une sensation de modulation ce qui crée un effet de mystère A RATE B DEPTH 5 NOISE REDUCER p 67 Réduit les bruits parasites A HUM CUT B NOISE CUT 6 RADIO p 67 Simule les craquements générés par un disque vinyle ou un poste de radio créant une sensat...

Page 65: ... cet effet trop fortement à une voix déjà claire le son deviendra rêche ou distordu 2 VOCAL ENHANCER Cet effet renforce ou réduit les composantes d un son constituant son caractère de base Vous pouvez l utiliser pour mettre en valeur ou corriger le caractère d une voix quand vous enregistrez un dialogue ou une chanson A TONE En tournant le bouton d effets A vers la droite vous renforcerez la gamme...

Page 66: ... effets B vers la droite les sons seront montés à un certain niveau Contrairement à une augmentation de volume globale cet effet évite la distorsion des sons forts 4 RICH CHORUS Cet effet ajoute une atmosphère de chœurs en ajoutant une modulation de tonalité au son d origine ce qui crée une sensation d espace Il peut s utiliser pour produire un effet fantastique où l on perd la notion d orientatio...

Page 67: ...NOISE CUT Cet effet supprime le bruit de fond présent lorsqu il n y a pas de chant Cette réduction du bruit de fond s amplifie à mesure que vous tournez le bouton d effets B vers la droite Si ce réglage est excessif le début et la fin des phrases vocales seront coupés de façon artificielle et les paroles deviendront difficiles à comprendre 6 RADIO Cet effet ajoute les caractéristiques d une transm...

Page 68: ...A vers la gauche vous baissez la tonalité de la voix Si vous tournez le bouton au maximum vers la droite la voix reste à sa tonalité d origine B FORMANT Les Formants représentent les caractéristiques d une voix qui déterminent son caractère Le bouton bouton d effets B règle les formants En tournant le bouton vers la gauche vous obtenez une voix plus prodonde Si vous tournez le bouton au maximum ve...

Page 69: ... la droite vous montez la tonalité de la voix Si vous tournez le bouton au maximum vers la gauche la voix reste à sa tonalité d origine B FORMANT Les Formants représentent les caractéristiques d une voix qui déterminent son caractère Le bouton bouton d effets B règle les formants En tournant le bouton vers la droite vous obtenez une voix plus aigue Si vous tournez le bouton au maximum vers la gauc...

Page 70: ...Collegare le casse monitor o le cuffie in modo da poter sentire i suoni mixati Collegare le casse monitor alle prese di controllo dell uscita o le cuffie alla presa per le cuffie fig basic Le prese di controllo dell uscita sono sia di tipo RCA che mini jack di tipo telefonico Lo stesso segnale viene trasmesso da entrambi i tipi di connettori Utilizzare i connettori adatti ai cavi utilizzati con le...

Page 71: ...ede questo tipo di alimentazione Si potrebbero verificare dei malfunzionamenti se viene fornita un alimentazione phantom a un microfono dinamico o a un dispositivo di riproduzione Per informazioni sulle specifiche tecniche del microfono consultare il manuale utente fornito insieme al microfono L alimentazione phantom dell M 100FX è 48 V cc 10 mA massimo Prima di collegare un microfono ruotare la m...

Page 72: ... ingresso GAIN non avrà alcun effetto sul livello d ingresso Informazioni sui collegamenti bilanciati e sbilanciati fig 04 1a fig 04 1b L ingresso bilanciato è un tipo di trasmissione del segnale che utilizza tre conduttori chiamati caldo hot freddo cold e massa ground La spina è suddivisa in tre parti Le spine utilizzate per i segnali stereo sono suddivise anch esse in tre sezioni ma sono cablate...

Page 73: ...l indicatore di picco fig mic1 3 Spostare l attenuatore di volume master al centro della zona illustrata nella figura sottostante fig mic2 4 Regolare il livello d ingresso Regolare l attenuatore del livello d ingresso in modo che il LED 0 dB giallo dell indicatore di volume master si illumini di tanto in tanto Se si utilizzano contemporaneamente più microfoni durante la registrazione aumentare len...

Page 74: ...ato al registratore o all apparecchio utilizzato Se si collegano entrambi i tipi di cavi solo l audio proveniente dalla presa mini jack verrà inviato al registratore o all altro apparecchio Regolazione del livello d ingresso volume Dopo aver collegato tutti gli apparecchi regolare il volume come segue Impostare gli attenuatori del livello d ingresso e l attenuatore di volume master sul minimo Se s...

Page 75: ... per registrarli aumentare il livello degli attenuatori del livello d ingresso per ogni ingresso utilizzato e regolarli ai livelli desiderati fig mic3 1 3 Se l apparecchio di registrazione permette di impostare il livello di registrazione regolarlo in modo da evitare che l indicatore di picco dell apparecchio in questione si illumini oppure in modo da mantenere l indicatore di livello entro i valo...

Page 76: ...tor o delle cuffie fare riferimento alla sezione Collegare le casse monitor o le cuffie pag 70 fig pc1 Se si lavora in ambiente Windows per trasmettere la riproduzione di un CD audio all M 100FX mediante la porta USB si dovrà utilizzare Windows Media Player 7 o versioni successive Se si lavora in ambiente Mac OS9 in modalità Advanced non sarà possibile trasmettere i dati audio riprodotti dal CD mu...

Page 77: ...di volume master si illumini di tanto in tanto fig mic3a Se sono stati collegati diversi apparecchi a più prese d ingresso linea per registrarli aumentare il livello degli attenuatori del livello d ingresso di tutti questi canali per regolarne il livello 3 Per registrare il segnale audio sul computer configurare il programma per avere il livello di registrazione opportuno L attenuatore di volume m...

Page 78: ...re in modo da impedire l output verso la porta USB oppure ruotare la manopola del livello d ingresso USB dell M 100FX completamente a sinistra posizione 0 L attenuatore di volume master controlla il volume dell output digitale e il volume del segnale mixato e inviato alla porta USB Per regolare il volume delle casse monitor indipendentemente dal livello di registrazione collegare le casse monitor ...

Page 79: ...i informazioni sui microfoni o altri dispositivi fare riferimento alle spiegazioni nella sezione Nozioni di base pag 70 1 Per attivare il canale cui è collegato il microfono premere l interruttore effetti Diventerà rosso 2 Utilizzare la manopola di selezione degli effetti audio voce per selezionare un effetto 3 Utilizzare le manopole A B di modifica degli effetti per configurare i parametri dell e...

Page 80: ...OMPRESS 4 RICH CHORUS pag 82 Conferisce ampiezza e profondità ai suoni Aumentando il livello della manopola del bilanciamento si aggiunge modulazione per dare A RATE B DEPTH 5 NOISE REDUCER pag 83 Riduce il ronzio elettronico e il sibilo A HUM CUT B NOISE CUT 6 RADIO pag 83 Simula il rumore riprodotto spesso da una radio o da una registrazione analogica dando l impressione di ascoltare una vecchia...

Page 81: ...do eccessivo a una voce già di per sé chiara il suono risultante rischia di essere distorto o duro 2 VOCAL ENHANCER Questo effetto enfatizza o riduce le componenti che caratterizzano un suono Consigliato per enfatizzare o correggere le caratteristiche di base di una voce quando si registra un dialogo o una canzone A TONE Ruotare la manopola A degli effetti verso destra per dare ampiezza alla fasci...

Page 82: ...ffetti verso destra per portare i suoni a un livello più alto Rispetto a un semplice aumento del volume questo effetto evita la distorsione dei suoni alti 4 RICH CHORUS Crea un effetto chorus grazie all aggiunta di un suono con un tono modulato al suono d origine per dare la sensazione dello spazio Consigliato per creare effetti immaginari senza una direzione ben definita o per aggiungere l impres...

Page 83: ...erati come la distorsione B NOISE CUT Elimina il rumore di sottofondo che si sente in assenza del parlato L eliminazione del rumore sarà maggiore quanto più la manopola B degli effetti viene spostata verso destra Se l impostazione è eccessiva l inizio e la fine delle frasi risulteranno tagliate in modo innaturale risultando in eventuali difficoltà di comprensione 6 RADIO Questo effetto aggiunge al...

Page 84: ...a manopola A degli effetti verso sinistra per abbassare il tono della voce Ruotare la manopola completamente verso destra per riportare la voce al tono originale B FORMANT Con formanti si intendono le impronte sonore che caratterizzano una voce La manopola B degli effetti regola le formanti Ruotare la manopola verso sinistra per avere una voce più profonda come se le corde vocali fossero più grand...

Page 85: ... il tono della voce Ruotare la manopola completamente verso sinistra per riportare la voce al tono originale B FORMANT Con formanti si intendono le impronte sonore che caratterizzano una voce La manopola B degli effetti regola le formanti Ruotare la manopola verso destra per avere una voce più acuta come se le corde vocali fossero più piccole Ruotare la manopola completamente verso sinistra per ri...

Page 86: ...ón de sonido Conecte los monitores o auriculares para oír el sonido que esté mezclando Conecte los monitores a los jacks de salida de monitor o los auriculares al jack de auriculares fig basic Los jacks de salida de monitor ofrecen tanto conectores de audio convencionales como conectores de audio RCA La señal de salida es la misma para ambos tipos de conector Utilice los conectores adecuados para ...

Page 87: ...ucirán anomalías en el funcionamiento si se suministra alimentación virtual a un micrófono dinámico o a un dispositivo de reproducción de audio Para obtener información detallada sobre las características de su micrófono consulte el manual del usuario específico del micrófono El suministro de alimentación virtual del M 100FX es de 48 V de CC 10 mA como máximo Antes de conectar un micrófono gire el...

Page 88: ...ono alimentado por cable de alimentación no podrá ajustar el nivel de entrada mediante el control de nivel de entrada GAIN Acerca de las conexiones con balance y sin balance fig 04 1a fig 04 1b La entrada con balance es un método de transmisión de señal en el que se utilizan tres conductores denominados base neutro y tierra El conector está dividido en tres secciones Las clavijas que se utilizan p...

Page 89: ...o fig mic1 3 Disponga el atenuador de volumen global en el centro del área que se muestra en la siguiente ilustración del panel fig mic2 4 Ajuste el nivel de entrada Ajuste el atenuador de nivel de entrada de manera que el LED amarillo 0 dB del indicador de volumen global se encienda de vez en cuando Si está grabando con más de un micrófono simultáneamente suba lentamente los atenuadores de nivel ...

Page 90: ...ado a la grabadora o a otro dispositivo de grabación que utilice Si conecta ambos tipos simultáneamente sólo se transferirá la señal de la conexión de la clavija convencional a la grabadora o los otros dispositivos Ajuste del nivel de entrada volumen Una vez haya establecido las conexiones ajuste el volumen de la siguiente manera Disponga los atenuadores de nivel de entrada y el atenuador de volum...

Page 91: ...anal y desea grabarlos suba los atenuadores de nivel de entrada de cada uno de los canales de entrada en uso y ajústelos según sus preferencias fig mic3 1 3 Si el dispositivo de grabación le permite ajustar el nivel de grabación ajuste el nivel de manera que no se encienda el indicador de pico del dispositivo de grabación o de manera que el medidor de nivel permanezca en el nivel de grabación adec...

Page 92: ... 100FX Para obtener más información sobre cómo conectar monitores o auriculares consulte el apartado Conexión de monitores o auriculares pág 86 fig pc1 Si utiliza Windows y desea enviar la reproducción de un CD de audio al M 100FX vía USB deberá servirse de Windows Media Player 7 o posterior Si utiliza el modo Advanced de Mac OS9 no podrá enviar el audio de la reproducción de un CD de música al M ...

Page 93: ... el control de nivel USB hacia la derecha para aumentar el nivel Ajuste el volumen de manera que el LED amarillo 0 dB del indicador de volumen global se encienda de vez en cuando fig mic3a Si tiene dispositivos conectados en más de un jack de entrada de línea canal y también desea grabarlos suba los atenuadores de nivel de entrada de todos los canales que desee grabar para ajustar su nivel Para ob...

Page 94: ...edback con la entrada de audio USB del M 100FX lo que puede ser causa de chirridos y distorsiones Para evitarlo puede configurar el software de grabación de manera que pare la salida a USB o girar el control de nivel de entrada USB del M 100FX hasta el tope izquierdo posición 0 El atenuador de volumen global controla el volumen de la salida digital y el nivel volumen en el que se envía la señal de...

Page 95: ...lada sobre cómo conectar micrófonos u otros dispositivos consulte las explicaciones del apartado Funcionamiento básico pág 86 1 En el canal en el que esté conectado el micrófono presione el interruptor de efectos para activarlo Esté se encenderá en rojo 2 Utilice el control de selección de efectos de audio voz para seleccionar el efecto deseado 3 Utilice los controles de modificación de efectos A ...

Page 96: ... Proporciona sensación de espacio y profundidad al sonido Si sube el control de balance se añade un sentido de modulación que produce un efecto A RATE Velocidad B DEPTH Profundidad 5 NOISE REDUCER Reductor de ruidos pág 99 Reduce los ruidos seseantes y zumbidos electrónicos A HUM CUT Corte de B NOISE CUT Corte de 6 RADIO Aparato de radio pág 99 Simula el ruido que normalmente produce una radio o u...

Page 97: ... grado excesivo de este efecto a una voz que sea clara de por sí el sonido se volverá rudo o distorsionado 2 VOCAL ENHANCER Potenciador de la voz Este efecto potencia o reduce los componentes de un sonido que constituyen su carácter básico Puede utilizarlo para enfatizar o corregir el carácter de una voz cuando grabe diálogo o canciones A TONE Tono Girando el control de efecto A hacia la derecha s...

Page 98: ...dos a un volumen más alto A diferencia de los resultados obtenidos limitándose a aumentar el volumen este efecto evita que distorsionen los sonidos de volumen alto 4 RICH CHORUS Este efecto confiere un efecto de coro añadiendo un sonido de tono modulado al sonido original con lo que se crea una sensación de espacio Puede utilizarse para producir efectos de fantasía con un sentido de dirección redu...

Page 99: ...fectos no deseados como distorsiones B NOISE CUT Corte de ruidos Este efecto corta los ruidos de fondo que se oyen cuando la voz está callada Los ruidos se cortarán con más intensidad a medida que gire el control de efecto B hacia la derecha Si lo establece en un valor excesivo se cortará el principio y el fin de las frases de forma artificiosa y puede que resulte difícil entender la voz 6 RADIO A...

Page 100: ...variará el tono A medida que gire el control de efecto A hacia la izquierda disminuirá el tono de la voz Si gira el control hasta el tope derecho la voz permanecerá en el tono original B FORMANT Formantes Los Formantes son características de una voz que determinan su carácter El control de efecto B ajusta los formantes Si gira el control hacia la izquierda obtendrá una voz más profunda como si las...

Page 101: ...hacia la derecha aumentará el tono de la voz Si gira el control hasta el tope izquierdo la voz permanecerá en el tono original B FORMANT Formantes Los Formantes son características de una voz que determinan su carácter El control de efecto B ajusta los formantes Si gira el control hacia la derecha obtendrá una voz más chillona como si las cuerdas vocales fueran más finas Si gira el control hasta e...

Page 102: ...erb How to apply reverb For details on connecting your mic and other equipment refer to Basic operation p 19 1 Use the reverb type select knob to select the desired reverb type 2 Turn the reverb AUX send level knob to adjust the reverb depth 3 Use the reverb time knob to adjust the length of the reverb Direct sound Early reflections Late reverberation Sound source Listener Direct sound Sound that ...

Page 103: ...e applied Select this setting if you don t want to apply an effect HALL 1 2 3 Simulates the reverberation of a spacious room such as a concert hall or gymnasium ROOM 1 2 Simulates the reverberation of a room such as a club or disco PLATE Simulates the artificial reverberation produced by a plate reverb a reverb unit using a metal plate It produces denser reverberation than HALL or ROOM This is par...

Page 104: ...time Turning the reverb time knob toward the right will lengthen the reverberation The default value is the setting when the reverb time knob is at the center position fig reverb3 2 Determines the length of reverberation ...

Page 105: ...105 Applications ...

Page 106: ...peakers to the monitor output jacks Alternatively connect your headphones to the headphone jack Now you can hear the sound you will be mixing Adjust the following volumes Headphones Headphone volume knob Monitor speakers Monitor volume knob 5 If you want to record the sound you are mixing connect your recording device to the master output jacks or the digital output jack 6 Use the input level fade...

Page 107: ...der to adjust the volume You can create a fade in by slowly raising the fader upward from the minimum position or a fade out by slowly lowering the fader down to the minimum position fig HINT It is effective to use a fade in when you start recording and a fade out when you finish recording Effect Operation To make the CD sound more powerful Turn the equalizer EQ LO knob toward the right To make th...

Page 108: ...cks to the line input jacks of your video deck If you want to adjust the audio from your video camera use the CH 3 4 input level fader to adjust the input level 5 Connect your mic to mic input jack 1 CH1 and adjust the gain and level Connecting a mic p 20 6 Make effect settings In this example we ll use the 1 NARRATION ENHANCER effect which is particularly suitable for narrations 1 Press the CH 1 ...

Page 109: ... have set the audio voice effect knob to 1 NARRATION ENHANCER the effect will have the default settings see diagram below or p 113 regardless of the actual positions of effect knobs A and B and the effect balance knob Default settings for 1 NARRATION ENHANCER fig narration 1_70 fig MEMO Other effects can also be used to modify the character of the voice For details on each effect readEffect types ...

Page 110: ...UX send level knobs of CH1 and CH2 to adjust the amount of reverb applied to each mic 6 Use the pan balance knobs to adjust the pan of each mic For a duet it is effective to set CH1 to the left and CH2 to the right 7 Play back the CD and sing into the mics fig MEMO The effect will depend on the type of reverb you select Refer to Reverb types p 103 and try out various types of reverb CD MD player M...

Page 111: ...el Adjusting the gain and level volume p 22 4 Simultaneously press the effect switches of CH1 and CH2 to select Stereo Control If you want to make additional adjustments to the sound use the CH1 input level fader or knobs 5 Set the audio voice effect knob to 5 NOISE REDUCER Monitor speakers Stereo set Cassette deck Stereo Control Simultaneously pressing the CH1 and CH2 effect switches will select ...

Page 112: ... the way toward FX right 8 Play back your cassette tape and move effect knob B Set effect knob B to the point at which the noise is removed from silent portions of the program material Set to the center Set to FX Be aware that if you turn effect knob B too far toward the right even desired sounds may disappear ...

Page 113: ...t they do refer to Audio Voice effects p 31 1 NARRATION ENHANCER fig narration_70 Default settings These settings clarify a narration or announcement making it more listenable while removing unpleasant noises fig narration 1 Removing only unpleasant noises With these settings the clarity of the voice will not be affected only unpleasant sibilants and other noises will be removed fig narration 2 ...

Page 114: ...ize the fundamental portion of a voice and its distinctive attributes giving the sound brightness and depth fig vocal 1 Reducing the obtrusiveness of the voice These settings restrain the fundamental portion of a voice and its distinctive attributes making the sound less obtrusive fig vocal 2 ...

Page 115: ... variations in volume to make the level more consistent and powerful fig power 1 Creating a more powerful voice These settings give more power to the low frequency region creating a more powerful sound Applying these settings to music that already has a substantial low frequency component can give the sound chest thumping impact fig power 2 ...

Page 116: ...t spacious to the sound These settings lightly apply a slow chorus sound to create a subtle spaciousness This is effective on backing chorus or scat singing fig rich 2 Creating a distinctive modulation effect These settings add a greater sense of modulation to the chorus effect producing a dramatic effect This is effective with jingles fig rich 3 ...

Page 117: ... effect knob B toward the right If a portion of the desired sound is being cut turn effect knob B toward the left fig noise 1 Removing hum noise These settings cut the buzzing hum noise produced by electronic devices If the electrical power in your area is 50 Hz turn the knob toward the left to cut the hum If your electrical power is 60 Hz turn the knob toward the right fig noise 2 60Hz 50Hz ...

Page 118: ...duced by a radio fig radio 1 Simulating the sound of an old radio These settings simulate the effect of speech heard through an old radio that is mistuned fig radio 2 Simulating the sound of a megaphone These settings add distortion and noise to simulate the effect of speaking through a megaphone fig radio 3 ...

Page 119: ...ttings These settings simulate a robotic unpitched voice fig robot 1 Space invader These settings produce the sound of an alien voice that might be heard in an SF movie fig robot 2 Big robot These settings produce the impression of a large robot fig robot 3 ...

Page 120: ...ult settings These settings transform a female voice into a male voice fig male 1 Anonymous interview These settings modify the voice in a way that makes it difficult to identify fig male 2 Duet These settings transform a solo into a duet fig male 3 ...

Page 121: ... fig female_70 Default settings These settings transform a male voice into a female voice fig female 1 Child s voice These settings produce a child like voice fig female 2 Duet These settings transform a solo into a duet fig female 3 ...

Page 122: ...122 Effect applications MEMO ...

Page 123: ...123 Supplementary information ...

Page 124: ...from the M 100FX to your application If you are using the M 100FX with ASIO compatible software or an application that supports 24 bit audio you will need to install a special driver Please read Using Advance mode p 163 Application Driver Personal computer M 100FX USB cable USB connector The procedure for installation and settings will depend on your system Proceed to the page for the system you a...

Page 125: ...master fader to the minimum position and turn ON the power switch The M 100FX will be detected automatically and the driver will be installed 6 When installation is complete restart Windows Next you will need to make the driver settings Settings and checking p 131 Once the connections have been completed turn on power to your various devices in the order specified By turning on devices in the wron...

Page 126: ...SB cable to connect the M 100FX to your computer 5 Set the M 100FX s power switch to the ON position 6 Windows will detect the M 100FX and the Add New Hardware Wizard dialog box will appear Make sure that Automatic search for a better driver Recommended is selected and click Next fig 05 23e_50 7 Driver detection will begin Once the connections have been completed turn on power to your various devi...

Page 127: ...05 24e_50 9 Once the driver has been installed a dialog box will inform you of this Click Finish 10 Restart Windows Next you will need to make the driver settings Settings and checking p 131 Depending on your system a certain amount of time may be required for the device to be detected after the driver has been installed ...

Page 128: ...100FX 2 Connect the AC adaptor to an electrical outlet 3 Use the USB cable to connect the M 100FX to your computer 5 Set the M 100FX s power switch to the ON position 6 USB composite device will be detected automatically and the Add New Hardware Wizard dialog box will appear Click Next fig 05 25e_50 Once the connections have been completed turn on power to your various devices in the order specifi...

Page 129: ...e_50 8 A dialog box like the one shown will appear Check CD ROM drive and click Next fig 05 27e_50 9 A dialog box like the one shown will appear Click Next fig 05 28e_50 10 File driver copying will begin fig 05 08e_50 If the Windows CD ROM is not inserted in the CD ROM drive a Insert Disk dialog box may appear In this case insert the Windows CD ROM into the CD ROM drive and click OK ...

Page 130: ... Hardware Wizard dialog box will appear Click Next and proceed with the installation in the same way as in steps 8 11 p 129 fig 05 33e_50 13 When installation of the USB audio device driver is complete a dialog box like the one shown here will appear Click Finish fig 05 34e_50 14 Installation of the USB composite device driver and USB audio device driver has been completed Restart Windows Next you...

Page 131: ...es dialog box 3 Click the Audio tab 4 For MIDI music playback click the t located at the right of Default device or in Windows 2000 Me Preferred device and select the following from the list that appears fig 2 28_50 5 Close the Sounds and Audio Devices Properties dialog box Click OK to complete the settings Sound playback Windows XP EDIROL M 100FX Windows 2000 Me USB Audio Device Sound recording W...

Page 132: ...l double click the Multimedia icon to open the Multimedia Properties dialog box 3 Click the Audio tab fig 12 09_50 4 In the playback and recording areas click beside Preferred Device and select the USB Audio Device from the list that appears 5 Close the Multimedia Properties dialog box Click OK to complete the settings This completes driver settings Next you will need to make the Volume Control se...

Page 133: ...using Windows 2000 and the CD Player is not displayed check Enable digital music CDs for this CD playback device in Digital CD Playback When playing audio CDs from the computer s internal CD ROM drive or using the M 100FX to play game music p 134 CD Player CD Audio Controls the volume of audio CDs on the internal CD ROM drive of the computer 1 WAVE Controls the volume of sound output from the EDIR...

Page 134: ...s 1 Open System Properties Select Start Settings Control Panel and in Control Panel double click the System icon 2 Open the CD ROM drive s Properties Double click the CD ROM icon and then double click the CD ROM drive that you are using 3 Click the Properties tab and in Digital CD Playback check the Enable digital CD audio for this CD ROM device item Windows 98 users 1 Open the Multimedia Properti...

Page 135: ...nnect the AC adaptor to the M 100FX 2 Connect the AC adaptor to an electrical outlet 3 Use the USB cable to connect the M 100FX to your computer 7 Set the M 100FX s power switch to the ON position 8 Wait for approximately five seconds The M 100FX will use the driver included with Mac OS While you are waiting the screen display will not change but the M 100FX is being detected Do not touch the mous...

Page 136: ...USB area three audio devices will be displayed fig 05 37e_60 If these are displayed correctly driver installation has succeeded 10 In the File menu click Quit to close Apple System Profiler If they are not displayed correctly disconnect the M 100FX wait for about ten seconds and then repeat the procedure from step 2 Next you will need to make the driver settings Settings the sound input output p 1...

Page 137: ...44e The Sound dialog box will appear 2 Click the Speakers tab or Speaker Settings fig 05 45e_50 3 With the volume turned down on the M 100FX and on your peripheral audio equipment click Start Test fig 05 46e_50 Test signals will be output from the M 100FX left first then right as indicated in the screen The main volume slider will not move ...

Page 138: ...x click the Input tab In Choose a source for sound input Device select USB audio fig 05 49e_50 5 When you are finished making settings close the Sound dialog box From the File menu select Quit Do not check Play sound through output device This completes driver settings ...

Page 139: ...ition und bringen Sie den Netzschalter in die Position ON Der M 100FX wird automatisch erkannt und der Treiber wird installiert 6 Starten Sie Windows neu sobald die Installation beendet ist Als nächstes müssen Sie die Einstellungen für den Treiber vornehmen Einstellungen und Überprüfung S 140 Nachdem die Anschlüsse fertig gestellt wurden schalten Sie die verschiedenen Geräte in der angegebenen Rei...

Page 140: ...e Audio 4 Klicken Sie bei MIDI Musikwiedergabe auf das t das sich rechts von Stan dardgerät befindet bzw in Windows 2000 Me rechts von Bevorzugtes Gerät und wählen Sie folgende Option aus der angezeigten Liste aus fig 2 28_50 5 Schließen Sie das Dialogfeld Eigenschaften von Sounds und Audiogeräte Klicken Sie auf OK um die Konfiguration abzuschließen Audiowiedergabe Windows XP EDIROL M 100FX Window...

Page 141: ...Verbinden Sie den Wechselstromadapter mit einer elektrischen Steckdose 3 Verwenden Sie das USB Kabel um den M 100FX mit Ihrem Computer zu verbinden 7 Bringen Sie den Netzschalter des M 100FX in die Position ON 8 Warten Sie ungefähr fünf Sekunden lang Der M 100FX benutzt anschließend den Treiber der im Mac OS enthalten ist Während Sie noch warten verändert sich die Bildschirmanzeige nicht aber der ...

Page 142: ...iogeräte angezeigt fig 05 37e_60 Wenn diese Geräte angezeigt werden war die Treiberinstallation erfolgreich 10 Klicken Sie im Menü File auf Quit um den Apple System Profiler zu beenden Wenn diese Geräte nicht angezeigt werden trennen Sie den M 100FX vom Anschluss warten ca 10 Sekunden und wiederholen alle Schritte ab Schritt 2 Als nächstes nehmen Sie die Einstellungen für den Treiber vor Anpassen ...

Page 143: ...ezeigt 2 Klicken Sie auf die Registerkarte Speakers oder Speaker Settings fig 05 45e_50 3 Reduzieren Sie die Lautstärke des M 100FX und Ihrer Peripherie Audiogeräte und klicken Sie anschließend auf Start Test fig 05 46e_50 Anschließend werden Testsignale aus dem M 100FX ausgegeben zuerst links dann rechts wie im Bildschirm angezeigt Der Lautstärke Schieberegler bleibt dabei unverändert ...

Page 144: ... sound input Wählen Sie ein Gerät für die Tonausgabe die Option USB Audio fig 05 49e_50 5 Nachdem Sie alle Einstellungen vorgenommen haben schließen Sie das Dialogfeld Sound Wählen Sie im Menü File die Option Quit Aktivieren Sie nicht Play sound through output device Ton über das Ausgabegerät abspielen Damit sind die Treibereinstellungen abgeschlossen ...

Page 145: ...curseur du volume général en position minimum puis appuyez sur l interrupteur d alimentation ON Le M 100FX est détecté automatiquement le pilote est installé 6 Une fois l installation terminée redémarrez Windows Vous devez ensuite procéder à la configuration du pilote Configuration et contrôle p 146 Une fois les connexions effectuées mettez sous tension les différents appareils dans l ordre spécif...

Page 146: ...logue Propriétés de Sons et multimédia 3 Cliquez sur l onglet Audio 4 Pour Lecture MIDI cliquez sur le t situé à droite de Périphérique par défaut identique avec Windows 2000 Me Périphérique par défaut puis sélectionnez ce qui suit dans la liste qui s affiche fig 2 28_50 5 Fermez la boîte de dialogue Propriétés Son et périphériques multimédia Cliquez sur OK pour confirmer Lecture audio Windows XP ...

Page 147: ... sur OFF branchez l adaptateur secteur sur le M 100FX 2 Branchez le cordon secteur sur une prise électrique 3 Utilisez le câble USB pour relier le M 100FX à votre ordinateur 7 Placez l interrupteur d alimentation du M 100FX sur ON 8 Attendez environ cinq secondes Le M 100FX utilise un pilote compris dans le système Macintosh Mac OS Pendant que vous patientez l affichage ne change pas mais le M 100...

Page 148: ...areils audio sont affichés fig 05 37e_60 Si l affichage est correct l installation du pilote a réussi 10 Dans le menu Fichier cliquez sur Quitter pour fermer Informations système Apple Si les appareils ne s affichent pas correctement débranchez le M 100FX attendez environ dix secondes puis répétez la procédure à partir de l étape 2 Vous devez ensuite procéder à la configuration du pilote Réglage d...

Page 149: ...La boîte de dialogue Son s affiche 2 Cliquez sur l onglet Haut parleur ou Configuration des HP fig 05 45e_50 3 Baissez le volume sur le M 100FX et sur votre équipement audio puis cliquez sur Lancer test fig 05 46e_50 Des signaux de test seront transmis par le M 100FX à gauche d abord puis à droite comme indiqué à l écran Le curseur du volume général ne bouge pas ...

Page 150: ...trée Dans Choisir une source d entrée audio Périphérique choisissez USB Audio fig 05 49e_50 5 Lorsque vous avez terminé la configuration fermez la boîte de dialogue Son Dans le menu File sélectionnez Quit Ne cochez pas Lecture du son par le périphérique de sortie Le paramétrage du pilote est terminé ...

Page 151: ...enuatore master dell M 100FX sul minimo e spostare l interruttore di alimentazione in posizione ON acceso L M 100FX verrà rilevato automaticamente e il driver verrà installato 6 Alla fine dell installazione riavviare Windows Successivamente sarà necessario configurare il driver Configurazione e verifica pag 152 Una volta terminati i collegamenti accendere i vari dispositivi nell ordine indicato Se...

Page 152: ...produzione musica MIDI fare clic su ta destra di Periferica predefinita oppure in Windows 2000 Me Periferica preferenziale e selezionare quanto segue nell elenco visualizzato fig 2 28_50 5 Chiudere la finestra di dialogo Proprietà Suoni e periferiche audio Fare clic su OK per completare le impostazioni Riproduzione audio Windows XP EDIROL M 100FX Windows 2000 Me Periferica audio USB Registrazione ...

Page 153: ...in posizione OFF spento collegare l adattatore AC all M 100FX 2 Collegare l adattatore AC a una presa elettrica 3 Utilizzare il cavo USB per collegare l M 100FX al computer 7 Spostare l interruttore di alimentazione dell M 100FX in posizione ON acceso 8 Attendere circa cinque secondi L M 100FX utilizzerà il driver fornito con MacOS Durante l operazione l M 100FX verrà rilevato anche se non viene v...

Page 154: ...ati tre dispositivi audio fig 05 37e_60 Se sono visualizzati correttamente l installazione del driver è riuscita 10 Nel menu File fare clic su Quit per chiudere la finestra Apple System Profiler Se non sono visualizzati correttamente scollegare l M 100FX aspettare circa dieci secondi e ripetere la procedura a partire dal passo 2 Successivamente sarà necessario configurare il driver Impostazione de...

Page 155: ...are la finestra di dialogo Sound 2 Fare clic sulla scheda Speakers o Speaker Settings fig 05 45e_50 3 Mantenendo il volume al minimo sull M 100FX e sugli altri apparecchi audio fare clic su Start Test fig 05 46e_50 Come visualizzato sullo schermo l M 100FX emetterà dei segnali di controllo prima a sinistra e poi a destra Lo slider Main Volume non si sposta ...

Page 156: ...eda Input In Choose a source for sound input Device selezionare USB Audio fig 05 49e_50 5 Alla fine delle impostazioni chiudere la finestra di dialogo Sound Nel menu File selezionare Quit Non selezionare Play sound through output device La procedura di configurazione del driver è giunta al termine ...

Page 157: ...or de volumen global hasta la mínima posición y disponga el interruptor POWER en la posición ON El sistema detectará el M 100FX automáticamente y se instalará el controlador 6 Cuando finalice la instalación reinicie Windows A continuación deberá configurar el controlador Configuración y comprobación pág 158 Una vez completadas las conexiones encienda los diferentes aparatos en el orden especificad...

Page 158: ... reproducción de música MIDI haga clic en la t que aparece a la derecha de Dispositivo predeterminado o Dispositivo preferido en Windows 2000 o Me y seleccione lo siguiente en la lista que aparece fig 2 28_50 5 Cierre el cuadro de diálogo Propiedades de sonidos y dispositivos de audio Haga clic en Aceptar para finalizar la configuración Reproducciónde sonido Windows XP EDIROL M 100FX Windows 2000 ...

Page 159: ...en la posición OFF conecte el adaptador de CA al M 100FX 2 Conecte el adaptador de CA a una toma de corriente eléctrica 3 Utilice el cable USB para conectar el M 100FX al sistema 7 Establezca el interruptor POWER del M 100FX en la posición ON 8 Espere unos cinco segundos El M 100FX utilizará el controlador integrado en el sistema operativo Mac Mientras espere el contenido de la pantalla no cambiar...

Page 160: ...s dispositivos de audio fig 05 37e_60 Si éstos se muestran correctamente la instalación del controlador se ha efectuado satisfactoriamente 10 En el menú File haga clic en Quit para cerrar Apple System Profiler Si no se muestran correctamente desconecte el M 100FX espere unos diez segundos y repita el procedimiento desde el paso 2 A continuación deberá configurar el controlador Configuración de la ...

Page 161: ... cuadro de diálogo Sound 2 Haga clic en la ficha Speaker o Speaker Settings fig 05 45e_50 3 Con el volumen bajado en el M 100FX y en su equipo de audio periférico haga clic en Start test fig 05 46e_50 Las señales de prueba saldrán del M 100FX de la izquierda primero y de la derecha después tal como se indica en la pantalla El deslizador de volumen principal no se moverá ...

Page 162: ...cha Input En Choose a source for sound input Device seleccione USB audio fig 05 49e_50 5 Cuando haya acabado con la configuración cierre el cuadro de diálogo Sound En el menú File seleccione Quit No seleccione Play sound through output device Con esto finalizará la configuración del controlador ...

Page 163: ...ssic view 3 Click the Hardware tab and then click Driver Signing 4 In the Driver Signing Options dialog box select Ignore and click OK If the current setting is Warn or Block set it to Ignore here then change it back to the original setting after you have finished installing the driver 5 Click OK to close the System Properties dialog box 6 Exit all currently running software applications Also clos...

Page 164: ...n using a user name with an administrative account type e g Administrator 2 Click the Windows Start button and from the menu that appears select Settings Control Panel In Control Panel double click the System icon 3 Click the Hardware tab and then click Driver Signature 4 In the Driver Signing Options dialog box select Ignore and click OK If the current setting is Warn or Block set it to Ignore he...

Page 165: ...sing virus checking or similar software be sure to exit it as well 3 Insert the CD ROM into the CD ROM drive of your computer 4 Click the Windows Start button From the menu that appears select Run 5 In the Run dialog box input the following into the Open field and click OK D DRIVER USB_ME98 SETUPINF EXE The drive name D may be different for your system Specify the drive name of your CD ROM drive 6...

Page 166: ...ication such as SONAR in WDM driver mode or when using a Direct Sound application MME Out EDIROL M 100FX This sends audio data from the computer to the M 100FX Use this setting if you are using the M 100FX with an application that does not have a WDM driver mode or if you want to use 24 bit audio with an application does not support ASIO such as Cool Edit Windows XP 2000 only Input devices EDIROL ...

Page 167: ...s procedure and gradually increase the buffer size specified in step 2 until interruptions no longer occur Depending on the application you are using there may be a buffer size or latency adjustment function among the audio settings of the application as well For details refer to the operation manual for your application Opening the special driver settings dialog box If using Windows 1 Open the Co...

Page 168: ...tch in the ON position 9 With the power switch turned OFF connect the AC adaptor to the M 100FX 10 Connect the AC adaptor to an electrical outlet 11 Use the USB cable to connect the M 100FX to your computer 12 Set the M 100FX s power switch to the ON position Installing the ASIO driver The M 100FX supports ASIO 1 0 24 bit audio The ASIO driver of the M 100FX supports the following audio input outp...

Page 169: ...Settings for Logic users 1 In Logic choose Audio Audio Hardware Drivers 2 In the Preferences dialog box open the ASIO item 3 Make sure that Software Monitoring is unchecked Roland cannot guarantee operation of or provide support regarding sequencer software and audio editing software produced by another manufacturer Please contact the manufacturer of the software you are using If your software is ...

Page 170: ...evel indication shown by the master volume indicator If the sound is distorted even though there is no problem with the indication of the master volume indicator the output volume is appropriate but the input volume is excessive Please adjust the input volume level of the M 100FX Noise is heard in the sound Are you applying the audio voice effect MALE or FEMALE The mic is picking up unwanted sound...

Page 171: ...sappear In this case adjust the input level knob GAIN to raise the input level or turn effect knob B toward the left If a device is connected to mic input jacks 1 2 to input sound try increasing the volume of the connected device Can t hear the audio voice effect Could the effect balance knob be set to the DRY left position There will be no effect if the knob is set to the DRY position If you want...

Page 172: ...et the pan balance knob to the center position Can t hear sound that is input to the RCA phono jacks of line inputs 3 4 Could a phone plug be connected to line input jacks 3 4 5 6 Both phone jacks and RCA phono jacks are provided for these inputs If something is connected to both types of jacks only the sound from the phone jacks will be input the sound from the RCA phono jacks will be ignored The...

Page 173: ... of the M 100FX turned on Make sure that the power switch of the M 100FX is set to the ON position Is the M 100FX connected correctly Make sure that the USB connector of your computer is connected to the M 100FX by a USB cable Check this and if you are using Windows close the Sounds and Audio Devices Properties dialog box Sounds and Multimedia Properties in Windows 2000 Me and Multimedia Propertie...

Page 174: ...he Found unknown device dialog box appears even though the M 100FX is connected to the same USB connector as before it is possible that the computer has detected the M 100FX incorrectly Re install the driver Installing the special driver Windows p 163 An Unknown driver found dialog box appears and you are unable to install the driver Device Manager shows or USB Composite Device Driver is not insta...

Page 175: ...input the following into the Open field and click OK Windows XP 2000 users D DRIVER USB_XP2K Uninstal EXE Windows Me 98 users D DRIVER USB_ME98 Uninstal EXE The drive name D may be different on your system Use the drive name for your CD ROM drive 4 Follow the on screen instructions to uninstall the driver Macintosh users 1 Turn off the power of the M 100FX Also disconnect the USB cable by which th...

Page 176: ...ne type RCA phono type Channel 7 8 9 10 RCA phono type Frequency Response 20 Hz to 20 kHz 0 dB 2 dB Nominal Input Level Channel 1 2 60 to 6 dBu variable Channel 3 4 to 9 10 4 dBu Input Impedance Channel 1 2 50 k ohms Channel 3 4 to 9 10 50 k ohms Equalizer HI 15dB 10 kHz shelving type LO 15dB 100 kHz shelving type Control GAIN knobs Channel 1 2 Equalizer HI knobs Equalizer LO knobs Reverb AUX send...

Page 177: ...dB Headphones jack Stereo 1 4 inch phone type Nominal Output Level 12 dBu Output Impedance 200 ohms External Input Output Connectors AUX Send 1 4 inch phone type Nominal Output Level 0 dBu Output Impedance 1 k ohms STEREO AUX RETURN 1 4 inch phone type L MONO R Nominal Input Level 10 dBu Input Impedance 33 k ohms Digital Output Connectors Digital output jacks Optical type Coaxial type conform to S...

Page 178: ...24 bits Advance Mode ON 16 bits Advance Mode OFF Sample Rate Digital output 44 1 kHz AD DA conversion 44 1 kHz Others Power Supply DC 9 V AC adaptor Current Draw 800 mA Dimensions 287 W x 269 4 D x 72 3 H mm 11 5 16 W x 10 5 8 D x 2 7 8 H inches Weight 2 1 kg 4 lbs 11 oz Accessories USB Cable AC adaptor Owner s manual CD ROM 962a In the interest of product improvement the specifications and or app...

Page 179: ...4 66 80 82 COMPRESS Compresión 96 98 Computer 124 Con balance 88 Condenser mic 12 20 21 Control de nivel de entrada 87 89 Control de volumen de los auriculares 89 Control de volumen de los monitores 89 Cuffie 70 Curseur de volume général 57 D Default Device 166 DELAY 103 DEPTH 32 34 48 50 64 66 80 82 DEPTH Profundidad 96 98 Digital output jack 17 106 Digital reverb 103 Dispositivo de audio USB 158...

Page 180: ... 12 20 110 111 Mic Eingangsbuchse 39 Micro 55 Micro à condensateur 55 56 Micro dynamique 56 Micro mini fiche alimenté 56 Microfono 71 Micrófono 87 Micrófono alimentado por el cable de conexión 88 Microfono condenser 71 72 Microfono dinamico 72 Micrófono dinámico 88 Micrófono electrostático 88 Microfono monofonico plug in 72 Microfono presa d ingresso 71 Micrófonos electrostáticos 87 Mikrofon 39 Mi...

Page 181: ... 103 Reverb AUX send level knob 14 102 103 108 110 171 RICH CHORUS 32 34 48 50 64 66 80 82 96 98 116 ROBOT 32 36 48 52 64 68 80 84 119 ROBOT Robot 96 100 Ronzio 83 ROOM 103 S Sbilanciato 72 Security Slot 18 Sibilant 33 Sibilant sibilante 81 Sifflement 65 Silbido 97 Sin balance 88 SPRING 103 Stereo Control 14 111 Symétrique 56 Symmetrisch 40 T Tierra 88 TONE 32 33 48 49 64 65 80 81 TONE Tono 96 97 ...

Page 182: ...182 Index MEMO ...

Page 183: ...n plug NEUTRAL LIVE For the U K USING THE UNIT SAFELY 001 Before using this unit make sure to read the instructions below and the Owner s Manual 002c Do not open or modify in any way the unit or its AC adaptor 003 Do not attempt to repair the unit or replace parts within it except when this manual provides specific instructions directing you to do so Refer all servicing to your retailer the neares...

Page 184: ... VENEZUELA Musicland Digital C A Av Francisco de Miranda Centro Parque de Cristal Nivel C2 Local 20 Caracas VENEZUELA TEL 212 285 8586 URUGUAY Todo Musica S A Francisco Acuna de Figueroa 1771 C P 11 800 Montevideo URUGUAY TEL 02 924 2335 DENMARK Roland Scandinavia A S Nordhavnsvej 7 Postbox 880 DK 2100 Copenhagen DENMARK TEL 3916 6200 FRANCE Roland France SA 4 Rue Paul Henri SPAAK Parc de l Esplan...

Reviews: