Software Overview
| 27
Sizing a Defect
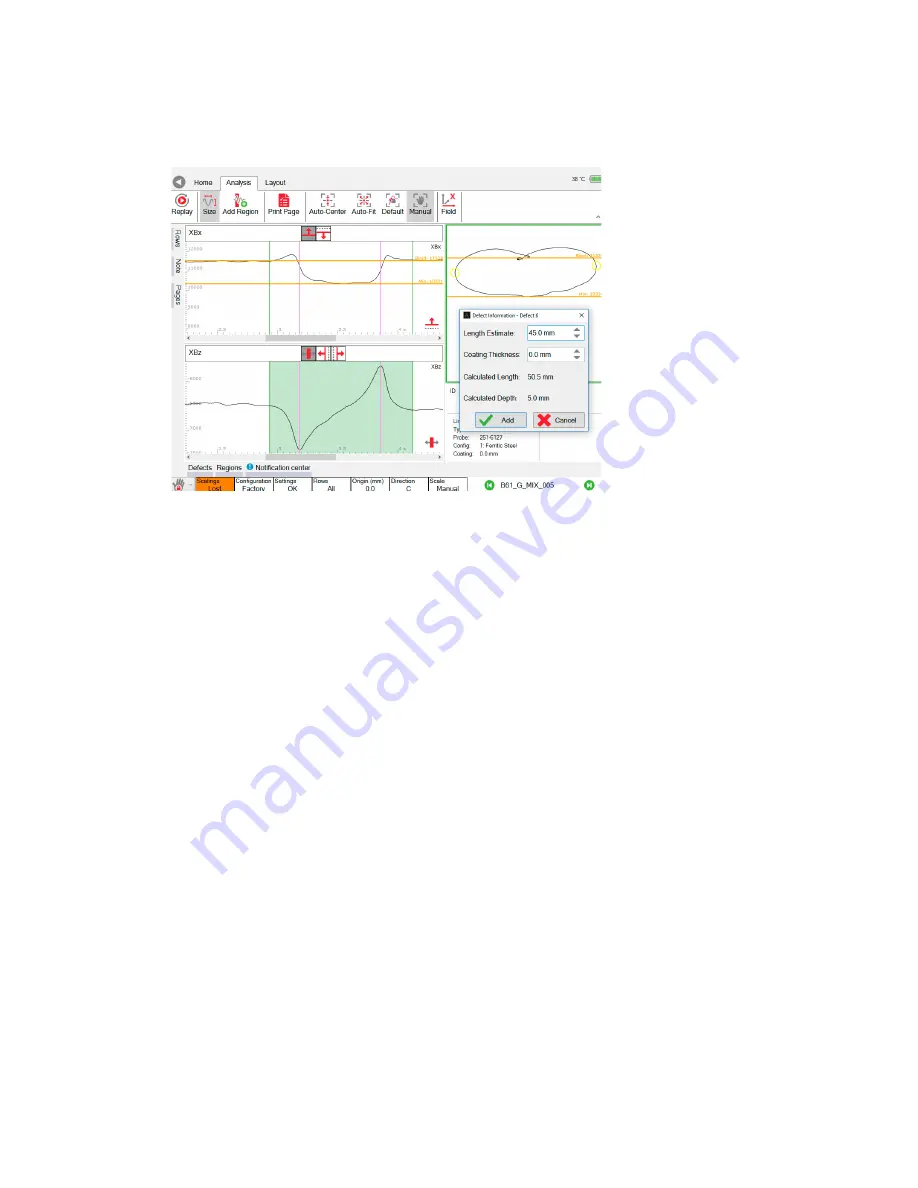
Once a defect indication has been found, it can be sized from the Analysis Ribbon.
Figure 21
Sizing
1.
The
Size
button brings up the defect information dialogue box.
2.
You may need to move the defect dialogue box to one side so the Bx and Bz signals are
visible.
3.
An area of data is selected by dragging a finger across the Bz trace. This is shown in
green. The ideal place to start the selection is at a point just before the Bz signal begins
to deviate from the background value.
4.
The ideal place to end the selection is just after the Bz signal rejoins the background.
5.
If this is done correctly, the Bx background value (yellow horizontal line labelled “Bkgd”)
will be in approximately the right position. It can be manually adjusted by touching the
screen.
6.
The Bx minimum value (yellow horizontal line labelled “Min”) can also be adjusted by first
pressing the button consisting of a red horizontal line and a red downward-pointing
arrow.
7.
The Bz peak and trough can be adjusted by pressing the button consisting of a red
vertical line and arrows pointing to the left and right.
8.
Enter the
Length Estimate
in the defect dialogue box.
9.
Check the
Coating Thickness
is correct.
10. Add
the depth information if it is satisfactory, or press
Cancel
to clear the current sizing
and start again.
11.
This defect can be edited by pressing the
Defects
tab. See page 28 for more detail.
12.
The length and depth summary is added to the information pane.
Summary of Contents for TSC Amigo2
Page 1: ...Getting Started with...
Page 3: ......
Page 4: ......
Page 6: ......
Page 8: ......
Page 10: ......
Page 12: ......
Page 13: ...General Precautions and Conventions...
Page 19: ......
Page 20: ......
Page 21: ...Chapter 1 Amigo2 System Overview...
Page 31: ......
Page 32: ......
Page 33: ...Chapter 2 Software Overview...
Page 55: ......
Page 56: ......
Page 57: ...Chapter 3 Preferences...
Page 61: ......
Page 62: ......
Page 63: ...Chapter 4 Keypad and Keyboard Functions...
Page 66: ......
Page 67: ...Chapter 5 Maintenance and Troubleshooting...
Page 73: ......
Page 74: ......
Page 75: ...Chapter 6 Specifications...
Page 78: ......
Page 79: ...Appendix A Connector Reference...
Page 83: ......
Page 84: ......
Page 85: ...Using the optional Harness Appendix B...
Page 94: ......
Page 95: ...Appendix C Amigo2 Software Service Plans Amigo2 Software Licensing Terms...


