background image

11

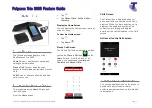
12 – Place the phone into the lower shell, sliding 

the shell forward until it locks into place.

10.1.2 Charging the battery

Warning: Use only batteries, chargers, and enhancements approved by Nokia
for use with this particular model. The use of any other types may invalidate any
approval or warranty, and may be dangerous.
The Ex-GSM 01 mobile phone must only be charged outside of the Ex-hazar-
dous areas and only with an approved battery charger type. Check the model
number of any charger before use with this device. This device is intended for
use when supplied with power from ACP-12, ACP-7, ACP-8 and AC-1.

1 – Open the flap on the bottom of the phone.
2 – Connect the lead from the charger to the 

socket on the bottom of the phone.

3 – Plug the charger into a standard wall 

outlet.

The battery indicator scrolls on the display during charging. Charging is dis-
played briefly if the phone is switched on. If the battery is completely dischar-
ged, it may take a few minutes before the charging indicator appears on the
display, or before calls can be made.
You can use the phone while the charger is connected.
The charging time depends on the charger and the battery used.

10.1.3 Switching the phone on and off

Your device has an internal antenna.

N o t e :

As with any other radio transmitting device, do not touch the antenna

unnecessarily when the device is switched on. Contact with the antenna affects
call quality and may cause the device to operate at a higher power level than
otherwise needed. Avoiding contact with the antenna area when operating the
device optimises the antenna performance and the battery life.

Summary of Contents for Ex-GSM 01

Page 1: ...Safety instructions Ex GSM 01...

Page 2: ...9 10 1 1 Installing the SIM card and battery 9 10 1 2 Charging the battery 11 10 1 3 Switching the phone on and off 11 10 1 4 Keys and connectors 12 10 1 5 Changing the shell and key mat 13 10 1 6 Att...

Page 3: ...able regulations Please take the time to carefully read through the owner s manual before you start using the unit 3 Errors and load restrictions If there is any risk that the safety or integrity of t...

Page 4: ...D T6 Ta 50 C Intrinsically Safe for use in a Class I Division 2 Groups A B C D with a Temperature class of T6 6 Accessories It is possible to connect the associated NOKIA headset HS 8 other connec tio...

Page 5: ...erating environment The regulations valid for a particular area must be complied with under all cir cumstances The mobile phone unit must always be switched off when the use of mobile telephones is fo...

Page 6: ...seek medical advice 8 3 2 Hearing aid In case of malfunctioning of certain types of hearing aid please refer the pro blem to your local service provider 8 3 3 Other medical equipment As with other ele...

Page 7: ...order to minimize the risk of injury or mal functioning no parts should be installed in the space that would be taken up by the inflated airbag 8 4 2 Aircrafts The use of mobile phones in aircrafts i...

Page 8: ...n make the emergency call 9 Certification Information SAR THIS DEVICE MEETS THE GOVERNMENT S REQUIREMENTS FOR EXPOSURE TO RADIO WAVES Your wireless phone is a radio transmitter and receiver It is desi...

Page 9: ...user guide is 1 29 W kg Body worn measurements differ among phone models depending upon available enhancements and FCC require ments While there may be differences between the SAR levels of various p...

Page 10: ...kia com 10 Commissioning How to connect the Ex GSM 01 cell phone with the power outlet outside the hazardous areas see following diagram Control drawing number 0163EX04A 10 1 Getting started 10 1 1 In...

Page 11: ...it unlocks 6 Swing the cover of the SIM card holder open 7 Insert the SIM card into the holder Ensure that the beveled corner of the SIM card is on the left and the golden contact area is facing down...

Page 12: ...n the bottom of the phone 3 Plug the charger into a standard wall outlet The battery indicator scrolls on the display during charging Charging is dis played briefly if the phone is switched on If the...

Page 13: ...lashlight To activate the flashlight press and hold in standby mode 2 Power key to turn the phone on and off 3 Bubble level to level the phone while using the compass 4 Volume keys to adjust the volum...

Page 14: ...not open the device inside Ex hazardous areas Before removing the cover always switch off the power and disconnect the charger and any other device Avoid touching electronic components while changing...

Page 15: ...he hol ster to the holes in the lower end of the phone 3 Connect the pin on the other end of the holster to the hole in the top end of the phone 4 Wrap the elastic band for example around your wrist a...

Page 16: ...list press Options and select Organise Scroll to the function that you want to move press Move and select where you want to move the function If there are no functions in the shortcut list press Add...

Page 17: ...e limited to a closed user group A headset handsfree or loopset is connected to the phone The timed profile is selected or Push to talk connection is active or suspended 10 2 2 Some useful shortcuts i...

Page 18: ...at anyone s eye or allow it to interfe re with other IR devices This device is a Class 1 laser product To use an IR connection the compatible device with which you want to estab lish a connection mus...

Page 19: ...ne already con tains several Java applications which were specially developed for mobile phones You can install further programmes in your telephone by using a PC and appropriate software 10 3 4 Voice...

Page 20: ...or traditional voice calls for example voice mailbox are not available for push to talk over cellular communications 10 3 6 E Mails You can use your mobile phone to send and receive e mails Informatio...

Page 21: ...The barring password is required when using the Call barring service You can obtain the password from your service provider Wallet code 4 to 10 digits The wallet code is required to access wallet serv...

Page 22: ...ion Use only the supplied or an approved replacement antenna Unauthorised antennas modifications or attachments could damage the device and may violate regulations governing radio devices All of the a...

Page 23: ...rranty as well as the exclusion or limitation of accompanying or consequential damage is not permissible it may be that the abovementioned limitations and exclusions are not valid for every purchaser...

Page 24: ...23 14 Certificate of Compliance 14 1 For USA...

Page 25: ...24...

Page 26: ...25 14 2 For Canada...

Page 27: ...26...

Page 28: ...27 15 Control Drawing How to connect the Ex GSM 01 cell phone with the power outlet outside the hazardous areas see following diagram Control drawing number 0163EX04A...

Page 29: ...o change without notice BAL Ex GSM 01_US_Umschl 6 29 11 2005 11 59 Uhr Seite 2...

Reviews: