8
3.6. Output connections
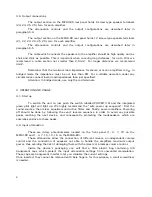
The output section on the MPA4-80 rear panel holds 8 screw-type speaker terminals
(23, 24, 25, 26), two for each amplifier.
The attenuation controls and the output configurations are described later in
paragraph 6.4.
The output section on the MPA6-80 rear panel holds 12 screw-type speaker terminals
(21, 22, 23, 24, 25, 26), two for each amplifier.
The attenuation controls and the output configurations are described later in
paragraph 6.5.
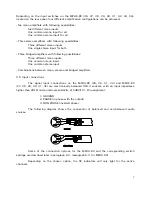
The cable which connects the speakers to the amplifier should be high quality and as
short and thick as possible. This is important when covering long distances; for up to 10m we
recommend a cable section not smaller than 2.5mm². For longer distances we recommend
4mm².
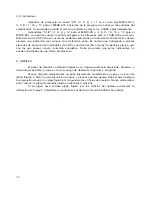
Remember that the minimum load impedance for stereo or mono amplifiers is 4
Ω
. In
bridged mode the impedance must be not less than 8
Ω
. For a reliable operation under any
circumstance connect lower load impedances than just specified.
Attention: In bridged mode, use only the red terminals.
4. OPERATION AND USAGE
4.1. Start up
To switch the unit on just push the switch labelled POWER (19) and the integrated
green pilot light will light up. We highly recommend the "safe power up sequence": First the
sound sources, then mixer, equalizers and active filters and, finally, power amplifiers. Powering
off should be done by following the exact reverse sequence in order to avoid any possible
peaks reaching the next device, and consequently protecting the loudspeakers, which are
specially sensitive to these peaks.
4.2. Input attenuation
These are rotary potentiometers located on the front panel (1, 4, 7, 10 on the
MPA4-80 and 1, 4, 7, 10, 13, 16 on the MPA6-80).
These attenuators allow the connection of different mixers, an independent volume
control and the connection of speakers not able to handle the amplifiers maximum output
power, thus avoiding the risk of damaging them with the mixers or preamps volume control.
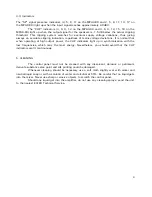
Inside the device's packaging you will find a little plastic bag containing 4/6
transparent caps which protect the input attenuation settings from unwanted manipulation.
These caps are transparent in order to let you visualize the current settings.
Once inserted, they cannot be removed with bare fingers, for this purpose, a small screwdriver
is needed.
Summary of Contents for MPA4-80
Page 2: ...2...


