background image


11.The universal receiver must have a clear and unobstructed view 

of the transmitter to work properly.  

12.When  you  are  finished  using  the    universal  receiver  turn 

the  volume  fully   counter  clockwise  until  the  ON/OFF  LED  is 

off . 

13.Place the universal receiver back into the charging cradle. 


14.The  charge  LED  will turn  RED  and  when  the  batteries  are fully 

charged  the  charge  LED  will    turn  green  again.  The 

charging cradle power LED will always be red when connected 

to mains. This indicates that power is available for the receiver. 

15.The  receiver  can  also  be  recharged by  plugging  the  12V  DC 

power lead directly into the receiver socket. 

16.When  the battery level is low, the ON/OFF LED will flash RED. 

Then  after a few minutes the receiver will  automatically  turn  off 

to  protect  the  batteries. The  receiver  must  be  recharged  if  this 

occurs. 

17.There are no user serviceable parts in the universal receiver. Do 

not  attempt  to  replace  the  batteries.  Contact  Hearing  Products 

International Limited if you have any service issues. 

18.Note:  if the serial numbers or labels are removed your warranty 

is invalid. 


7


Summary of Contents for EchoLink IR

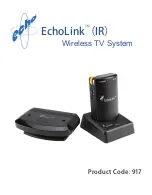
Page 1: ...EchoLink IR Wireless TV System TM Product Code 917...

Page 2: ...EchoLink IR TM Wireless Infrared TV system Please read and follow the safety instructions before using the product Safety Instruction and precautions continued 7 8 Setup and User Instructions Continue...

Page 3: ...Accessories Picture Receiver Charger Transmitter SCART Adapter 12V DC Power adapter 12V DC Power adapter Headset Phono plugs Echo ILoop 1 Microphone...

Page 4: ...to the headset socket before turning the unit on Failure to do so can result in high sound levels that could adversely affect your hearing Using this product inappropriately could adversely affect you...

Page 5: ...cause a tripping hazard The unit may get warm when being used Ensure the unit has adequate ventilation Please refer all servicing to qualified personnel ONLY Do not attempt to open the unit The batte...

Page 6: ...s a clear line of sight between the transmitter and receiver with no obstruction 2 Plug the 12V DC power adapter into an electrical power socket then plug the power lead into the transmitter DC socket...

Page 7: ...Fig 3 Fig 4 5...

Page 8: ...nto the EchoLink IR TM charging cradle socket see g 2 8 Rotate the volume wheel ON OFF switch until the ON OFF LED is off on th e receiver and place the receiver on the charging base 9 When charging t...

Page 9: ...hen connected to mains This indicates that power is available for the receiver 15 The receiver can also be recharged by plugging the 12V DC power lead directly into the receiver socket 16 When the bat...

Page 10: ...ome of the newer flat screen TVs the sockets may be covered by a removable panel at the rear of the TV Step 2 If the TV has no audio out sockets or they are not working the next thing to try is the he...

Page 11: ...L COAXIAL The picture below shows the front and rear of a typical Digital to Analogue converter Set up is easy the converter is connected from the TV to the in socket on the converter and the MegaLoop...

Page 12: ...Transmitter Universal Charging Base 1 1 2 1 12V DC 500mA power supply 570 1011 01 Echolink sleeve 490 1008 01 490 1005 01 940 1009 01 Headset under chin 101 Echo ILoop 910 1003 01 EchoLink IR instruc...

Page 13: ...0mAh LI ION battery receiver not serviceable by the end user Volume dB 0 20dB receiver DC 12V TX can also be powered by Power supply of receiver Li ion rechargeable battery Dimensions transmitter 115...

Page 14: ......

Page 15: ......

Page 16: ...details www hear4you com Hearing Products International Limited Echo House 26 27 Haigh Park Stockport SK4 1QR England Tel 44 0 161 480 8003 Fax 44 0 161 480 8006 www hear4you com RoHS E O E Hearing P...

Reviews: