background image

Page 6 of 8


LEFT/RIGHT/FRONT/BACK: To rename the camera lo

cations.


DISPLAY:  To turn on/o

 di

spl

a

y.


           or 


SCALE:  Turn on/o

ff ele

ctric 

dist

ance lab

el.

  When

 se

t a

s

 ON, electronic di

s

tance label will be 

displace

d when rear 

view camera (camera 3)

 is


activate

d

.


INPUT SCAN: To turn on/o

ff auto 

iden

tification of

 cam

era inp

u

ts.

   When INPUT SCAN i

s se

t a

s ON,

 monitor will 

displa

y connected camera

s and sk

i

p inputs no

t in connec

tion.


SPEAKER:  To turn 

speaker

 on/o

ff.


TURN SHOW:   To turn Turn Show on/o

ff.


BOUNDARY:  

To set

 colo

r of th

e

 separ

a

ti

on line between camera in

puts.  Wh

ite, gra

y, black a

nd uncolored are 

av

ailable.


LANGUAGE:  To

 set OS

D language

.  E

ngl

ish, Finish,

 Netherlan

ds

, E

spań

ol, Deut

s

ch and Italiano

.


SOFTWARE VERSION:  To be u

p

dated at all 

ti

m

es.


or 


REC-V OUT:  

To set

 the camera in

put(s

) to be recorded when connected to DVR via the green RCA wire

.

  L

eft

-

side, right

-

si

d

e, fr

ont view, rear view camera and quad view image can

 be sel

ected

.


AUTOSCAN:  

To set

 the au

to scann

ing 

functi

o

n.  W

hen AUTO

SCAN is se

t

 as O

N, monitor will automa

ti

call

y switch 

between connected camer

a inp

u

ts an

d quad i

mage.


SCAN DELAY:  To

 se

t the 

s

witchi

ng ti

me

 of A

UTOSCA

N.  Swi

tchin

g tim

e

 frame: 0

-

60 seconds.


JUMP KEY:  To

 set

 the 

sh

ortcut di

splay


mode fr

om the 13 mode

s

 to the le

ft.  It

 can be ac

tiv

ated by jum

p key 

selec

to

r.


 Options

:  

Left

, Right, Fron

t, Back, Qu

ad, Dual, Dual2,

 Trip

le, Tri

p

le 2, 

Pip 1, Pip 2,

 P

ip 3,

 H-

Spli

t, 

Tref

oil 

and Y-

Split.


P-ON MODE: 

 To se

t the de

fault displa

model fr

om the 13 mode

s

 to the le

ft

 or STANDBY mo

de.

  O

ptions:


 Left, 

Right, Front, Bac

k, Quad

, Dual, Dual2

, Triple,

 Tri

ple 

2

, Pip 1, Pip 

2

, Pip 3, H

-S

pl

i

t, Trefoil a

nd Y-

Spl

i

t.


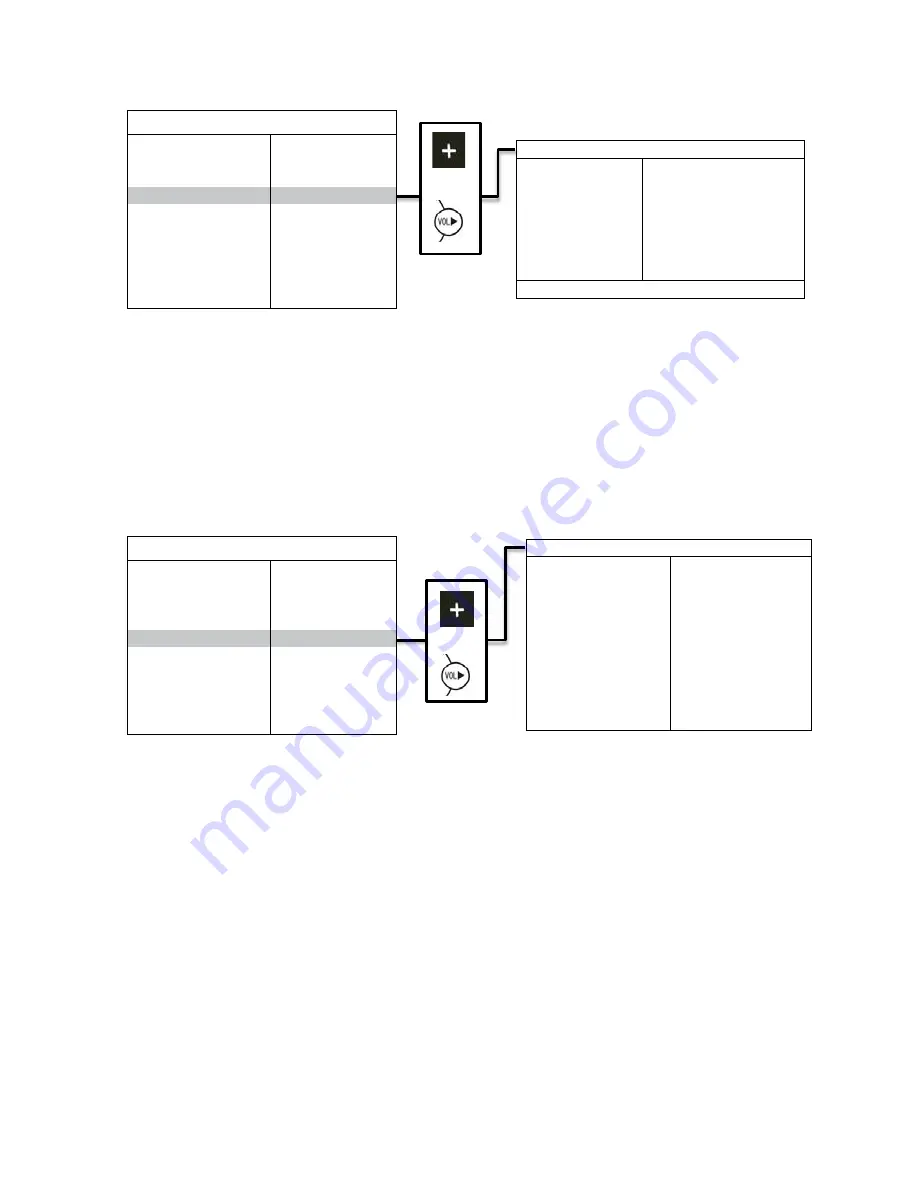
MAIN MENU 


CAMERA 

SETUP 

CAMERA 

NAME 

OSD 

SETUP 

SYSTEM 

SETUP 

TRIGGER 

SETUP 

TRIGGER 

PRIORITY 

SPLIT 

SETUP 

RESET 

ALL 


OSD SETUP 


SCALE 

(ON/OFF) 

INPUT 

(ON/OFF) 

SPEAKER  

(ON/OFF) 

TURN SHOW 

(ON/OFF) 

BOUNDARY 

BLACK/GRAY/WHITE/OFF 

LANGUAGE 

(see


sel

ec

tio

n below) 

(SOFTWARE VERSION) 

MAIN MENU 


CAMERA 

SETUP 

CAMERA 

NAME 

OSD 

SETUP 

SYSTEM 

SETUP 

TRIGGER 

SETUP 

TRIGGER 

PRIORITY 

SPLIT 

SETUP 

RESET 

ALL 


SYSTEM SETUP 


REC-V OUT 

(see


sel

ec

tio

n below) 

AUTO-SCAN 

(ON/OFF) 

SCAN DELAY 

(select sc

an delay) 

JUMP KEY 

(see


sel

ec

tio

n below) 

P-ON 

(see


sel

ec

tio

n below) 

BEEP 

(ON/OFF) 

SYSTEM 

(PAL/NTSC) 

DIMMER 

(selection


backl

ight) 


Summary of Contents for EC7000-QK

Page 1: ...of the vehicle operator to ensure during use that all features of this product work correctly In use the vehicle operator should ensure the projection of the warning signal is not blocked by vehicle components i e open trunks or compartment doors people vehicles or other obstructions Do not install and or operate this safety product unless you have read and understand the safety information contai...

Page 2: ...alant when passing through compartment walls Minimize the number of splices to reduce voltage drop High ambient temperatures e g under hood will significantly reduce the current carrying capacity of wires fuses and circuit breakers All wiring should conform to the minimum wire size and other recommendations of the manufacturer and be protected from moving parts and hot surfaces Looms grommets cabl...

Page 3: ...l shock DO NOT OPEN THE MONITOR CASE Opening the monitor case will expose the inside of the monitor to conditions that could adversely affect performance Any evidence of tampering with sealed components will void the warranty Important Do not expose the monitor to water it is not waterproof Any water that leaks into the monitor could cause extensive damage Installation EC7000 QM Installation instr...

Page 4: ...tion 9 SEL Jump key selector Fast jump to the display mode specified by SYSTEM SETUP 10 P N PAL NTSC TV system selector 11 LANG Language selection 12 REST To restore factory settings 13 AV To go to leave DVD channel 1 MUTE To mute unmute the volume 2 POWER Power off on button 3 MENU Menu control button 4 UP Menu selection up 5 DN Menu selection and display mode single dual triple quad view PIP ima...

Page 5: ...or the button on the monitor screen to go back to the previous menu or CAMERA To select the camera that needs adjustment BRIGHTNESS To adjust the camera s brightness CONTRAST To adjust the camera s contrast COLOR To adjust the camera s color TINT To adjust camera s tint MIRROR To turn mirror feature on or off or MAIN MENU CAMERA SETUP CAMERA NAME OSD SETUP SYSTEM SETUP TRIGGER SETUP TRIGGER PRIORIT...

Page 6: ...set as ON monitor will automatically switch between connected camera inputs and quad image SCAN DELAY To set the switching time of AUTOSCAN Switching time frame 0 60 seconds JUMP KEY To set the shortcut display mode from the 13 modes to the left It can be activated by jump key selector Options Left Right Front Back Quad Dual Dual2 Triple Triple 2 Pip 1 Pip 2 Pip 3 H Split Trefoil and Y Split P ON ...

Page 7: ...rame 0 30 seconds SPLIT SCREEN To set camera input s to be displayed when split trigger wire is activated LEFT RIGHT is to set the camera input to be displayed on the left right side of monitor screen AUDIO is to set the audio output form any of the four cameras or TRIGGER PRIORITY To set camera trigger priority MAIN MENU CAMERA SETUP CAMERA NAME OSD SETUP SYSTEM SETUP TRIGGER SETUP TRIGGER PRIORI...

Page 8: ... APPLICABLE LAW ORAL STATEMENTS OR REPRESENTA TIONS ABOUT THE PRODUCT DO NOT CONSTITUTE WARRANTIES Remedies and Limitation of Liability MANUFACTURER S SOLE LIABILITY AND BUYER S EXCLUSIVE REMEDY IN CONTRACT TORT INCLUDING NEGLIGENCE OR UNDER ANY OTHER THEORY AGAINST MANUFACTURER REGARDING THE PRODUCT AND ITS USE SHALL BE AT MANUFACTURER S DISCRETION THE REPLACEMENT OR REPAIR OF THE PRODUCT OR THE ...

Page 9: ...ente durante su uso Durante su uso el operador del vehículo debe asegurarse de que los componentes del vehículo es decir maleteros o puertas de compartimentos abiertos personas vehículos u otros obstáculos no bloqueen la visión de la cámara ADVERTENCIA Si no se instala y utiliza este producto según las recomendaciones del fabricante puede causar daños a la propiedad lesiones corporales personales ...

Page 10: ...be prestarse especial atención a la ubicación y al método de hacer las conexiones eléctricas y los empalmes para proteger estos puntos contra la corrosión y la pérdida de conductividad 5 Las descargas a tierra sólo deben hacerse en componentes sustanciales del chasis de preferencia directamente en la batería del vehículo 6 Los disyuntores son muy sensibles a las altas temperaturas y se activarán e...

Page 11: ...ara evitar una descarga accidental NO ABRA LA TAPA DEL MONITOR Al abrir la tapa del monitor expondrá el interior del monitor a condi ciones que podrían afectar el desempeño de manera negativa Cualquier evidencia de manipulación de los componentes sellados anulará la garantía Importante No exponga el monitor al agua no es a prueba de agua Si entra agua en el monitor podría causar daños graves Monit...

Page 12: ...cla de salto Salto rápido al modo de visualización especificado por SYSTEM SETUP CONFIGURACIÓN DEL SISTEMA JUMP KEY TECLA DE SALTO 10 P N Selector del sistema PAL NTSC TV 11 LANG IDIOMA Selección de idiom 12 REST RESTABLECER Restablecer los ajustes de fábrica 13 AV Para ir a salir del canal del DVD 1 MUTE SILENCIAR Para silenciar ractivar el volumen 2 POWER ENCENDIDO Botón de apagado encendido 3 M...

Page 13: ...leccionar la cámara que se va a ajustar BRILLO Para ajustar el brillo de la cámara CONTRASTE Para ajustar el contraste de la cámara COLOR Para ajustar el color de la cámara TONO Para ajustar el tono de la cámara ESPEJO Para encender o apagar la función de espejo o MENÚ PRINCIPAL CONFIGURACIÓN DE LA CÁMARA CÁMARA IZQUIERDA DERECHA PARTE FRONTAL PARTE TRASERA BRILLO seleccionar brillo CONTRASTE sele...

Page 14: ...ñal 1 señal 2 señal 3 división en H tresbolillo y división en Y MODO P ON Para configurar el modelo de visualización predeterminada de los 13 modos a la izquierda o el modo de ESPERA Opciones Izquierda derecha parte frontal parte trasera cuádruple dual dual 2 triple triple 2 señal 1 señal 2 señal 3 división en H tresbolillo y división en Y Ri MENÚ PRINCIPAL CONFIGURACIÓN DE OSD ESCALA ENCENDIDO APA...

Page 15: ...atro cámaras o CONFIGURACIÓN DEL ACTIVADOR GIRAR IMAGEN SENCILLA DIVIDIDA IMAGEN TRASERA TRASERA TRIPLE RETRASO DEL ACTIVADOR seleccionar retraso PANTALLA DIVIDIDA IZQUIERDA IZQUIERDA FRONTAL TRASERA DERECHA DERECHA FRONTAL TRASERA AUDIO las cuatro cámaras o MENÚ PRINCIPAL PRIORIDAD DEL ACTIVADOR 1ST PRIMERA PRIORIDAD FRONTAL TRASERA DIVIDIDA IZQUIERDA DERECHA 2ND SEGUNDA PRIORIDAD FRONTAL TRASERA...

Page 16: ...TÍA LIMITADA NO PODRÁ ENMENDARSE MODIFICARSE NI AMPLIARSE EXCEPTO MEDIANTE UN ACUERDO ESCRITO FIRMADO POR UN REPRESENTANTE AUTORIZADO DEL FABRICANTE QUE HAGA REFERENCIA EN FORMA EXPRESA A ELLA Exclusión de otras garantías EL FABRICANTE NO OTORGA NINGUNA OTRA GARANTÍA EXPRESA O IMPLÍCITA MEDIANTE LA PRESENTE SE EXCLUYEN LAS GARANTÍAS IMPLÍCITAS DE COMERCIABILIDAD O APTITUD PARA UN PROPÓSITO EN PART...

Page 17: ...ant l utilisation que toutes les fonctionnalités de ce produit fonctionnent correctement Pendant l utilisation le conducteur du véhicule doit vérifier que la vue de la caméra n est pas bloquée par les éléments du véhicule par exemple des coffres ou des portes de compartiment ouvertes des personnes des véhicules ou d autres obstacles AVERTISSEMENT Le défaut d installation ou d utilisation de ce pro...

Page 18: ...t à la méthode de réalisation des connexions électriques et des épissures pour protéger ces points de la corrosion et de la perte de conductivité 5 La terminaison de la masse ne doit être réalisée que sur des composants importants du châssis de préférence directement sur la batterie du véhicule 6 Les disjoncteurs sont très sensibles aux températures élevées et se déclenchent de manière erronée lor...

Page 19: ...VERTISSEMENT Pour éviter un choc électrique accidentel N OUVREZ PAS LE BOÎTIER DU MONITEUR L ouverture du boîtier du moniteur expose l intérieur de celui ci à des conditions susceptibles de nuire à ses performances Toute preuve de manipulation des composants scellés annulera la garantie Important N exposez pas le moniteur à l eau car il n est pas étanche De l eau pénétrant dans le moniteur pourrai...

Page 20: ...leurs par défaut AV Passer sur le canal DVD ou le quitter AVERTISSEMENT 1 Alignez la télécommande sur le capteur de réception de signal de télécommande 2 Ne démontez jamais la télécommande ne la laissez pas tomber empêchez qu elle soit mouillée 1 MUTE SOURDINE Pour couper rétablir le volume sonore 2 POWER ALIMENTATION Bouton de mise hors tension sous tension 3 MENU Bouton de commande Menu 4 UP HAU...

Page 21: ...ra COULEUR Pour régler la couleur de la caméra TEINTE Pour régler la teinte de la caméra ou MENU PRINCIPAL CAMÉRA RÉGLAGE CAMÉRA NOM AFFICHAGE RÉGLAGE SYSTÈME RÉGLAGE DÉCLENCHEMENT RÉGLAGE DÉCLENCHEMENT PRIORITÉ PARTAGE RÉGLAGE RÉINITIALISATION TOUT CONFIGURATION DE LA CAMÉRA CAMÉRA GAUCHE DROITE AVANT ARRIÈRE LUMINOSITÉ CONTRASTE COULEUR TEINTE MIROIR MARCHE ARRÊT MENU PRINCIPAL CAMÉRA RÉGLAGE CA...

Page 22: ...e d affichage par défaut parmi les 13 modes de gauche ou le mode Partage horizontal Trois panneaux et Partage en Y Ri MENU PRINCIPAL CAMÉRA RÉGLAGE CAMÉRA NOM AFFICHAGE RÉGLAGE SYSTÈME RÉGLAGE DÉCLENCHEMENT RÉGLAGE DÉCLENCHEMENT PRIORITÉ PARTAGE RÉGLAGE RÉINITIALISATION TOUT CONFIGURATION DE L AFFICHAGE ÉCHELLE MARCHE ARRÊT ENTRÉE MARCHE ARRÊT HAUT PARLEUR MARCHE ARRÊT AFFICHAGE ALTERNÉ MARCHE ARRÊT...

Page 23: ...uand les signaux de déclenchement s arrêtent Plage de délai de 0 à 30 secondes ÉCRAN PARTAGÉ Permet de définir les entrées de caméra à afficher quand le fil de déclenchement partagé est ou CONFIGURATION DU DÉCLENCHEMENT TOURNER L IMAGE SIMPLE PARTAGÉE IMAGE ARRIÈRE ARRIÈRE TRIPLE DÉLAI DE DÉCLENCHEMENT ÉCRAN PARTAGÉ GAUCHE GAUCHE AVANT ARRIÈRE DROITE DROITE AVANT ARRIÈRE AUDIO les quatre caméras ou ME...

Page 24: ...CCORD ÉCRIT SIGNÉ PAR UN REPRÉSENTANT AUTORISÉ DU FABRICANT QUI FAIT EXPRESSÉMENT RÉFÉRENCE À LA PRÉSENTE GARANTIE Exclusion d autres garanties LE FABRICANT N ACCORDE AUCUNE AUTRE GARANTIE EXPRESSE OU TACITE LES GARANTIES IMPLICITES DE QUALITÉ MARCHANDE OU D APTITUDE À UN USAGE PARTICULIER SONT EXCLUES ET NE S APPLIQUERONT PAS AU PRODUIT LE SEUL ET UNIQUE RECOURS DE L ACHETEUR CONTRE LE FABRICANT ...

Reviews: