background image

No. 7-309

August, 1999

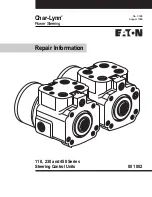
Char-Lynn

®

Power Steering

110, 230 and 450 Series
Steering Control Units

Repair Information

001 002

Summary of Contents for Char-Lynn 110

Page 1: ...No 7 309 August 1999 Char Lynn Power Steering 110 230 and 450 Series Steering Control Units Repair Information 001 002...

Page 2: ...ve toward gerotor O ring Groove 3 4 7 3 6 9 1 2 5 3 23 22 9 31 30 10 8 17 13 1413 15 18 19 16 Previous Manual Steering Check Valve W U V X Y Z 11 12 11 11 Low Input Torque Spring 4 Spacer 2 Package St...

Page 3: ...1 2 inch socket for current hex head cap screws Breaker bar wrench Torque wrench 30 Nm 275 lb in capacity Plastic hammer or rubber hammer 1 4 inch Hex key 10 24 machine screw 38 mm 1 1 2 in long Needl...

Page 4: ...cap screws and sealing washers if used 3 Remove end cap 4 Remove seal 5 Remove meter Be careful not to drop star 6 Remove seal 7 Remove drive spacer Spacer is not used on some models Refer to Parts In...

Page 5: ...rom housing as shown in figure 6 14 Lift spool and sleeve assembly up just far enough to free gland bushing from housing figure 7 Remove bushing Note Examine bushing to determine whether you are repai...

Page 6: ...hand Figure 11 Low input torque unit uses four centering springs and two spacers Standard input torque unit uses six centering springs 21 Remove seal from housing see figure 12 22 Remove manual steer...

Page 7: ...l check ball in housing 3 Lubricate 9 2 mm 36 in ID seal and 7 6 mm 30 inch ID seals Install seals on check ball seat as shown in figure 13 4 Lubricate check ball seat and seals thoroughly before inst...

Page 8: ...within housing bore until parts are flush atl 4 hole end of housing To prevent cross pin from dropping into discharge groove of housing do not pull spool assembly beyond this point With spool assembly...

Page 9: ...spool and sleeve assembly until pin is parallel with port face figure 23 Install drive making sure drive is engaged with pin To assure proper alignment mark drive as shown in figure 25 reference B Whe...

Page 10: ...ge 20 27 Install end cap on gerotor aligning holes Seal Seal Groove this Side 002 Unit See Note inside Front Cover page 2 A B C D Port Face Pin Drive Marked Meter Gerotor Star Valley O ring Groove thi...

Page 11: ...ashers if applicable see figure 26 in end cap Pretighten screws to 17 Nm 150 lb in then torque screws to 25 30 Nm 225 275 lb in in sequence shown in figure 27 Eaton Corp Hydraulics Div Eden Prairie MN...

Page 12: ...sam Dong Kangnam Ku Soeul 135 750 Korea Telephone 82 2 557 0595 Fax 82 2 557 1634 Eaton Ltd Hydraulics Division Glenrothes Fife Scotland KY7 4NW Telephone 44 0 1592 771 771 Fax 44 0 1592 773 184 Eaton...

Reviews: