Eaton 9PX Lithium-Ion User Guide DPD-9PX2206—Rev 01
31
2.
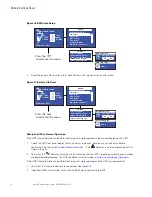
Remove the two screws to open the left side of the front panel.
3.
Disconnect the battery connectors.
A ribbon cable connects the LCD control panel to the UPS. Do not pull on the cable or disconnect it.
4.
Remove the two screws that hold the battery protection cover in place.
5.
Carefully guide the BMS cable through the hole in the metal protection cover and remove.
6.
Pull out the handle of the battery pack, and slide the pack out slowly on to a flat and stable surface. Use
two hands to support the battery pack. See
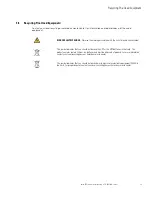
for proper disposal.
7.
Verify that the replacement batteries have the same rating as the batteries being replaced.
8.
Put the new battery pack into the UPS. Push the battery pack firmly,
9.
Guide the BMS cable through the hole in the metal protection cover.
10. Reconnect the BMS communication cable connector.
11. Verify that all of the alarms have cleared on the display.
12. Screw back the metal protection cover and the front panel, then clip the center cover.
13. If the UPS was shut down during the battery replacement process see
Replacing the EBM(s)
The EBM is heavy. Lifting the cabinet into a rack requires a minimum of two people.
To replace the EBM(s):
1.
Unplug the EBM power cable and battery detection cable from the UPS. If additional EBM(s) are installed,
unplug the EBM power cable and battery detection cable from each EBM.
2.
Replace the EBM(s). See
for proper disposal.
A small amount of arcing may occur when connecting an EBM to the UPS. This is normal and will not harm
personnel. Insert the EBM cable into the UPS battery connector quickly and firmly.
3.
Plug the EBM cable(s) into the battery connector(s). Up to four EBMs may be connected to the UPS.
4.
Verify that the EBM connections are tight and that adequate bend radius and strain relief exist for each
cable.
5.
Connect the battery detection cable(s) to the connector of the UPS and of the EBM(s).
6.
If the UPS was shut down during the battery replacement process see .
77..44
B
Baatttteerryy S
Seettttiinnggss R
Reesseett
After replacement of the internal UPS batteries and extended battery modules the “BMS auto setup” and
“Reset battery life” setting will need to be reset in the “
Control
” menu of the display.
1.
Press the
button on the main display.
2.
Press the
button to display the “Control” option. Press
.
3.
Press the
to display the “BMS auto setup” or “Reset battery life” option of the control menu. Press the
button and use the
to select “Yes”. Press the
button to reset.
Summary of Contents for 9PX6K-L
Page 16: ...10 Eaton 9PX Lithium Ion User Guide DPD 9PX2206 Rev 01 User Settings...
Page 26: ...20 Eaton 9PX Lithium Ion User Guide DPD 9PX2206 Rev 01 Detecting Other Accessories...
Page 32: ...26 Eaton 9PX Lithium Ion User Guide DPD 9PX2206 Rev 01 UPS Shutdown...
Page 40: ...34 Eaton 9PX Lithium Ion User Guide DPD 9PX2206 Rev 01 Recycling The Used Equipment...
Page 44: ...38 Eaton 9PX Lithium Ion User Guide DPD 9PX2206 Rev 01 Compliance Contact...
Page 49: ...Eaton 9PX Lithium Ion User Guide DPD 9PX2206 Rev 01 43 Model Specifications...
Page 50: ...DPD 9PX220601 DPD 9PX2206 01...


