background image


26

‹

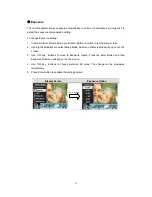
 White Balance 

The camera adjusts the color balance of images automatically. Three manual white balance 

settings are available: 


1. Auto (Default): The camera automatically adjusts white balance. 

2. Daylight: Under outdoors 

3. Fluorescent: Under fluorescent light condition. 

4. Tungsten: Under tungsten light condition. 


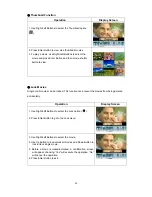
To change White Balance Setting: 

1.  In Movie/Picture Record Mode, press Enter Button to switch to record menu screen.   

2.  Use Right/Left Buttons to select Camera Mode. Submenu of Camera Mode will pop out on 

the screen. 

3.  Use T/W key to select White Balance, then press Enter Button to switch to White Balance 

submenu. 

4.  Use T/W key to move between four settings. The change can be previewed immediately. 

5.  Press Enter Button to validate the setting and exit.


Display Screen 

W/B Option 


Enter Button

Summary of Contents for 5.2

Page 1: ...Digital Video Camera User Manual...

Page 2: ...ode 35 Section 5 Listening to MP3 Music 49 Section 6 Reading eBook 51 Section 7 Viewing MPEG4 Movie on PC 53 Section 8 Viewing Pictures and Movies on a TV 54 Section 9 Video File Converter 55 Section...

Page 3: ...n 8x digital zoom increases user control over the movies and pictures you take The camera is also ideally suited for using as a PC camera hooked up to your home computer via high speed USB 2 0 port Bi...

Page 4: ...stration LCD Panel Enter Button Picture Shutter Button Movie Shutter Button Tele Wide Button TV Out ear Phone Port Mini USB 2 0 port Strap Hole Green Red Led Lens LED Right Button Left Button RECORD P...

Page 5: ...4 Side View Speaker Battery Cover Marco Microphone...

Page 6: ...ing an optional SD or MMC memory card up to 4GB To insert a memory card refer to the figure as below 1 Insert the memory card into the right position 2 To remove an installed SD card press the card in...

Page 7: ...ss the Picture Shutter Button To record the voice press the enter key and press Right Left Button to voice pen for voice recording To view stored movies pictures listen to voice recordings press RECOR...

Page 8: ...t to take movie or record voice 2 To stop recording press it again Picture Shutter Button Take the picture Tele Wide Button Digital Zoom in and out OK Button Menu ON Right Button Flash ON OFF Red Eye...

Page 9: ...Snap Mode Night Mode Backlight Mode 2 Resolution Movie High Standard Low Picture High Standard Low 3 Number of images or recording time of movie that can still be taken at current resolution 4 SD card...

Page 10: ...ings are available Quality High Quality Standard Quality Low Quality Picture Recording Press the Picture Shutter Button to take a picture Press RECORD PLAY Button to view the picture Three resolution...

Page 11: ...Exit z Enter z Exit z Normal z B W z Classic z Negative z Exit z Sound z Start up Screen z Time Setting z Format Memory z TV System z Language z Default Setting z Exit Operations for Record Mode Oper...

Page 12: ...vie Standard for Picture Exposure One Time 0EV Sharpness One Time Level 5 White Balance One Time Auto Motion Stabilization Always Off Motion Detect One Time Off Two in One One Time Off Photo Frame One...

Page 13: ...solution 1 In Movie Picture Record Mode press Enter Button to switch to record menu screen 2 Use Right Left Buttons to select Movie Mode Submenu of Movie Mode will pop out on the screen 3 Use T W key...

Page 14: ...o record menu screen 2 Use Right Left Buttons to select Movie Mode Submenu of Movie Mode will pop out on the screen 3 Use T W key Buttons to move to Exposure Option Press the Enter Button and then Exp...

Page 15: ...w light environment Off The LED is turned off To change Flash setting 1 When in Movie Mode use Up Down Buttons to select Flash Option then press Enter Button to switch to Flash submenu 2 Use Up Down B...

Page 16: ...screen 2 Use Right Left Buttons to select Movie Mode Submenu of Movie Mode will pop out on the screen 3 Use T W key to select Sharpness then press Enter Button to switch to Sharpness submenu 4 Use T W...

Page 17: ...t condition To change White Balance Setting 1 In Movie Picture Record Mode press Enter Button to switch to record menu screen 2 Use Right Left Buttons to select Movie Mode Submenu of Movie Mode will p...

Page 18: ...to select Movie Mode Submenu of Movie Mode will pop out on the screen 3 Use Up Down Buttons to select Motion Stabilization then press Enter Button to switch to Motion Stabilization submenu 4 Use Up D...

Page 19: ...l pop out on the screen 3 Use T W key to select Motion Detect then press Enter Buttons to switch to Motion Detect submenu 4 Use T W key to choose ON or OFF 5 Press Enter Button to validate the setting...

Page 20: ...night scenes or low light conditions A longer exposure captures more detail of background subjects Display Screen Night Mode Option Note To avoid blurry pictures place the camera on a flat steady sur...

Page 21: ...screen 2 Use Right Left Buttons to select Camera Mode Submenu of Camera Mode will pop out on the screen 3 Use T W key to select Resolution then press Enter Button to switch to Resolution submenu 4 Use...

Page 22: ...witch to record menu screen 2 Use Right Left Buttons to select Camera Mode Submenu of Camera Mode will pop out on the screen 3 Use T W key to move to Exposure Option Press the Enter Button and then Ex...

Page 23: ...Mode Submenu of Camera Mode will pop out on the screen 3 Use Up Down Buttons to select Two in One then press Enter Button to switch to Two in One submenu 4 Use Up Down Buttons to choose ON or OFF 5 P...

Page 24: ...ectronic photo frame To enable Photo Frame 1 When in Camera Mode use T W key to select Photo Frame option then press Enter Button to switch to Photo Frame submenu 2 Use T W key to locate preferred pho...

Page 25: ...nces Use this mode when taking images in a place where flash photography is prohibited or when the subject is distant beyond the range of the flash Red Eye Reduction The flash fires twice before the p...

Page 26: ...Self timer submenu 2 Use T W key to choose On or Off 3 Press Enter Button to validate the setting and exit Display Screen Self timer Options Sharpness You can soften and sharpen images to achieve dif...

Page 27: ...condition To change White Balance Setting 1 In Movie Picture Record Mode press Enter Button to switch to record menu screen 2 Use Right Left Buttons to select Camera Mode Submenu of Camera Mode will...

Page 28: ...s Enter Button to validate the setting and exit Display Screen Multi Snap Option Backlight With the camera set to backlight Mode you can take shots when bright light is behind the subject To enable Ba...

Page 29: ...validate the setting and exit Display Screen Date Printing Option Note Date would be shown on the printed picture once date printing is enabled Night Mode Use Night Mode for night scenes or low light...

Page 30: ...u screen 2 Use Right Left Buttons to move to Voice Option Then Voice Submenu will pop out on the screen 3 Use Up Down Button to move between Enter and Exit Option 4 Choose Enter option to enable voice...

Page 31: ...ewed immediately 4 Press Enter Button to validate the setting and exit Display Screen Setting Menu The Setting submenu contains options for configuring your camera set up To change advanced setting 1...

Page 32: ...31 z Sound Setting Enable or disable operation sound by using T W key the press Enter Button to validate the setting Submenu Display Screen Sound Setting Sound...

Page 33: ...tart Up Screen Start Up Screen If you do not want to customize the start up screen press Left Right Buttons and select No Start Up Screen No Start Up Screen z Time Setting Move between Date Time Set a...

Page 34: ...Card Options Format Memory Yes Format the SD Card built in memory No Default Do not format SD Card built in memory Note z All the data will be erased if the SD card is formatted Make sure all the dat...

Page 35: ...dard UK Europe China Australia Singapore and Hong Kong etc Submenu Display Screen TV System Option TV System z Selecting Interface Language You can select what language you want by using T W key the p...

Page 36: ...ry card Operation Display Screen Press RECORD PLAY Button to switch from Record Mode to Playback Mode Main Menu z There are three options in the Playback Mode movie picture voice z T W key and Right L...

Page 37: ...Wide Button Information T W Up Down Up Button Invalid Down Button Information ON OFF Right Button Go to the next movie picture Movie fast forward Left Button Go to the previous movie picture Movie fas...

Page 38: ...e Indicator Movie Playback Mode Picture Playback Mode Voice Playback Mode 2 Resolution Indicator High Resolution Standard Resolution Low Resolution 3 Indicate the selected movie picture is locked 4 Cu...

Page 39: ...o go to the next or last movie 4 Press Movie Shutter Button to play and press it again to pause 5 While playing movie press Right Left Buttons to fast forward backward then release the button to stop...

Page 40: ...delete single movie 5 Before a movie is deleted a confirmation screen will appear choosing Yes will execute the operation and No to cancel the operation 6 Press Enter Button to exit Note If a memory...

Page 41: ...ies can be locked This function can prevent the movies from being deleted accidentally Operation Display Screen 1 Use Right Left Buttons to select the Lock option 2 Press Enter Button to go to the Loc...

Page 42: ...s function automatically repeats playing single movie or all movies in order Operation Display Screen 1 Use Right Left Buttons to select the Repeat One option or Repeat All option 2 Press Enter Button...

Page 43: ...ight Left Buttons to go to the next or last picture 4 While the picture is selected use Tele Wide Buttons to magnify 5 For navigation press enter key and then use T W key and Right Left buttons to nav...

Page 44: ...elete single picture 5 Before a picture is deleted a confirmation screen will appear choosing Yes will execute the operation No will cancel the operation 6 Press Enter Button to exit Note If a memory...

Page 45: ...elete single picture 5 Before a picture is deleted a confirmation screen will appear choosing Yes will execute the operation No will cancel the operation 6 Press Enter Button to exit Note If a memory...

Page 46: ...all pictures can be locked This function can prevent the pictures from being deleted accidentally Operation Display Screen 1 Use Right Left Buttons to select the Lock option 2 Press Enter Button to g...

Page 47: ...de Show This function automatically repeats all pictures in order Operation Display Screen 1 Use Right Left Buttons to select the Slide option 2 Press Enter Button to start the slide show Press it aga...

Page 48: ...Operation Display Screen 1 Use T W key or Right Left Buttons to select the Voice option 2 Press Enter Button to go to Voice Playback Mode 3 Use Right Left Buttons to go to the next or last voice reco...

Page 49: ...ption and Repeat All option 11 To delete a voice use Right Left Buttons to select the voice 12 Use Up Button to delete all voice recordings and Down Button to delete single voice recording 13 Before a...

Page 50: ...n the front for those MP3 with Lyrics display 3 Press T W key to play MP3 4 Use T W key to adjust the volume 5 Press Enter Button to go to the voice playback option menu 11 To delete a voice use Right...

Page 51: ...in the camera can be played either by built in speaker or Earphone or TV When the earphone cable is plugged in the camera the option menu of Earphone TV pops out on the LCD Screen Choose earphone or...

Page 52: ...ur computer 2 Connect your camera to the computer USB port 3 The Red LED will light when the camera is connected to the computer and in Mass Storage Mode 4 Transfer eBooks txt file format only to My C...

Page 53: ...eBook 4 Press T W keys to scroll up down the text 5 Select to jump to the first page 6 Select to jump to the last page 7 Select to change the color of text and background 8 Select to auto scroll down...

Page 54: ...vie on PC When playing an MPEG4 movie for the first time MPEG4 Video Codec Xvid should be installed in PC To do this 1 Insert the CD ROM into the computer s CD ROM drive Click Install Device Driver In...

Page 55: ...to a television 3 The option menu of Earphone TV pops out on the LCD Screen 4 Choose TV option and press Enter Button to validate the setting 5 The steps for viewing stored pictures and movie on a TV...

Page 56: ...indows XP 2000 and Vista System users please refer to 9 1 Media Converter2 For windows 98 and Windows Me Users please refer to 9 2 Media Converter 1 9 1 Media Converter 2 To convert a video file 1 Ins...

Page 57: ...5 Click Add Media 6 Select Video file you want to convert...

Page 58: ...review your media files before converting To preview media files use the following control functions Click to start previewing Click to stop previewing Make sure your media files can be previewed befo...

Page 59: ...erted file to Clip0001 avi Please note if Clip0001 avi exists in the camera then the converted file has to be renamed to clip0002 avi 11 Connect your camera to PC and transfer the converted video to M...

Page 60: ...verter 1 To convert a video file 1 Install Arcsoft Media Converter 2 Click Start Select Programs Acrsoft Media Converter Media Converter 3 Media Converter main Screen will appear on your desktop 4 Cli...

Page 61: ...60 5 Select the video file you want to convert 6 Click Select Destination to choose the location you want to store the converted video file...

Page 62: ...61 7 Click Convert to start video converting...

Page 63: ...001 avi Please note if Clip0001 avi exists in the camera then the converted file has to be renamed to clip0002 avi 10 Connect your camera to PC and transfer the converted video to My Computer Removabl...

Page 64: ...s burning the movie clip into DVD You can preserve your precious movies on DVD to share with family and friends To create a DVD 1 Install Arcsoft Showbiz DVD 2 Click Start Select Programs Acrsoft Show...

Page 65: ...64 5 Click Create 6 Click Start to start DVD burning...

Page 66: ...o friends or post them on websites To do this you should 1 Install the camera driver on your computer 2 Connect the computer and camera with the supplied mini USB 2 0 cable 3 Default mode is Mass Stor...

Page 67: ...t you need to have installed to read the User s Manual Many computer users will find they already have this software installed on their computer MPEG4 Video Codec Xvid this decode software has to be i...

Page 68: ...ory is used for Firmware code SD MMC Card Slot support up to 4GB Image Resolution 3840x2880 11M Pixels 2592x1944 5M Pixels 1600x1200 2M Pixels Movie Resolution 640x480 VGA 30 fps 320X240 QVGA 30 fps W...

Page 69: ...68 System Requirement Windows 98SE 2000 ME XP Vista Pentium III 800MHz or higher 256 MB RAM CD ROM 1GB free HDD space Available USB port...

Reviews: