background image

Auto dataset

An 

automatic dataset 

is composed of measuring points with interval of time.

a

. Click on 

OK 

or  

 to enter  sub function.

b

. Select 

Auto. 

 with 


and


. Confirm wih 

OK

c

. Select 

Name 

 with 


and


. Confirm wih 

OK 

or  

.  Enter dataset name with the arrow keys 

 

  and


e

Confirm wih 

OK

.

d

. Enter dataset time  and  interval of time between 2 measurements by selecting 

Period

 with access key. Select 

Duration 

 or 

Interval 

with 


and


. Confirm wih 

OK

. Enter minutes and seconds  with arrow keys


and


( from 1 minute to 24 hours for the duration and from 5 seconds to 10 minutes for the interval). Confirm with 

OK

.

e.

 Select 

Start 

for dataset launching.

1.2 Automatic dataset

2.


Launch a planned dataset

4. Delete all datasets

 Select 

Delete

 with 


and


. Confirm wih 

OK

A planned dataset is composed of several locations. For each location, the operator can enter a theorical 
value and a tolerance for the parameter to be controlled. Planification must be made via the software.

a

. Click on 

OK 

or  

 to enter into sub function.

b

. Select 

Planned 

 with 


and


. Confirm wih 

OK

c

. Choose dataset name


 with 


and


. Confirm wih 

OK

d

. Select the location with 


and


. Confirm wih 

OK

.   

10

IV – Menus

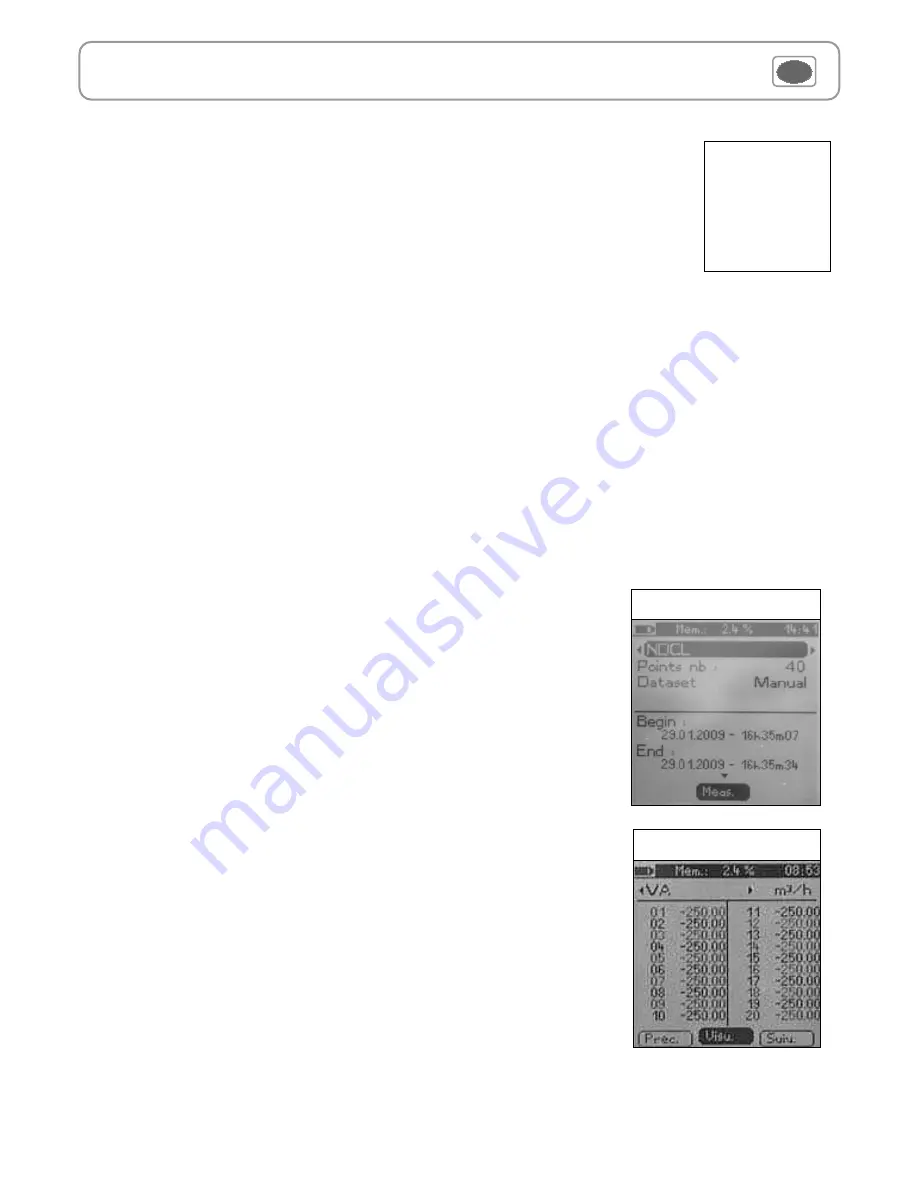
3. Preview of tables of points of datasets

a.

 Go to 

Recording

 menu.

b. 

Select  

Display

. Click on 

OK

 to validate.

c. 

Select 

dataset name

 with arrow keys 


et 

. Click on 

OK

 to validate.

Summary screen of selected dataset is displayed

From this screen, you can :

 Select other dataset using arrow keys 

t

 and 

u

.

 Display data of other channels using arrow keys 

p

 and 

q

.

d.

 Click on 

Mesure 

to display values table of selected dataset.

From this screen you can : 

 Browse values table of points of the same channel pressing 

Prev.

 or 

Next.

 Change of channel with arrow keys 

 and 


.

 Back to dataset summary screen pressing 

Visu.

You can display tables of points of datasets performed on the device.  

Dataset summary

Dataset table

Summary of Contents for AQ 200

Page 1: ...AQ 200 AQ 200 Air Quality...

Page 2: ...Using wire probes and modules 8 Use wireless probes 8 Functions 8 Hold Min Max 8 Configuration 9 Thermocouple type 9 Display 9 Units 9 Delta T 9 Alarms 9 Recording 9 Parameters 11 Language 11 Date tim...

Page 3: ...0 4 Reading value 0 5 C ou 0 4 Reading value 0 1 C 0 1 C 0 1 C C F K J T THERMOCOUPLE See related datasheet CLIMATIC CONDITIONS Hygro Air pressure RH from 5 to 95 RH Accuracy Repeatability linearity...

Page 4: ...5 Description II Introduction...

Page 5: ...the instrument Mini Din C1 connector Mini Din C2 connector Probes are connected on min DIN connectors C1 and or C2 Wireless probe instrument communication Wireless communication between probe and inst...

Page 6: ...tion with right and left keys Connections can be activated or deactivated with or Infos Measure Params Select a sub menu with access keys or with arrow keys Measurement Communication interrupted Check...

Page 7: ...re Sensor type Serial number Date of last calibration or adjustement Probes Status enabled ou disabled On enabled mode the probe is connected the measurement is carried out and the value is displayed...

Page 8: ...equired with and Confirm with OK Click on Esc to return to previous screen Delta T When two PT100 probes or 2 thermocouple temperature probes are connected AQ200 can calculate Delta temperature value...

Page 9: ...r can enter a theorical value and a tolerance for the parameter to be controlled Planification must be made via the software a Click on OK or to enter into sub function b Select Planned with and Confi...

Page 10: ...ct the delay in minute Click on OK or to enter into the sub function Select with and OFF in order to disable the automatic shut off or enter the delay from 15 to 120 minutes Confirm wih OK Date time B...

Page 11: ...After Sales Service required for appraisal Maintenance Warranty Info menu This menu allows to view the serial number of instrument and firmware version Battery When battery indicator flashes it is re...

Reviews: