background image

7

15. Do not use any cleaning agents or lubricants 

on this appliance. Unplug before cleaning or 

carrying out any maintenance.

16. Always carry the appliance by the base, do not 

carry it by the loop amplifier.

17. Turn off all controls before unplugging. Unplug 

from socket when not in use for extended 

periods. To avoid a tripping hazard, safely coil 

the cable.

18. Do not use near furnaces, fireplaces, stoves or 

other high temperature heat sources.

19. Do not use in conjunction with or directly next 

to an air freshener or similar products. Do not 

spray or apply perfumes directly on or near 

the filter. Keep essential oils and chemicals 

away from the appliance.

20. This appliance is only to be used with the 

power supply unit provided with it.

READ AND SAVE THESE 

INSTRUCTIONS

This Dyson appliance is intended for household 

use only.

Summary of Contents for PureCool TP05

Page 1: ...Operating manual TP05...

Page 2: ...Thank you for choosing to buy a Dyson purifying fan To read your manual in English go to page 3 Dyson 19...

Page 3: ...13 13 Care and maintenance Additional information Contents EN Getting started Registration Important safety instructions Assembly Controls Additional functions Information menu Auto mode Sleep timer A...

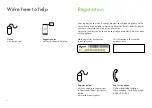
Page 4: ...date of purchase subject to the terms of the guarantee Your serial number can be found on your rating plate which is on the base of the appliance Note your serial number for future reference Register...

Page 5: ...not close securely stop using the product remove the batteries and keep it away from children If you think batteries might have been swallowed or placed inside any part of the body seek immediate med...

Page 6: ...ter or rain 8 Do not handle any part of the plug or appliance with wet hands 9 Do not operate any appliance with a damaged cable or plug Discard the appliance or return to an authorised service facili...

Page 7: ...id a tripping hazard safely coil the cable 18 Do not use near furnaces fireplaces stoves or other high temperature heat sources 19 Do not use in conjunction with or directly next to an air freshener o...

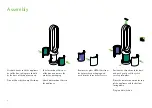
Page 8: ...ut of the box and remove the protective packaging Attach both carbon filters to the appliance Remove the glass HEPA filters from their protective packaging and push into the shrouds until secure Posit...

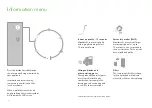
Page 9: ...d Night mode Oscillation ON OFF Sleep timer Auto mode Information menu Controls Continuous monitoring The continuous monitoring function will collect extensive environmental information see the Inform...

Page 10: ...nds Monitor the current air quality with a graph showing the last 12 seconds of data Particulate matter PM10 Monitors the presence of larger microscopic particles up to 10 microns in size suspended in...

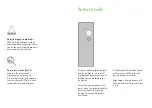
Page 11: ...ng products paints and new furnishings Auto mode Set your appliance to Auto mode and the on board sensors will intelligently adjust the settings of the appliance according to the air quality Air quali...

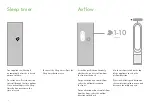
Page 12: ...Press the Sleep timer button twice Air will be purified continuously whether the air is set to flow from the front or the back For purification and cool airflow select the airflow direction to the fr...

Page 13: ...and respond to changes in air quality and temperature but only using its quietest settings and with its LCD screen dimmed Oscillation Press the button to circulate the air around the room and scroll t...

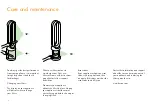
Page 14: ...will come with instructions go online for further support and videos Do not use your appliance without the filters in place Unplug your appliance from the mains electricity supply before cleaning or...

Page 15: ...allowed Your filter units are non washable and non recyclable Dispose of the exhausted filter units in accordance with local ordinances or regulations The battery should be removed from the product be...

Page 16: ...out by parties other than Dyson or its authorised agents Blockages Please refer to the Care and maintenance section and illustrations in this Dyson Operating Manual for details on how to look for and...

Page 17: ...17...

Page 18: ......

Page 19: ...19 32 33 RU 20 21 26 27 27 28 29 30 30 31 31...

Page 20: ...20 www dyson com ru support Dyson 2 www dyson com ru 8 800 100 100 2...

Page 21: ...21 2 1 2...

Page 22: ...22 3 Dyson 4 5 6 Dyson Dyson 7 8 9...

Page 23: ...23 Dyson 10 Dyson 11 12 13 14 15 16 17 18 19...

Page 24: ...24 20 Dyson...

Page 25: ...25...

Page 26: ...26 x2 clik x2 clik x2 clik HEPA...

Page 27: ...27 x2 x2 x2 clik...

Page 28: ...28 12 12 PM10 10...

Page 29: ...29 PM2 5 2 5 1 4...

Page 30: ...30 1 4 1 10 Manual AUTO mode...

Page 31: ...31 1 4 1 10 Manual AUTO mode 0 350...

Page 32: ...32 www dyson com ru Dyson www dyson com ru support...

Page 33: ...33 CR 2032 www dyson com ru 6 Dyson DYSON DYSON Dyson 2 Dyson Dyson DYSON www dyson com ru www dyson com ru register Dyson 8 800 100 100 2...

Page 34: ...34 2 DYSON 2 Dyson Dyson 2 Dyson i ii Dyson Dyson Dyson Dyson Dyson Dyson Dyson C Dyson Dyson Dyson Dyson Dyson Dyson...

Page 35: ...35 Dyson TP05 20 50 40 10 2 20 16 119048 35 7 499 530 12 12 info russia dyson com 8 800 100 100 2 c 9 00 21 00 2009 2010 2011 D 2012 E 2013 N I L D E F G H J K M N 004 2011 020 2011...

Page 36: ...JN 98473 PN 261630 02 02 31 10 18 RCS PARIS 410 191 589...

Reviews: