background image

DYNISCO PG500 Series

3

33

3

3

3

33

3

3

2.

INSTALLATION

After lubricating the probe thread as described, install the probe in the
mounting hole with the hex nut provided at the top of the probe.

• DO NOT ATTEMPT TO SCREW UNIT IN BY TWISTING GAUGE

ENCLOSURE.

A mounting torque of 100 inch lbs. should provide an adequate seal,
although the stem will withstand up to 500 inch lbs.

*A mounting hole which has become damaged, distorted or partially
filled with plastic can render a gauge inoperative as easily as one which
is not properly machined.

*A cleaning tool kit (Dynisco P/N 200100) is available which is
designed to remove excess plastic from the 0.312 diameter hole, the
45° seat, the 0.451 diameter and the threads. A gauge plug is
included in this kit.

2.1

Gauge Enclosure Rotation

Once installation has been completed, the gauge enclosure can be
swiveled 310° to provide optimum visibility. To do this, rotate the
enclosure to the desired position. Do not attempt to force enclosure
rotation beyond the built-in mechanical stops.

2.2

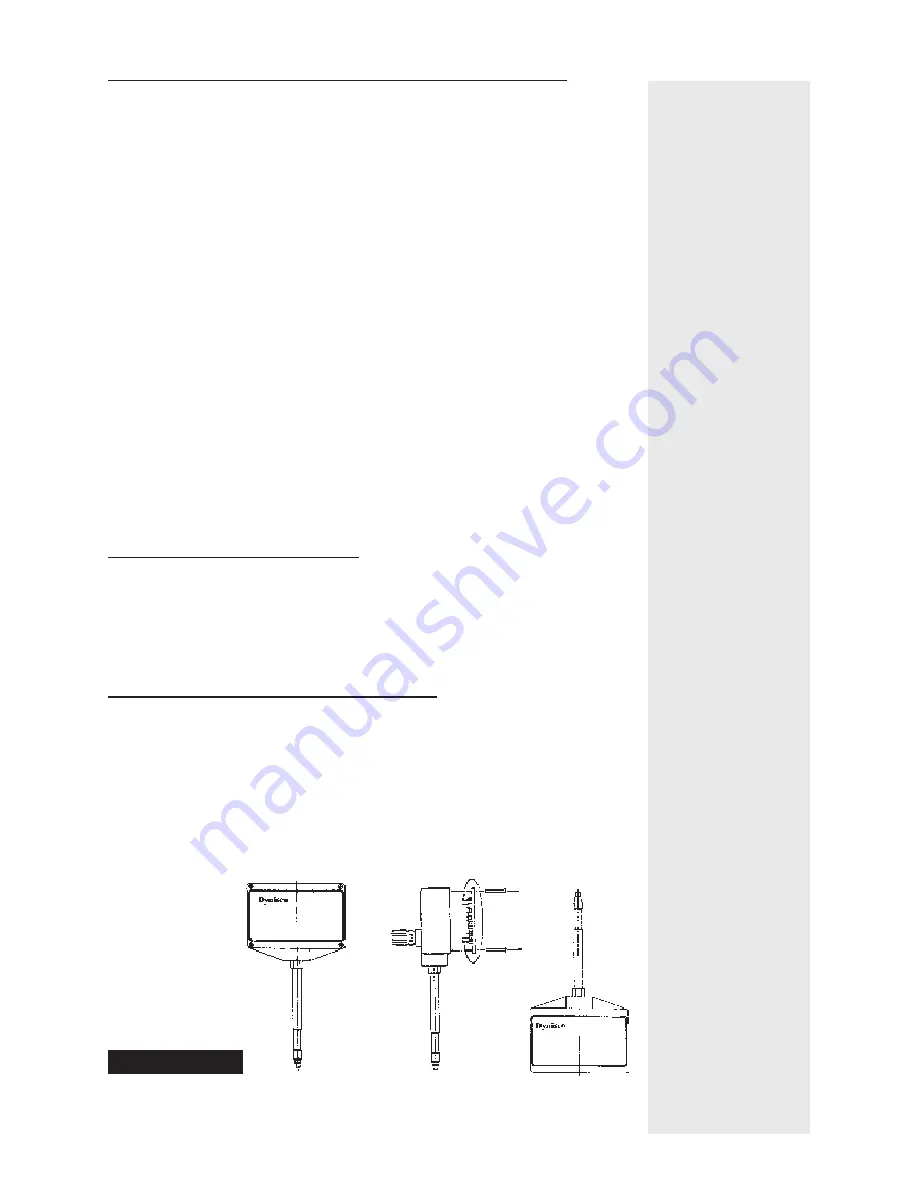
Stem Up - Stem Down Modification

All PG500 Series gauges are shipped from the factory in a stem down
configuration (Figure 5). For those installations which require a stem
up configuration, (mounting on bottom of extruder barrel) merely
remove the four corner screws on the gauge face and gently lift the
face plate off (Figure 5). Reinstall face plate upside down and re-
tighten corner screws.

Fig. 5

Summary of Contents for PG 552

Page 1: ...INSTRUCTIONS FOR PLASTIC MELT PRESSURE GAUGES The following models are covered in this manual PG541 PG542 PG551 PG 552 TPG543 TPG553...

Page 2: ...erminal Connections 4 2 5 Alarm Manual Automatic Reset Option 5 2 6 Alarm Hi Low Modification alarm units only 5 2 7 Alarm Relay Ratings 6 2 8 Power Supply Requirements 6 3 Operation 6 3 1 Zero Adjust...

Page 3: ...ere abrasion dents and gouges During storage the protective cap supplied with the unit should be left in place 1 1 Gauge Probe Mounting Hole The gauge probe is machined to tight dimensional tolerances...

Page 4: ...blue Note 1 2 To prevent galling lubricate the threads with a high temperature anti seize compound 3 Insert the plug and torque lightly until seated in the well 4 Remove and carefully examine the plu...

Page 5: ...to remove excess plastic from the 0 312 diameter hole the 45 seat the 0 451 diameter and the threads A gauge plug is included in this kit 2 1 Gauge Enclosure Rotation Once installation has been compl...

Page 6: ...semble strain relief as shown in Figure 6 Attach strain relief assembly to gauge enclosure using four screws provided in kit as shown in Figure 7 2 4 Terminal Connections 5 Position Terminal Block Ala...

Page 7: ...arm i e the alarm relay resets automatically when the pressure drops back below the setpoint If manual reset is desired remove the factory installed jumper between terminals 4 and 5 Reset on the termi...

Page 8: ...ounter clockwise until the off scale indicator illuminates then clockwise slowly until this indication ceases The unit will now be calibrated 3 2 Alarm Adjustment PG551 PG552 Units equipped with an al...

Page 9: ...g four screws Detach the two 12 VDC leads going to the terminals on the short terminal block on the gauge printed circuit board and remove them from the strain relief assembly 2 Remove power supply co...

Page 10: ...imited to the replacement or repair without charge at our factory of any material or construction defect that becomes apparent within two years from the date that the products are shipped We are not l...

Page 11: ...DYNISCO PG500 Series PG500 Series Manual P N 974030 12 01 Rev C ECO 26292 DYNISCO INSTRUMENTS 38 Forge Parkway Franklin MA 02038 Tel 508 541 9400 Fax 508 541 9436...

Reviews: