Dynamix UM-AU Quick Start Manual Download Page 14

IV. Driver Utility 


After the successful installation of the ADSL USB Modem driver, an 
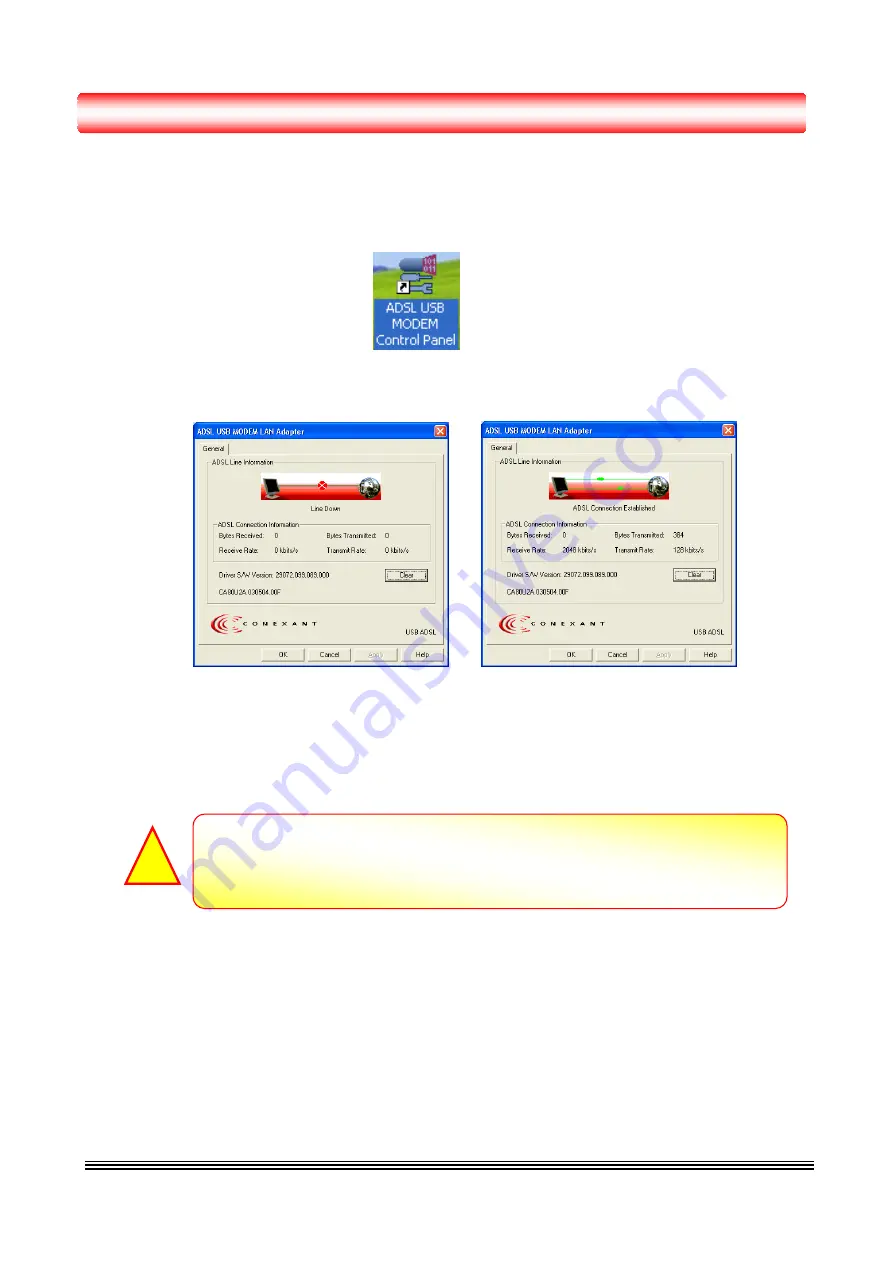
“ADSL USB Modem 

Control Panel”

 icon will appears on the Windows screen.   


Double click the icon, an ADSL Line Information widows will pop up and shows all the ADSL 

connection status information. 


To uninstall the ADSL USB Modem’s driver from your system, click 

“Start”


Æ


“Programs”


Æ


“ADSL USB Modem”


Æ


“Uninstall ADSL USB Modem”

. The uninstall wizard will 

guides you and remove all the necessary files from your system.   

                                                            ADSL USB MODEM                                                                    P13


Restart your Windows system to activate your choice might be necessary. 


Click “OK” to restart your Windows system.


Summary of Contents for UM-AU

Page 1: ...DYNAMIX UM AU ADSL USB MODEM Quick Start Guide...

Page 2: ...Contents I Panel Description P2 II Hardware Installation P3 III Driver Installation P4 IV Driver Utility P13 ADSL USB MODEM P1...

Page 3: ...ve ADSL device Blinking Yellow light indicates ADSL connection session LINK Steady Yellow light indicates a valid ADSL connection 2 Back Panel ADSL Port for connecting the USB ADSL Modem to the ADSL S...

Page 4: ...System with installed 64 MB RAM or more d At least 50 MB of free disk space for driver installation e An installed CD ROM drive 2 An ADSL service account and configuration information provided by your...

Page 5: ...the USB port of the USB ADSL Modem Step 4 Insert the Setup CD Title into your CD ROM drive The following Setup Wizard will pop up Click Driver Install and follow the on screen instructions to complete...

Page 6: ...ed and the installation process will continue automatically Step 5 A Type Selection window wizard will appear Click Auto Installation or Manual Installation then click Next to continue The USB ADSL Mo...

Page 7: ...ect Country from the list provided then click Next to continue Step 2 Select ISP from the list provided then click Next Click Back and choose the Manual Installation to complete the Driver Installatio...

Page 8: ...your ISP for the setting details and click Next after your choice Step 4 The Setup Wizard will ask you to review your settings before it starts to copy necessary files to your system Click Finish if...

Page 9: ...con will appear indicates the files copying process Step 6 Click OK to complete the Auto Installation process If Windows asks you for the original Windows CD ROM insert the CD ROM and direct Windows t...

Page 10: ...n Step 1 Select Manual Installation and click Next to continue Step 2 Select Encapsulation Handshake and enter the VPI and VCI setting then click Next to continue Check your ISP for the setting detail...

Page 11: ...PPPoA LLC PPPoA VC MUX PPPoE LLC PPPoE VC MUX 1 1483 Bridge LLC 1483 Bridge VC MUX 1483 Routed LLC 1483 Routed VC MUX or 1577 IPoA Check your ISP for the setting details before entering the VPI VCI a...

Page 12: ...nfirm Password in the field provided then click Next to continue Step 3 The Setup Wizard will ask you to review your settings before it starts to copy Check your ISP for the setting details before ent...

Page 13: ...on will appear indicates the files copying process Step 5 Click OK to complete the Auto Installation process If Windows asks you for the original Windows CD ROM insert the CD ROM and direct Windows to...

Page 14: ...s will pop up and shows all the ADSL connection status information To uninstall the ADSL USB Modem s driver from your system click Start Programs ADSL USB Modem Uninstall ADSL USB Modem The uninstall...

Reviews: