background image


34 


Camera Controlled by WAN 

Setup IP Controlled by Dynamic DNS 

Dynamic DNS providers: Dyndns.org, 3322.org. 


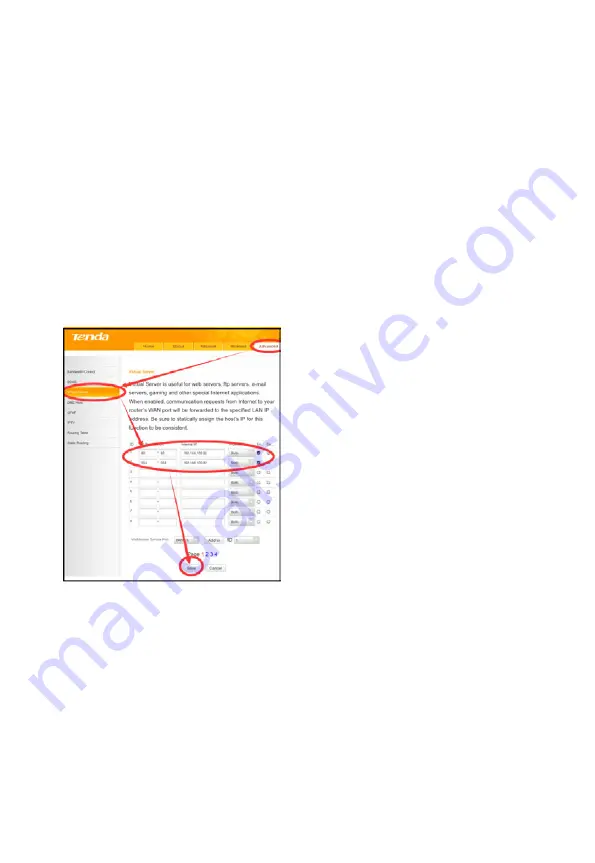
Router Port Mapping: 

Refer to below “Tenda” router example: enter the Router Home Page 

(interface page), select 

“Advanced” -> “Virtual Server”, add a new port 

number in “Ext Port”, add a new port number in “Int port”, input camera IP 
address to “Internal IP”, then select “Save

, as shown 


Dynamic DNS View Camera 

To view camera via DDNS, use this link format: http://hostname:port number. 

For  example,  for  host  computer  name  “youdomain.f3322.org”  and  camera 

port 89, the link is http://youdomain.3322.org:89 


Tip:

 If the camera default port is 80, it is unnecessary to input port number. 

The host name can access camera directly. 

Summary of Contents for DVDO-C3-1

Page 1: ...Version V1 0 2 DVDO C3 1 PTZ Auto Tracking Camera User Manual...

Page 2: ......

Page 3: ...will not occur in a particular installation If this equipment does cause harmful interference to radio or television reception which can be determined by turning the equipment off and on the user is e...

Page 4: ...on 13 Wiring 15 IR Remote Control 16 RS232 Control 20 RS232 Interface 20 VISCA Network 22 RS232 Serial Communication Control 22 GUI Settings 23 MENU 23 EXPOSURE 24 COLOR 25 IMAGE 25 P T Z 26 NOISE RED...

Page 5: ...N 34 Setup IP Controlled by Dynamic DNS 34 Dynamic DNS Visit Camera 34 VLC Stream Media Player Monitor 35 Camera Parameter Setup 36 Homepage Introduction 36 Video Settings 39 Image Settings 41 Audio S...

Page 6: ...deo The panoramic and close up images provide consistent brightness and color 72 5 Wide Angle Lens Close up camera uses 72 5 wide angle high quality lens and supports 12x optical zoom and 16x digital...

Page 7: ...7 Package Contents 1 x Camera 1 x AC Power Adaptor 1 x Power Cable 1 x RS232 Cable 1 x Remote 1 x Wall Bracket with Screw Pack...

Page 8: ......

Page 9: ......

Page 10: ......

Page 11: ......

Page 12: ...12 Dimensions...

Page 13: ...13 Installation and Wiring Installation To mount camera on a wall please follow the following wall mounting installation steps...

Page 14: ......

Page 15: ...nel of the camera The power indicator on the front panel of the camera will turn on 3 After the camera is powered on it will initialize by moving to its limits then returning horizontally and vertical...

Page 16: ......

Page 17: ......

Page 18: ......

Page 19: ......

Page 20: ......

Page 21: ......

Page 22: ......

Page 23: ...n menu on the normal screen using arrow button to move the cursor to the item to be set Press the HOME button to enter the corresponding sub menu MENU Exposure Color Image P T Z Noise Reduction Setup...

Page 24: ...Off Only in Auto mode Bright Intensity control from 0 17 Only in Bright mode Gain Limit Maximum gain limit 0 15 Auto SAE AAE Bright modes Anti Flicker Select Off 50Hz 60Hz Auto AAE Bright modes Meter...

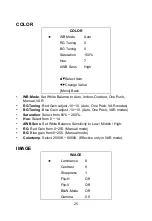
Page 25: ...10 10 Auto One Push VAR modes BG Tuning Blue Gain adjust 10 10 Auto One Push VAR modes Saturation Select from 60 200 Hue Select from 0 14 AWB Sens Set White Balance Sensitivity to Low Middle High RG...

Page 26: ...On Off Flip V On Off B W Mode On Off Gamma Select Default 0 45 0 5 0 56 0 63 Style Select Default Norm Clarity Clarity LED Bright Soft 5S LDC Set LDC Off 10 10 P T Z P T Z SpeedByZoom On AF Zone Cent...

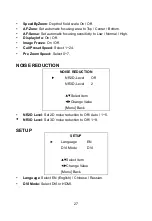
Page 27: ...On Off Call Preset Speed Select 1 24 Pre Zoom Speed Select 0 7 NOISE REDUCTION NOISE REDUCTION NR2D Level Off NR3D Level 2 Select Item Change Value Menu Back NR2D Level Set 2D noise reduction to Off A...

Page 28: ...n Off P_D_Address Select 0 254 Effective only in PELCO D protocol P_P_Address Select 0 31 Effective only in PELCO P protocol Net Mode Set serial port network control to Serial Parallel Baudrate Select...

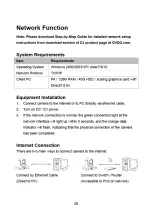
Page 29: ......
Page 30: ...IPv4 to set PC IP address as shown below Note Write down existing IP settings or take screenshot to revert to original settings after setup 2 Turn on C3 camera and connect directly to PC using Ethern...

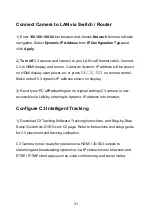
Page 31: ...e of C3 dynamic IP address shown on display 3 Revert your PC s IPv4 settings to its original settings C3 camera is now accessible via LAN by entering its dynamic IP address into browser Configure C3 I...

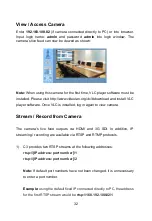
Page 32: ...yer software Once VLC is installed log in again to view camera Stream Record from Camera The camera s live feed outputs via HDMI and 3G SDI In addition IP streaming recording are available via RTSP an...

Page 33: ...ess and a stream key from Facebook Live Youtube OBS Studio etc then enter into the MRL field of the NETWORK settings in the C3 s web interface The receiving RTMP server address and stream key should b...

Page 34: ...rt number in Ext Port add a new port number in Int port input camera IP address to Internal IP then select Save as shown Dynamic DNS View Camera To view camera via DDNS use this link format http hostn...

Page 35: ...Open Network Stream or Ctrl N Step 3 Input URL address rtsp ip port number 1 First stream rtsp ip port number 2 Second stream Step 4 Click Play Tip Default RTSP port number is 554 If the camera port...

Page 36: ...dow Video viewing window must accommodate video resolution higher resolutions will allow larger playback area Double click viewing window to view full screen double click again to will restore window...

Page 37: ...trol for fine manual focus adjustment in case auto focus encounters difficult objects or backgrounds 4 PTZ Speeds Pan speed can be set between 1 24 Tilt speed can be set between 1 20 Zoom and Focus sp...

Page 38: ...the camera 1 Type a number into the Preset box 2 Type preset name into Presets Information Click Set button Click Call button or click the preset number name in Presets Information to return PTZ to pr...

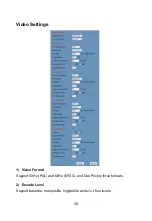
Page 39: ...39 Video Settings 1 Video Format Support 50Hz PAL and 60Hz NTSC and Dial Priority three formats 2 Encode Level Support baseline mainprofile highprofile and svc t four levels...

Page 40: ...ages However bit rate configuration must match network bandwidth When network bandwidth is narrow high bit rates may result in abnormal video streams and inferior images 6 Frame Rate The user may spec...

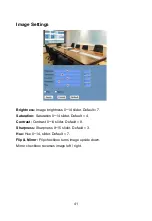
Page 41: ...Default 7 Saturation Saturation 0 14 slider Default 4 Contrast Contrast 0 14 slider Default 8 Sharpness Sharpness 0 15 slider Default 3 Hue Hue 0 14 slider Default 7 Flip Mirror Flip checkbox turns im...

Page 42: ...Bit Rate Selectable 96K 128K 256K Input Type Input type line in Input Vol L Left channel volume Input Vol R Right channel volume ADTS Options Enable disable ADTS System Settings Work Mode Select RTSP...

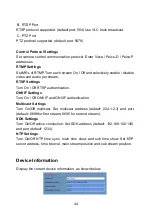
Page 43: ...be modified Port Settings A HTTP Port IP address identifies the network device which may run multiple web applications using network ports to transmit data Port setting determines web server program...

Page 44: ...Turn On Off RTSP authentication ONVIF Settings Turn On Off ONVIF and ONVIF authentication Multicast Settings Turn On Off multicast Set multicast address default 224 1 2 3 and port default 6688 for fir...

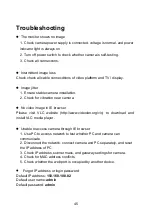
Page 45: ...era No video image in IE browser Please visit VLC website http www videolan org vlc to download and install VLC media player Unable to access camera through IE browser 1 Use PC to access network to te...

Page 46: ...e defects are caused by the product being repaired dismantled or altered by anyone other than an authorized service partner 4 The defects are caused the product being used or handled improperly roughl...

Reviews: