background image

Important safety notice

To reduce the risk of serious injury, read the following safety instructions before using the 
product. You will learn important information about safety, proper use and maintenance. Keep this 
instruction manual in case of later repairs, maintenance or subscribe heated parts.
This device can not be used in people whose body weight is greater than 120 kg.
Is the owner's responsibility to ensure that all users of this product have been properly informed about 
how to stay safe should use this product.
The device is designed for training adults. Do not leave children or pets unattended in a room with the 
machine.
Provide sufficient space to safely operate the equipment.
Place the device on a non-slip surface. In case you want to protect your floor, place a protective mat 
underneath the device.
Use the device inside and protect it from moisture and dust. Do not place the device into the covered 
porch and near the water.
The device is designed for home use. For commercial use of the device to the unit not covered by 
warranty and the manufacturer is not liable for the device.
When medical complications and limitations consult your workout with your doctor. He'll tell you that 
training is suitable for you.
Correct training and overestimate your abilities can damage your health.
As during training experience nausea, chest pain or you will breathe wrong, immediately stop training 
and consult a doctor.
With training and how to start, make sure the device is properly folded and adjusted.
When installing the device, follow the instructions exactly.
Use only original parts BH Fitness (see list).
Tighten all moving parts to prevent their release during training.
Do žívajte equipment while barefoot or with loose shoes. During the training wear loose clothing. Before 
starting training aside all jewelry. Hair can properly adjust to you during exercise traffic.
Damaged components may endanger your safety and affect the life of the equipment. Replace worn or 
damaged parts immediately replace, or stop using the device.
Periodically check all nuts and bolts that are tightened.
Any assembly / disassembly facility must be done carefully.
Keep hands and feet away from moving parts.
Do not attempt to service this product by yourself. 

7

EN

Summary of Contents for Felix DVL4008

Page 1: ...N vod na pou itie Veslovac trena r DUVLAN Felix k d DVL4008 N vod k pou it Veslovac trena r DUVLAN Felix k d DVL4008 User manual Rower DUVLAN Felix code DVL4008 1 CZ EN SK...

Page 2: ...a kody sp soben nespr vnou manipul ciou so zariaden m V pr pade reklam cie n s kontaktujte Z ru n doba za na plyn d tumom predaja uschovajte preto doklad o k pe Z kazn cky servis Aby sme V m mohli o n...

Page 3: ...ie zariadenia sa na zariadenie z ruka nevz ahuje a v robca za zariadenie neru Pri zdravotn ch komplik ci ch a obmedzeniach konzultujte V tr ning s Va im lek rom Povie V m ktor tr ning je pre V s vhodn...

Page 4: ...ovan sti a kody zp soben nespr vnou manipulac se za zen m V p pad reklamace n s kontaktujte Z ru n doba za n b et datem prodeje Uschovejte proto doklad o koupi Z kaznick servis Abychom V m mohli co ne...

Page 5: ...n na za zen z ruka nevztahuje a v robce za za zen neru P i zdravotn ch komplikac ch a omezen ch konzultujte V tr nink s l ka em ekne V m kter tr nink je pro V s vhodn Nespr vn tr nink a p ecen n Va ic...

Page 6: ...ages caused by incorrect handling the device In case of complaint please contact us The warranty period begins on the date of sale Therefore retain proof of purchase Customer Service So we can best he...

Page 7: ...it not covered by warranty and the manufacturer is not liable for the device When medical complications and limitations consult your workout with your doctor He ll tell you that training is suitable f...

Page 8: ...tor 2 na hlavn r m 1 zaistite imbusovou skrutkou 3 a obl kov podlo kou 4 CZ KROK 1 P ipojte p edn stabiliz tor 2 na hlavn r m 1 zajist te imbusovou roubem 3 a obloukovou podlo kou 4 EN STEP 1 Attach t...

Page 9: ...pri inovej podlo ky 7 a plochej podlo ky 8 CZ KROK 2 P ipevn te zadn stabiliz tor 16 na kolejnicovou ty 5 pomoc imbusov ho roubu 6 pri inovej podlo ky 7 a ploch podlo ky 8 EN STEP 2 Attach the Rear S...

Page 10: ...sedadlov podporu 18 pomocou skrutky s Phillip hlavou 19 CZ KROK 3 Namontujte sedadlo 17 na sedadlovou podporu 18 pomoc roubu s Phillip hlavou 19 EN STEP 3 Assembly the Seat 17 to the Seat Support 18...

Page 11: ...pravou hlin kovou koncovou krytku 15 28 na konci kolejnicov ty e 5 2 P ipevn te kolejnicovou ty 5 k hlavn mu r mu 1 vlo te skl dac osa 70 zajist te podlo kou 22 a imbusovou roubem 23 pak zajist te sta...

Page 12: ...ROK 5 Uvoln te stav c roub 12 a sejm te kolejnicovou ty 5 do svisl polohy a zajist te k hlavn mu r mu 1 pomoc stav c ho roubu 12 jak je uvedeno na obr n e P ipojte st edn po ta ov vodi 11 a doln po ta...

Page 13: ...lo ky 22 a imbusovej skrutky 23 CZ KROK 6 P ipevn te ped l 21 na r m ped lov podp ry 20 vlo en m ped lov n pravy 24 a zajist te pomoc podlo ky 22 a imbusov ho roubu 23 EN STEP 6 Attach the Pedal 21 on...

Page 14: ...polo te kolejnicovou ty 5 do vodorovn polohy a dot hn te nastavovac roub 12 na hlavn m r mu 1 jak je uvedeno na obr zku n e pot p ipojte r m podp ry ped lu 20 k hlavn mu r mu 1 zajist te nosnou roube...

Page 15: ...y po ta a 30 CZ KROK 8 Posu te po ta 30 na r mu po ta ov podpory 31 upevn te roubem s Phillip 32 pot p ipojte horn po ta ov vodi 34 do zadn z suvky po ta e 30 EN STEP 8 Slide the Computer 30 onto the...

Page 16: ...na nulu SCAN Stla te tla idlo k m SCAN monitor bude automaticky medzi STEP MIN TIME COUNT CAL ka d ch 5 sek nd AS jednotka min ty sekundy Stla te tla idlo k m TIME zobraz spo ta uplynul as Opakovanie...

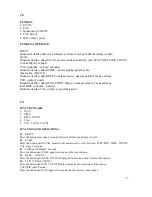
Page 17: ...ORI jednotka kalorie Stiskn te tla tko CAL zobraz se spot eba kalori EN FUNCTION MARK 1 SCAN 2 TIME 3 REPS COUNT 4 CAL 5 TTR TOTAL COUNT FUNCTIONS AND OPERATIONS RESET Press the button more than 2 sec...

Page 18: ...tor Front stabilizer 1 38 Rukov Rukoje Handlebar Grip 1 3 Imbusov skrutka Imbusov roub Allen Bolt M10 20 2 39 U Matica Matice Nut 6 2 4 Obl kov podlo ka Obl kov podlo ka Arc Washer 10 5 25 T1 5 2 40...

Page 19: ...1 20 Podporn r m na ped l Podporn r m na ped l Pedal Support Frame 1 56 Hnac reme Hnac emen Drive Belt 1 21 Ped l Ped l Ped l 2 57 Kryt k uky Kryt kliky Crank Cover 2 22 Ploch podlo ka Ploch podlo ka...

Page 20: ...ka tvorcov koncov krytka Square End Cap 1 32 Phillip Skrutka roub ScrewM5 15 4 68 Imbusov skrutka Imbusov roub Allen Bolt M8 50 1 33 Nap ov tla idlo Napa ov tla idlo Tension Knob 1 69 Magnetick dr iak...

Page 21: ...Sch matick v kres Sch matick v kres Exploded drawing 21...

Reviews: