5
Operation
Shredder Capacity
Note
With the electrical cord plugged in, the switch in the auto position and the
shredder assembled, the power LED will light up.
This means the the shredder is now set for operation.
When paper is inserted into the feed opening,
the shredding process will start, and stop when
the paper has completed its travel through the feed opening.
The main switch is located on the top of the shredder,
the main switch has four settings.
1. When the auto switch is selected, the shredding process
will start when paper is inserted into the feed opening
and will continue until it has passed through the opening.
2. The reverse switch is used to assist in the removal of a paper jam,
which reverses the shredding process, prior to a completed forward cycle.
When switching from auto to reverse, always stop in the off position,
in order to prevent possible damage to the motor.
3. The off Position is also used to terminate the AC power
to the shredder. It is recommended to slide to the off position,
while emptying the wastebasket or when the shredder
is not in use for a prolonged period of time.
4. The forward switch is used to assist in clearing any
excess paper from the cutter after the completion of a shred cycle.
The PS391 will shred up to 3 sheets of A6 paper,
and will accept paper widths up to 115mm.
When shredding small materials like envelopes or receipts,
insert them into the middle of the paper feed opening.
The Power LED will not light up if the unit is in the off position,
or if the shredder head is not positioned on top of the wastebasket.
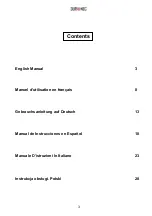
Summary of Contents for PS391
Page 1: ...PS391 Paper Micro Cut Shredder ...
Page 3: ...3 English Manual ...
Page 8: ...8 Manuel d utilisation en français ...
Page 13: ...13 Gebrauchsanleitung auf Deutsch ...
Page 18: ...18 Manual de instrucciones en español ...
Page 23: ...23 Manuale Di Istruzioni In Italiano ...
Page 28: ...28 Instrukcja obsługi Polski ...
Page 33: ......


