background image

5

Safety Instructions

1. In order to prevent the risk of an electrical shock, do not open or attempt 

to make any repairs to the fan yourself. This should be done by a qualified 

technician.

2. Never insert foreign objects or accessories through the grill of the fan.

3. Always unplug the appliance first before manually handling the fan or any of 

the parts.

4. Make sure that the fan is on a flat, even and stable surface when operating 

as this enables safe usage and will prevent the fan from falling.

5. Do not use outdoors as the weather (eg. rain) may affect its performance, 

as well as the aesthetics of the fan. Additionally, never submerge the fan under 

water as this may cause internal damage to the motor.

6. Do not operate the fan with a damaged cable or plug. Do not operate the 

fan if it malfunctions, or has been dropped or damaged in any way.

7. Do not operate the fan in the presence of flammable fumes.

8. Do not use the fan near curtains, plants, or where other objects can become 

caught in the blades.

9. To disconnect the fan, pull the plug out of the mains power outlet. Do not 

pull it using the cable.

10. Do not run the cable under carpeting or cover the cable with rugs, runners, 

or similar covers.

11. This appliance is not intended for use by persons (including children) 

with reduced physical, sensory or mental capabilities, unless they have been 

given supervision or instruction concerning use of the appliance by a person 

responsible for their safety. Children should be supervised to ensure they do 

not injure themselves or cause harm to their surroundings.

12. If you notice any anomalies such as an unusual noise from the fan, turn 

the appliance off and unplug it immediately.

13. This product is made for household domestic use only and not for 

commercial purposes.

Summary of Contents for FN45

Page 1: ...FN45 Standing Fan PLEASE READ ALL THE INSTRUCTIONS BEFORE USE ...

Page 2: ...2 ...

Page 3: ...3 English Manual Manuel d utilisation en français Gebrauchsanleitung auf Deutsch Manual de Instrucciones en Español Manuale D istruzioni In Italiano Instrukcja obsługi Polski 4 12 20 28 36 44 Contents ...

Page 4: ...4 English Manual ...

Page 5: ...f it malfunctions or has been dropped or damaged in any way 7 Do not operate the fan in the presence of flammable fumes 8 Do not use the fan near curtains plants or where other objects can become caught in the blades 9 To disconnect the fan pull the plug out of the mains power outlet Do not pull it using the cable 10 Do not run the cable under carpeting or cover the cable with rugs runners or simi...

Page 6: ...ing Screw 14 Control Panel 4 Blade Cap 15 Power Switch 5 Fan Blade 16 Pole Inner Tube 6 Fastening Nut 17 Pole Tightening Cap 7 Back Cover 18 Pole Exterior Tube 8 Motor Shaft Pin 19 Cap 9 Oscillation Lock 20 Base 10 Fan Head Motor 21 Fixing Plate for Base 11 Tilting Joint 22 Tightening Screw ...

Page 7: ...pole on the top side of the base Tighten it all together with the tightening screw 22 The fan head should now all be assembled and attached to the control box Next loosen the control box screw 13 and place the whole assembled fan head with control box onto the inner tube 16 and fasten in place by tightening the control box screw 13 a Loosen and remove the tightened fastening nut 6 from the fan hea...

Page 8: ...ected by pressing the numbered buttons on the control pad button 1 low wind 2 medium wind 3 high wind Press button 0 to stop the fan 4 Setting the Timer This fan has a built in timer which will automatically turn off the fan after a selected time Simply turn the timer dial to the desired time choose from 10 20 30 40 50 and 60 minutes 1 Make sure the blade is tightly inserted into the shaft pin of ...

Page 9: ...y use a mild detergent if necessary After cleaning wipe the unit dry by using a soft dry cloth 3 Do not use alcohol gasoline abrasive powders furniture polish or brushes to clean the fan as this may cause damage and deterioration to the surface of the fan 4 Always ensure the fan is completely dry after cleaning before operating again Technical Specification Model Voltage Frequency Power FN45 220V ...

Page 10: ...rposes 4 It does not cover wear and tear malicious damage misuse neglect inexpert repairs or consumable parts 5 Shine Mart Ltd has no responsibilities for accidental or consequential loss or damage 6 Shine Mart Ltd are not liable to carry out any type of servicing work under the guarantee 7 Valid in the UK only This product is fitted with CE 1363 plug and fuse Imported by Shine Mart Ltd RM3 8SB In...

Page 11: ...11 ...

Page 12: ...12 Manuel d utilisation en français ...

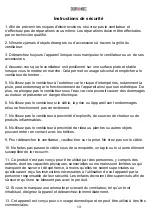
Page 13: ...et ou ne fonctionnent pas correctement 7 N utilisez pas le ventilateur à proximité d explosifs de sources de chaleur ou de produits inflammables 8 N utilisez pas le ventilateur à proximité de rideaux plantes ou autres objets pouvant entrer en contact avec les hélices 9 Pour débrancher le ventilateur veuillez tirer sur la prise Ne tirez pas sur le câble 10 Ne faites pas passer le câble sous de la m...

Page 14: ... 17 Collier 7 Grille 18 T externe de la perche ube 8 Axe 19 Chapeau 9 Verrou d oscillation 20 Base 10 Tête du ventilateur moteur 21 Plateau 11 Articulation 22 Vis avant du cerceau des hélices de fixation arrière de l arbre moteur basculante de contrôle du boîtier de contrôle de contrôle d alimentation de serrage de la perche de serrage de fixation ...

Page 15: ...t ensemble à l aide de la vis de serrage 22 Desserrez Détachez l écrou de fixation 6 de la tête du ventilateur 10 b Placez la grille arrière 7 sur l axe de l arbre moteur 8 Maintenez la en place avec l écrou de fixation 6 c Placez les hélices 5 au dessus de l écrou de fixation 6 d Vissez ensuite la protection des hélices afin de les sécuriser e Placez la grille avant 1 sur le dessus Maintenez les ...

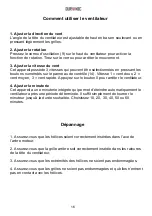
Page 16: ...yez sur le bouton 0 pour arrêter le ventilateur 4 Ajuster la minuterie Cet appareil a une minuterie intégrée qui permet d éteindre automatiquement le ventilateur après une période déterminée Il suffit simplement de tourner le minuteur jusqu à la durée souhaitée Choisissez 10 20 30 40 50 ou 60 minutes 1 Comment utiliser le ventilateur Dépannage Assurez vous que les hélices soient correctement insér...

Page 17: ...ide Vous pouvez utiliser un détergent non corrosif si nécessaire Après nettoyage essuyez le ventilateur avec un tissu sec 3 N utilisez pas de l alcool de l essence des détergents corrosifs du polisseur à meuble ou des éponges abrasives pour nettoyer votre ventilateur L utilisation de ces éléments pourrait endommager la surface du ventilateur 4 Assurez vous que le ventilateur soit tout à fait sec a...

Page 18: ...usure normale l utilisation malveillante de l appareil la mauvaise utilisation d un élément les réparations conduites par des non experts ainsi que les pièces consommables 5 Shine Mart Ltd ne porte pas de responsabilité pour tout dommage ou perte accidentel ou conséquent causé par ce produit 6 Shine Mart Ltd se dégage de toute responsabilité en matière de réparation durant la période de garantie 7...

Page 19: ...19 ...

Page 20: ...20 Gebrauchsanleitung auf Deutsch ...

Page 21: ...m Gerät 7 Benutzen Sie das Gerät nicht in der Gegenwart von entflammbaren Dämpfen 8 Benutzen Sie das Gerät nicht in der Nähe von Gardinen Pflanzen und anderen Objekten die sich im Propeller verfangen können 9 Ziehen Sie stets am Stecker und nicht am Kabel um das Gerät von der Steckdose zu entfernen 10 Legen Sie das Kabel nicht unter Teppich oder decken Sie es mit einem Läufer oder ähnlichem ab 11 ...

Page 22: ...in Aus 5 Rotor 16 Ausziehleiste 6 Befestigungsring 17 Befestigungsschraube 7 Hinteres 18 Verbindungsstück 8 Antriebswelle 19 Kappe 9 Oscillierung 20 Standfuß 10 Motor 21 Standfuß 11 Verbindungsstück 22 Standfuß Gitter Schraube Verriegelung Gitter Schraube Schalter Verbindungsplatte Verbindungsschraube Stopper ...

Page 23: ... befestigt sein Lösen Sie anschließend die Kontrollbox Schraube 13 und positionieren Sie den gesamten zusammengebauten Ventilator auf die Ausziehleiste 16 Fixieren Sie ihn durch Festziehen der Kontrollbox Schraube 13 a Lösen b Setzen c Positionieren d S e Montieren Zusammenbau des Ventilators Sie den Befestigungsring 6 von der Antriebswelle 8 Sie das hintere Gitter 7 auf die Antriebswelle und schr...

Page 24: ...ng wird die Rotationsfunktion aktiviert 3 Geschwindigkeitseinstellung Dieser Ventilator verfügt über 3 Geschwindigkeitseinstellungen L langsam M mittlel H schnell Drücken Sie die AUS Taste um den Lüfter anzuhalten 4 Timer einstellen Sie einfach den Timer auf die gewünschte Zeit und wählen Sie zwischen 10 20 30 40 50 und 60 Minuten Fehlerbehebung Sie sicher dass der Rotor fest an der Antriebswelle ...

Page 25: ...um den Ventilator zu reinigen Bei Bedarf können Sie ein mildes Reinigungsmittel verwenden Wischen Sie das Gerät nach der Reinigung mit einem weichen trockenen Tuch trocken 3 Verwenden Sie zum Reinigen des Ventilators keinen Alkohol Möbelpolitur oder Bürsten da dies die Oberfläche des Ventilators beschädigen 4 Stellen Sie sicher dass der Ventilator trocken ist bevor Sie ihn wieder in Betrieb nehmen...

Page 26: ...schädigung Missbrauch Vernachlässigung und unsachgemäße Reparaturen sind von der Gewährleistung ausgeschlossen 5 Shine Mart Ltd übernimmt keine Verantwortung für zufällige oder Folgeschäden 6 Shine Mart Ltd ist nicht für Wartungsarbeiten zuständig Diese fallen nicht unter die Gewährleistung 7 Gültig in der EU Dieses Produkt ist mit fitted CE geprüfte Typ F Euro Stecker BS Stecker ausgestattet Von ...

Page 27: ...27 ...

Page 28: ...28 Manual De Instrucciones En Español ...

Page 29: ...entación o enchufe están averiados o si el aparato no funciona correctamente se ha caído o se ha dañado de alguna manera 7 No utilice el aparato en presencia de gases inflamables 8 No utilice cerca de cortinas plantas o donde otros objetos puedan atascarse en las hojas del ventilador 9 No tire del cable de alimentación a la hora de desconectarlo 10 No pase el cable debajo de alfombras tapetes o co...

Page 30: ...Eje 19 Cubierta 9 Botón 20 Base 10 Cabezal del ventilador 21 Placa 11 Punto 22 Tornillo Cubierta delantera de la cubierta de ajuste de la hélice de la hélice de fijación trasera del motor de rotación de unión inclinable de velocidades del control de velocidades de control superior de ajuste de altura inferior de la base de fijación de la base de la base ...

Page 31: ...l poste 3 Montaje del cabezal a Desatornille y retire la tuerca de fijación del cabezal 9 b Coloque la cubierta trasera 7 en el eje del motor 8 del cabezal Una estas partes usando la tuerca de fijación 6 c Coloque la hélice 5 sobre la tuerca de fijación 6 d Después atornille el anillo de la hélice 4 para que esta esté segura e Coloque la cubierta delantera 1 Para fijar ambas cubiertas use el anill...

Page 32: ...tón correspondiente a la velocidad que desee baja botón 1 media botón 2 y alta botón 3 Para detener el ventilador pulse el botón 0 4 Configuración del temporizador Este ventilador dispone de un temporizador que hace que se apague de forma automática una vez finalice el tiempo seleccionado Tan solo tiene que girar la rueda del temporizador al tiempo que desee 10 20 30 40 50 o 60 minutos Resolución ...

Page 33: ...dor puede usar un paño húmedo 3 No use alcohol gasolina polvos abrasivos productos para lustrar o cepillos para limpiar el ventilador ya que esto podría causar daños y deteriorar la superficie del ventilador 4 Asegúrese siempre de que el ventilador esté completamente seco después de limpiarlo antes de volverlo a usar Especificaciones técnicas Modelo Voltaje FN45 220V 240V 50Hz 60W Frecuencia Poten...

Page 34: ...s inexpertas o partes consumibles 5 Shine Mart Ltd no será responsable por cualquier daño consecuente accidentes o pérdidas 6 Shine Mart Ltd no es responsable ah llevar a cabo cualquier tipo de servicio bajo la garantía 7 Valido solamente dentro de la EU Este producto esta equipado con enchufe fusible Europeo Importado por Shine Mart Ltd RM3 8SB Información sobre la eliminación de residuos para lo...

Page 35: ...35 ...

Page 36: ...36 Manuale D istruzioni In Italiano ...

Page 37: ...ti o dopo che il prodotto ha subito urti o è stato danneggiato in qualsiasi modo 7 Non utilizzare il ventilatore in presenza di gas infiammabili 8 Non utilizzare il ventilatore vicino atende piante o in vicinanza di oggetti che potrebbero venire a contatto con le pale 9 Scollegare l apparecchio dalla presa di corrente tirando la spina e alimentazione 10 Non posizionare il cavo di alimentazione sot...

Page 38: ...o 7 Gabbia 18 Asta 8 Rotore 19 Copertura 9 Blocco 20 Base 10 Motore 21 Perno 11 Meccanismo 22 Vite frontale di fissaggio per anello di fissaggio pale per gabbia posteriore Oscillazione inclinazione pannello di controllo pannello di controllo di controllo d accensione interiore di fissaggio per asta supporto inferiore di fissaggio perno di fissaggio ...

Page 39: ...zionare d Avvitare e Montare Montaggio del ventilatore 1 Montaggio asta 3 Montaggio del rotre 2 Montare l asta alla base 4 Fissare l asta al rotore la gabbia posteriore 7 sul rotore 8 Avvitare utilizzando il fissaggio per gabbia 6 le pale 5 sul fissaggio per gabbia il fissaggio pale 4 per fissare le pale la gabbia anteriore 1 Fissare le due gabbie con l anello di fissaggio 2 e la vite per l anello...

Page 40: ...zionato Basta posizionare la rotella su 10 20 30 40 50 o 60 minuti 2 Accertarsi 3 Accertarsi 4 Assicurarsi Istruzioni d uso L angolo del ventilatore è regolabile verso l alto o verso il basso sollevando o abbassando leggermente la testa del ventilatore Premendo il pulsante di oscillazione sul pannello di controllo o sul telecomando si attiverà la funzione di rotazione 4 Impostare il timer Risoluzi...

Page 41: ... morbido e umido È possibile utilizzare un detergente delicato se necessario Dopo la pulizia asciugare il ventilatore utilizzando un panno morbido e asciutto 3 Non utilizzare alcol polveri abrasive lucido per mobili o spazzole per pulire il ventilatore poiché ciò potrebbe causare danni e deterioramento della superficie del ventilatore 4 Assicurarsi sempre che il ventilatore sia completamente asciu...

Page 42: ...odotto deve essere restituito al rivenditore con la prova d acquisto originale 2 Il prodotto deve essere installato e usato seguendo le istruzioni contenute nel manuale 3 Il prodotto va utilizzato solo per scopi domestici Non è da utilizzarsi per uso commerciale 4 La garanzia non copre usura danni volontari abuso negligenza riparazioni inesperte o consumo dei materiali 5 Shine Mart Ltd non è respo...

Page 43: ...43 ...

Page 44: ...44 Instrukcja obsługi Polski ...

Page 45: ...szczony 7 Nie używaj urządzenia w pobliżu łatwopalnych oparów 8 Nie używaj urządzenia blisko zasłon roślin lub innych obiektów które mogą zostać wciągnięte przez śmigła wentylatora 9 Odłączaj urządzenie od zasilania pociągając za wtyczkę a nie przewód zasilający aby uniknąć ryzyka porażenia prądem i uszkodzenia urządzenia 10 Nie zakrywaj przewodu zasilającego pod dywanami wykładzinami lub innymi m...

Page 46: ...Tylna 18 Obudowa 8 Wał 19 Nakładka 9 Blokada 20 Podstawa 10 Jednostka silnika 21 Podkładka 11 Śruba 22 Śruba siatka zabezpieczająca siatka zabezpieczająca mocująca siatki zabezpieczającej śmigieł tylnej siatki silnika oscylacji skrętu głowicy panelu kontrolny kontrolnego teleskopowa rury teleskopowej rury podstawy mocująca śruby podstawy siły wiatru ...

Page 47: ... zabezpieczającej 6 z głowicy wentylatora 10 b Umieść tylną siatkę zabezpieczającą 7 na wale silnika 8 znajdującym się na głowicy wentylatora Dokręć elementy za pomocą nakrętki tylnej siatki 6 c Umieść śmigła 5 na nakrętce tylnej siatki 6 d Następnie przykręć śmigła dedykowaną nakrętką 4 aby zablokować w miejscu łopatki wentylatora e Za pomocą obręczy mocującej 2 połącz tylną siatkę zabezpieczając...

Page 48: ...ać nieznacznie naciskając lub podciągając za siatkę zabezpieczającą rotacji oscylacji Po wciśnięciu przycisku oscylacji 9 znajdującego się na jednostce silnika uruchamia się tryb oscylacji Pociągnij przycisk ponownie aby zablokować oscylację głowy prędkości wiatru Wentylator ma wbudowane 3 prędkości Wybierając odpowiedni przycisk dostosowujesz siłę wiatru 1 najniższy poziom 2 średni 3 najwyższy po...

Page 49: ...zką Możesz użyć delikatnego detergentu jeżeli zachodzi taka konieczność Po oczyszczeniu przetrzyj urządzenie do sucha 3 Nie używaj alkoholu benzyny łatwopalnych pyłów past do polerowania lub szczotek aby czyścić urządzenie poniewaz może to spowodować uszkodzenie urządzenia lub jego powierzchni 4 Zawsze upewnij się czy wentylator jest całkowicie osuszony przed ponownym uruchomieniem urządzenia Spec...

Page 50: ...ia niewłaściwego użycia zaniedbania niewłaściwych napraw lub części eksploatacyjnych 5 Shine Mart Ltd nie ponosi odpowiedzialności za przypadkowe albo celowe zgubienie produktu lub jego uszkodzenie 6 Firma Shine Mart Ltd nie jest zobowiązana do przeprowadzania jakichkolwiek prac serwisowych w ramach gwarancji 7 Obowiązuje na obszarze Unii Europejskiej Ten produkt jest wyposażony we wbudowaną wtycz...

Page 51: ...51 ...

Page 52: ......

Reviews: