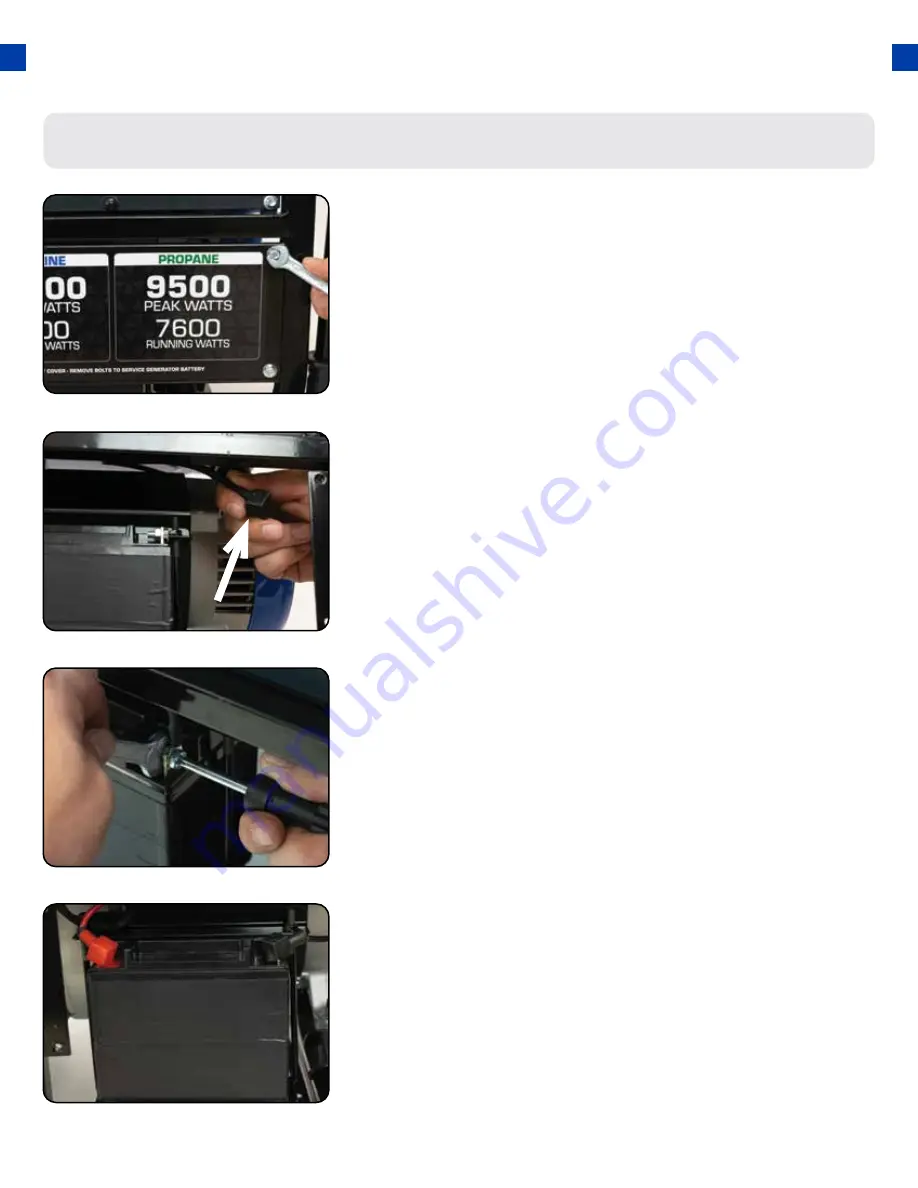
Step 3 - Connect the Battery
28
GENERATOR SETUP (CONTINUED)
Remove the battery cover
1.
Reinstall the battery plate
a.
Cover the connected terminal with the black rubber
boot.
b.
Reinstall the battery cover plate using the wrench
from the toolkit.
4.
Locate the negative cable
a.
Locate the negative battery cable above and behind
the battery. One side is connected to ground and
the other end needs to be connected to the battery.
b.
Route the free end to the negative battery terminal.
2.
Connect the negative cable
a.
Push the black rubber boot up the wire to expose
the connector.
b.
Securely connect the free end of the battery cable
to the negative battery terminal using the screw
and nut from the battery with the screwdriver and
wrench from the toolkit.
3.
a.
Remove the battery cover plate using the wrench
from the toolkit.
Summary of Contents for XP10000HX
Page 2: ......
Page 5: ......
Page 24: ...24 ...
Page 32: ...32 ...
Page 41: ...41 ...
Page 44: ...44 ...
Page 51: ...51 Hours Total The number of hours the generator has been run in total 4 ...
Page 52: ...52 ...
Page 55: ...MAINTENANCE LOG Date Generator Hours Maintenance Performed 55 ...
Page 74: ...WIRING DIAGRAM 74 ...
Page 75: ...75 ...
Page 81: ......
Page 82: ...5800 Ontario Mills Parkway Ontario CA 91764 United States 844 DUROMAX REV XP10000HX 07212020 ...


