background image

DuraLabel.com | 800.788.5572    


13.19  Next Label | 

39

LABEL-EDITING FUNCTION KEYS

13.17 

Print 

Pressing the 

Print

 key will print the current label you are working on. Change printing 

and cutting options in the 

Setup

 menu.

13.17.1 

PRINTING A SEQUENCE

If the label currently being worked on has a sequence, pressing the 

Print 

key will 

present an 

Input Quantity

 prompt, choosing how many labels in the sequence series will 

be printed. (See 

Sequence

 for more information about working with sequences.) If the 

sequence series contains Time/Date stamps, these will also update with every print.

13.17.2 

PRINTING A MULTIPLE-LABEL PROJECT

If you are working in a project with multiple labels and would like to print multiple copies 
of the labels in the project, use 

View Label >List of Labels

 to choose how many of each 

label you want to print. 

13.18 

Next Cell

The Next Cell key is a navigation key. If the label being 
worked on has a multiple-cell layout, pressing Next Cell will 
move to the next cell on the label canvas. Pressing 

Shift + 

Next Cell will

 move back to the previous cell.

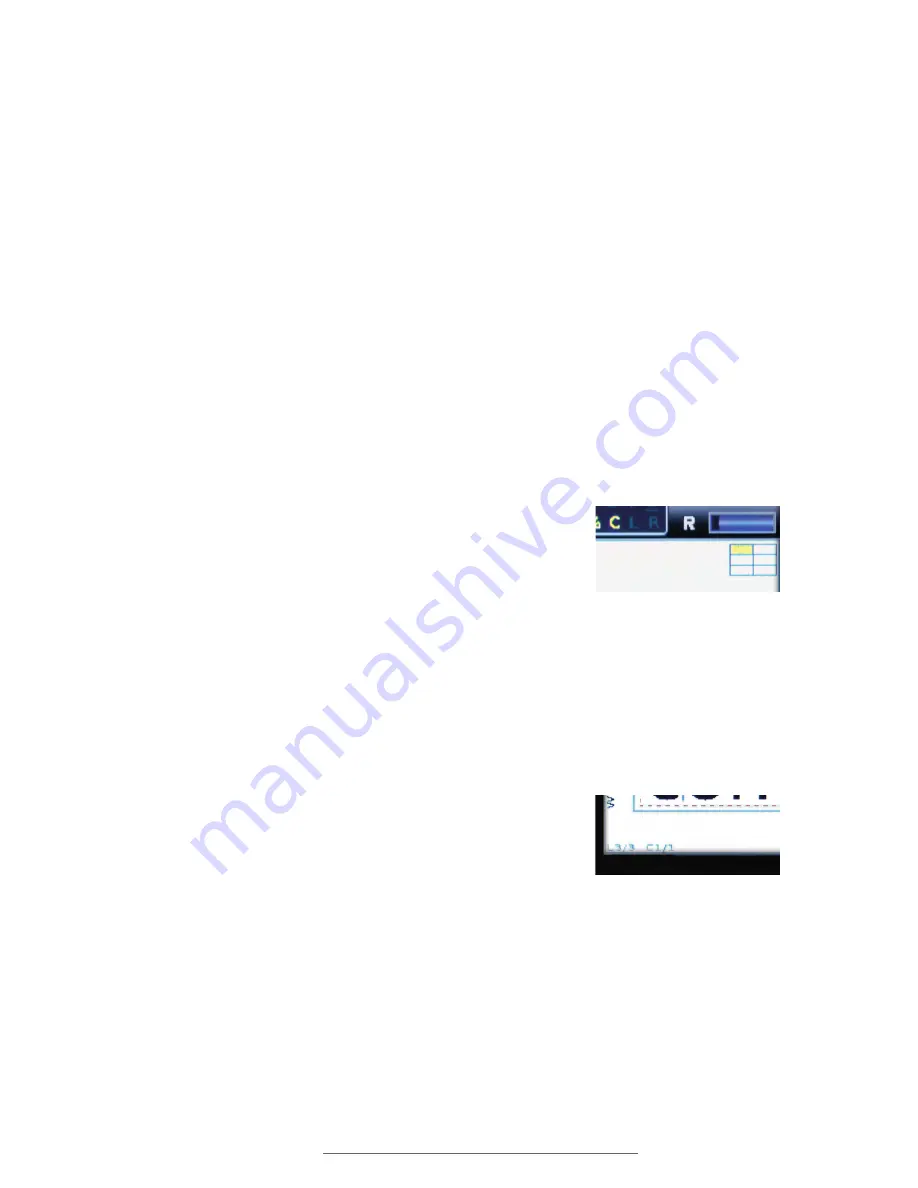
If you are working on a label with multiple cells, an icon with 
the label’s layout structure will be displayed at the top right 
corner of the screen. The current cell will be highlighted 
yellow on the layout icon. 

13.19 

Next Label

The 

Next Label

 key is a navigation key. In a multi-label 

project, pressing 

Next Label 

moves to the next label. Pressing 

Shift + Next Label

 will move back to the previous label.  

If there is no next label, pressing 

Next Label

 will create a 

new label.  

The number of the label currently being worked on is  
displayed in the lower left corner of the display screen.

A maximum of eight labels can be created in any one label project. 

Use 

Clear > Current Label 

to erase a label from a multi-label project.

Pressing Next Cell and Shift + 

Next Cell will move you forward 

and backward in a multi-cell 

layout.

The L3 on the display screen 

indicates that this is the third 

label in a multi-label project.

Summary of Contents for Lobo

Page 1: ...USER GUIDE 800 788 5572 DuraLabel com...

Page 2: ...the express written permission of Graphic Products Inc Products and corporate names appearing in this manual may or may not be registered trademarks or copyrights of their respective companies and ar...

Page 3: ...8 Battery 13 8 1 Battery Installation 13 8 2 Battery Charging 13 8 3 Improving Long Term Battery Life 13 9 Print Cartridge 14 9 1 Loading Cartridge 14 9 2 Removing Cartridge 15 9 3 Switching Cartridge...

Page 4: ...t 28 13 4 Label Length 29 13 5 Frame 30 13 6 Font 30 13 7 Font Size 30 13 8 Font Options 31 13 9 Text Align 32 13 10 Repeat Print 32 13 11 Barcode 33 13 12 Sequence 34 13 13 Time Date 35 13 14 Print O...

Page 5: ...celing a Print Job 50 16 5 Label Doesn t Feed When Print is Attempted 50 16 6 Label Print is Not Lined up Correctly 50 16 7 SD Card Isn t Working 50 16 8 Saved Label is Blank 51 16 9 Labels are Wrinkl...

Page 6: ...roduction The Lobo is a self contained thermal transfer printer used to make labels for a wide range of applications The Lobo Reference Card located on the bottom of the Lobo is designed to get you la...

Page 7: ...er is longer 2 1 2 BATTERIES The optional battery packs for the DuraLabel Toro and Lobo portable systems are warrantied for three years from the date of purchase The battery for the DuraLabel 2000 PLU...

Page 8: ...and cooling cycles abrasion and chemical exposures Graphic Products warranties labels made from its Premium vinyl supplies for a period of five 5 years Within five years of purchase and after proper a...

Page 9: ...type of maintenance work is done The Lobo may build a small static charge in static sensitive environments Do not operate the Lobo near flammable materials The power outlet should be near the printer...

Page 10: ...the printer The cutting blade is sharp and cycles automatically after a label is printed Under normal operating conditions the blade poses no harm to a user The Lobo is designed so that the blade cann...

Page 11: ...accept any interference received including interference that may cause undesired operation These limits are designed to provide reasonable protection against harmful interference when the equipment is...

Page 12: ...s LABEL CREATION LESSON The following lesson will walk you through making the simple label shown below It will also show you how to save and print the label Use the keyboard to type the word POWER The...

Page 13: ...rinting takes place When a print cartridge is loaded labels are printed cut and exit here F USB port USB connection allows labels to be created on a computer and printed on the Lobo G Power On Off swi...

Page 14: ...ug the power cord into the DC power adaptor and then plug the DC adaptor cord into the Lobo Finally plug the power cord into an AC power outlet The On Off switch is located beside the power cord input...

Page 15: ...oward you and move the plug upward so that the three metal prongs in the top part of the compartment slide into the three holes in the connector Once the plug is attached place the battery into the co...

Page 16: ...d a new cartridge into your Lobo The cartridge will only fit one way To load the printer position a cartridge face up above the cartridge compartment The label supply should feed out of the cartridge...

Page 17: ...bo grip the cartridge at the indented spaces shown right and lift the cartridge out 9 3 Switching Cartridges The Lobo can be left on when switching from one print cartridge to another cartridge The Lo...

Page 18: ...cally fill with the current date and or time when the label is printed Text is the default content type you can start to enter text onto a new label immediately just by typing on the keyboard The othe...

Page 19: ...lly cycle through all of the cells returning to the first cell You can also use Shift Next Cell to move back to a previous cell 10 1 4 MULTIPLE LABEL PROJECTS There can be more than one label in a sin...

Page 20: ...and press Enter You will be asked whether you want to save the work you ve done select No A new blank label will be created 10 2 1 LESSON 1 SIMPLE LABEL WITH TEXT AND SYMBOL This lesson will teach yo...

Page 21: ...hlighted in yellow Step 3 Enter content in first cell Type Pipe 20 Step 4 Enter content in second cell To move to the label s next cell press the Next Cell key Type Contents Press Enter to move the cu...

Page 22: ...ect the field that has the text Contents Press Font Options and turn Underline to On Press Enter Choose the Selected Field option and press Enter The Selected Field option lets you apply formatting to...

Page 23: ...lects whether the sequence will increment Inc or decrement Dec with each successive print Leave this set to Inc and press Enter The next screen selects the Input Sequence Count Value This allows you t...

Page 24: ...der to fit the label width This automatic field resizing won t occur if Font Size is set to Fixed The label s length will change based on how much content has been entered on the label Automatic lengt...

Page 25: ...ut of those in the current project and the current cell out of those in the current label are shown in the lower left C Vertical horizontal orientation indicator The small T in the lower right hand co...

Page 26: ...rtridge G Power status indicator The power status icon changes to indicate the Lobo s current power source This means that the Lobo is plugged into the power adaptor and currently using AC power This...

Page 27: ...revious cell press Shift Next Cell 12 1 4 MOVING BETWEEN LABELS If you are working on a project that has multiple labels press Next Label to move to the next label To move to a previous label press Sh...

Page 28: ...setting or to the left most value setting as in left justified text for example The right arrow is used to move a selection to the On position to the highest value setting or to the right most value s...

Page 29: ...and will not be able to open the file New begins a new label project If you were working on an existing label you will be asked whether you want to save the existing label before starting a new label...

Page 30: ...e up and down arrow keys to highlight the desired category and press Enter to browse the symbols in that category Use the arrow keys to highlight the desired symbol and press Enter to place that symbo...

Page 31: ...Enter to set the length of the label design You will be returned to the label canvas NOTE If the label already includes content the length may not be reduced There is also a Width value in this menu s...

Page 32: ...nt Size menu allows you to change the size of the label text By default font sizes are in Auto mode This automatically adjusts the size of text to fill the label as content is added To manually enter...

Page 33: ...t style you will choose where the style will be applied At Cursor Selected Field Entire Cell Entire Label or All Labels At Cursor will make the font style active at the cursor This option effectively...

Page 34: ...l Labels in the current project 13 10 Repeat Print Repeat Print is used for printing multiple copies of labels If the current label includes a sequence you will be prompted to Input Quantity This is t...

Page 35: ...ta formatting or a specific number of digits If the data entered does not match the necessary format Lobo will attempt to create a valid barcode by adjusting the data Always check your barcodes for ac...

Page 36: ...ou have set barcode options press Enter and you will be prompted to input the barcode value If Sequence has been turned on you will be walked through a series of sequence data input screens 13 12 Sequ...

Page 37: ...f the sequence For example if you wanted each number in the sequence to have three digits and the first sequence value to be 1 you would input 001 as the Start Value Printing To print labels with sequ...

Page 38: ...a design that would normally have black text on a white background would be printed with white text on a black background There are some layouts that include negative cells these cells are displayed...

Page 39: ...menu allows you to change the following formatting and printing options Set Defaults This menu allows you to edit the default values for many of the settings of the Lobo including text formatting lab...

Page 40: ...the displayed font size unit in Lobo menu screens Time Date Stamp This lets you edit the setting of the Time Date function The three choices are Time Date and Both By default both the time and date w...

Page 41: ...abel being worked on has a multiple cell layout pressing Next Cell will move to the next cell on the label canvas Pressing Shift Next Cell will move back to the previous cell If you are working on a l...

Page 42: ...e been made 13 22 Cut Pressing the Cut key advances the print supply reel approximately one inch and performs a cut 13 23 Status Pressing the Status key displays a list of all of the Lobo s current se...

Page 43: ...e data with the List of Labels printing function It only prints identical copies of labels 13 26 Image Move Image Move is used to move an image or symbol from its original position When you press Imag...

Page 44: ...your Lobo this way you will need the Lobo driver software installed on your computer 14 1 Installing Printer Driver The CD that comes with your Lobo includes the printer s driver software These steps...

Page 45: ...location and click Install on the Choose Install Location window that appears A window shows the installation progress 8 In the next window select Install printer drivers and click Next NOTE You will...

Page 46: ...orrect previous selections and click Finish when the information is correct 12 A Driver Wizard Completed Successfully window appears confirming the printer driver installation was completed successful...

Page 47: ...ed items you wish to remove then click Next 9 Review the list provided then click Finish 10 Click Restart The new Lobo printer driver may now be installed Follow directions in the previous section Ins...

Page 48: ...er 15 1 Cutter CAUTION The cutter blade is very sharp Do not place your fingers in the cutter Locate the cutter mechanism at the left of the cartridge bay The moving portion of this mechanism is a sci...

Page 49: ...e any build up present If excessive build up is present and more leverage is needed insert the swab through the cutter opening and clean the heater line from this angle 15 3 Polyester Printhead Shield...

Page 50: ...cartridge bay This is a black rubber roller located in the upper left of the cartridge bay near the printhead and cutter mechanisms Rub the swab along the entire length of the roller Try to clean arou...

Page 51: ...clockwise to the locking position the print cartridge is probably not pushed down completely To fix this press down lightly on the print cartridge with one hand while you turn the Cartridge Lock clock...

Page 52: ...rence After fixing the label supply position return the cartridge to the Lobo and lock it 16 6 Label Print is Not Lined Up Correctly A label s print can occasionally come out lined up incorrectly When...

Page 53: ...cartridge may print labels that are wrinkled or labels with some parts of the printed area missing This is usually a result of the ribbon not being properly tight If this happens turn the cartridge s...

Page 54: ...message you must unlock and remove the print cartridge to clear the jam Save the label you are working on and then turn off the printer Remove the print cartridge Attempt to clear the label material f...

Page 55: ...quarter rotation so that it locks in place When locked the Cartridge Lock should be in the position shown above If the Cartridge Lock is in the locked position and the error is still displayed there...

Page 56: ...le memory available via SD card slot Software Embedded label creation software Power Requirements Input Voltage 100 240V 2 5A 50 60HZ Output Voltage 19V DC 4 73A Battery optional Type Lithium Ion Li I...

Page 57: ...Label com 800 788 5572 17 Specifications 55 SPECIFICATIONS Ribbon Supply Type Resin Width 1 02 2 03 Capacity 59 Printer body Dimensions 4 35 H x 11 63 W x 12 25 D Weight 5 0 lbs excluding supplies bat...

Page 58: ...Symbols The Lobo library contains over 1200 symbols accessible by pressing the Symbol key This section shows all of these symbols organized by symbol category Note that future Lobo firmware updates ma...

Page 59: ...DuraLabel com 800 788 5572 18 Symbols 57 SYMBOLS CEMA Electrical Symbols ACOUSTIC DEVICES General ANALOG DIGITAL LOGIC FUNCTIONS General CIRCUIT PROTECTORS Circuit Breakers...

Page 60: ...Symbols DuraLabel com 800 788 5572 SYMBOLS Electrical Symbols cont CIRCUIT PROTECTORS CONT Current Limiters Fuse Lightning Arrester Protective Relay COMPOSITE ASSEMBLIES Amplifier Circuit Assembly Ne...

Page 61: ...572 18 Symbols 59 SYMBOLS CONTRACT SWITCHES CONTRACTORS RELAYS Aneroid Capsule Operated Switch Phase Shifter Rectifier Repeater Basic Contact Assemblies CONTRACT SWITCHES CONTRACTORS RELAYS CONT Elect...

Page 62: ...ls cont CONTRACT SWITCHES CONTRACTORS RELAYS CONT Flow Actuated Switch Limit Switch Sensitive Switch Liquid Level Activated Switch Locking Switch Nonlocking Switch Momentary or Spring Return Operation...

Page 63: ...abel com 800 788 5572 18 Symbols 61 SYMBOLS Relay Safety Interlock Selector or Multipositional Switch Switch Switches with Time Delay Features Switching Function Telegraph Key Temperature Activated Sw...

Page 64: ...62 18 Symbols DuraLabel com 800 788 5572 SYMBOLS Electrical Symbols cont CONTRACT SWITCHES CONTRACTORS RELAYS CONT Thermostat FUNDAMENTAL ITEMS Antennas Battery Attenuator Capacitors...

Page 65: ...com 800 788 5572 18 Symbols 63 SYMBOLS Capacitors Letter Combinations Continuous Loop Fire Detector Delay Function Delay Line Slow Wave Structure Ignitor Plug Oscillator Permanent Magnet Pickup Head...

Page 66: ...Label com 800 788 5572 SYMBOLS Electrical Symbols cont FUNDAMENTAL ITEMS CONT Spark Gap Squibb Electric Thermocouple Transducer SYMBOLS USED ON SYSTEM DIAGRAMS MAPS CHARTS Exchange Equipment Radio Sta...

Page 67: ...8 Symbols 65 SYMBOLS Telegraph Equipment TERMINALS CONNECTORS Cable Termination Telegraph Repeater Qualifying Symbols Telephone Set Coaxial Connector Connector Disconnecting Device Connectors Commonly...

Page 68: ...8 Symbols DuraLabel com 800 788 5572 SYMBOLS Electrical Symbols cont Test Block Wave Guide Flanges TRANSFORMERS INDUCTORS WINDINGS Core Inductor Transductor Transformer TERMINALS CONNECTORS CONT Termi...

Page 69: ...S TRANSMISSION PATH Alternative or Conditional Wiring Associated or Future Circuit Return Conductor Cable Wiring Distribution Lines Transmission Lines Intentional Isolation of Direct Current Path Pres...

Page 70: ...68 18 Symbols DuraLabel com 800 788 5572 SYMBOLS Electrical Symbols cont Eng Apparatus TRANSMISSION PATH CONT Strip Type Transmission Line Termination Waveguide...

Page 71: ...DuraLabel com 800 788 5572 18 Symbols 69 SYMBOLS Eng Apparatus cont Fire Safety General Safety...

Page 72: ...70 18 Symbols DuraLabel com 800 788 5572 SYMBOLS GHS 49 CFR General Safety cont...

Page 73: ...DuraLabel com 800 788 5572 18 Symbols 71 SYMBOLS GHS 49 CFR cont GHS 49 CFR No Border Diamonds...

Page 74: ...72 18 Symbols DuraLabel com 800 788 5572 SYMBOLS Hazard GHS 49 CFR No Border Diamonds cont...

Page 75: ...DuraLabel com 800 788 5572 18 Symbols 73 SYMBOLS Hazard cont Information Injury...

Page 76: ...74 18 Symbols DuraLabel com 800 788 5572 SYMBOLS Injury cont...

Page 77: ...DuraLabel com 800 788 5572 18 Symbols 75 SYMBOLS International Plugs Letter Symbols...

Page 78: ...76 18 Symbols DuraLabel com 800 788 5572 SYMBOLS Mandatory Maritime ISO 17631...

Page 79: ...DuraLabel com 800 788 5572 18 Symbols 77 SYMBOLS Maritime ISO 17631 cont Medical...

Page 80: ...78 18 Symbols DuraLabel com 800 788 5572 SYMBOLS Package Plastic Medical cont...

Page 81: ...DuraLabel com 800 788 5572 18 Symbols 79 SYMBOLS PPE Prohibited...

Page 82: ...80 18 Symbols DuraLabel com 800 788 5572 SYMBOLS Stack Prohibited cont...

Page 83: ...DuraLabel com 800 788 5572 18 Symbols 81 SYMBOLS Target Organs Tools WHMIS...

Page 84: ...800 788 5572 DuraLabel com 2013 2014 Graphic Products Inc All Rights Reserved v2 0 01 01 15...

Reviews: