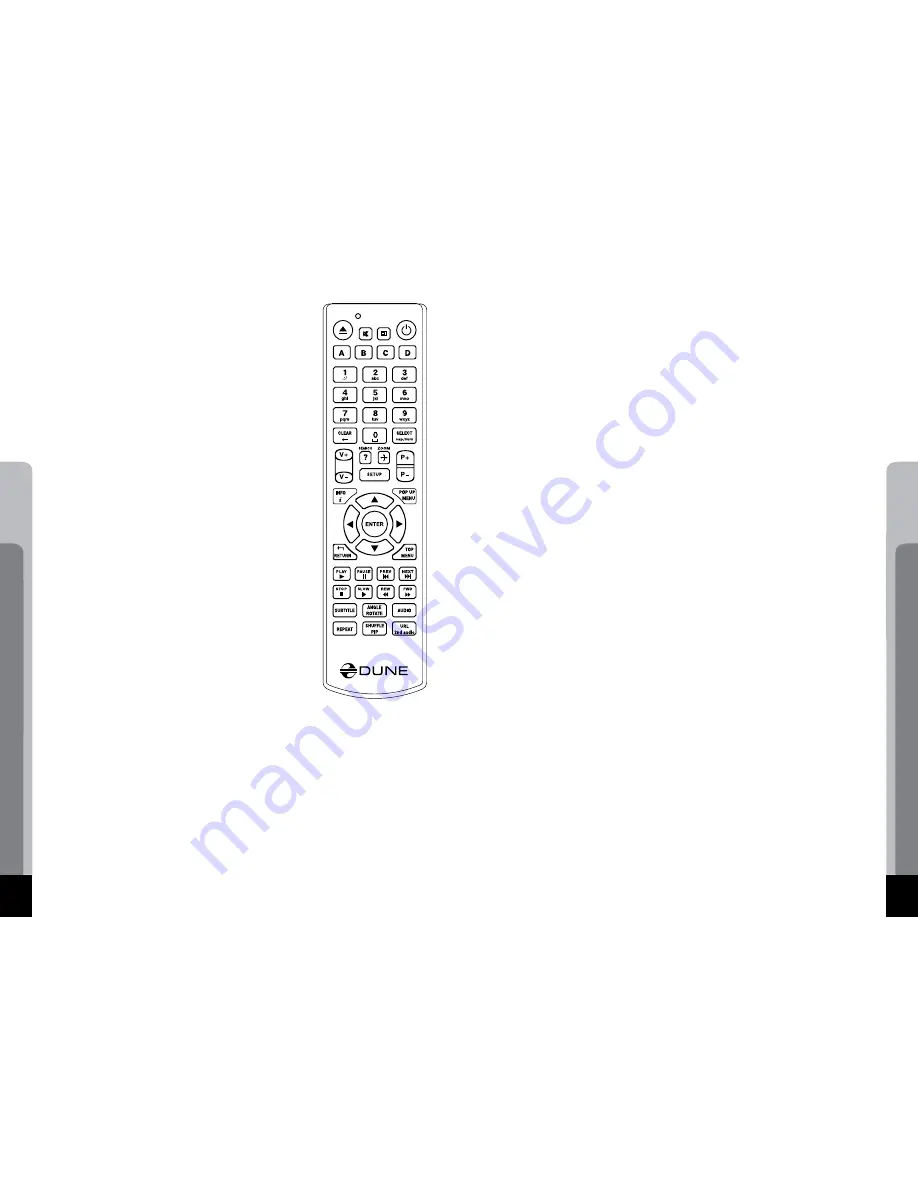
Dune HD Base 2.0
30
User manual
31
●
P+/P–: Increase/decrease the overscan area (useful to com-
pensate for picture cropping by a TV/projector).
●
To exit the picture zooming mode, press ENTER or wait until
automatic exit will be performed after a short period of time.
SETUP: Display picture parameters setup menu (contrast,
brightness, hue, saturation).
●
Up/Down: Select previous/next parameter.
●
Left/Right: Decrease/increase the current parameter value.
●
CLEAR: Reset to the default value.
●
To exit the picture parameter setting mode, press ENTER (or wait
until automatic exit occurs after a short period of time).
MODE: Switch the deinterlacing mode used for playback of in-
terlaced content. Modes available: motion adaptive (default), bob,
constant blend, disabled.
A (Red): Switch to the sound synchronization adjustment mode,
display information on current setting.
●
Left: decrease adjustment value ("move" the sound backwards
in time relatively to the video).
●
Right: increase adjustment value ("move" the sound forward in
time relatively to video).
●
To exit the adjustment mode, press ENTER or wait until automatic
exit occurs after a short period of time.
B (Green): First press: display information on the current status of
video frame rate adjustment.
●
Subsequent presses: turn on/off video frame rate adjustment. In
case of activated adjustment,
the video frame rate increases by a
factor of 25/23.976.
PREV (|<<): Start playback of the current file from the beginning
or switch to the previous file from the playlist (if the current playback
position is close to the file beginning).
NEXT (>>|): Switch to the next file from the playlist.
MENU: Toggl
e showing of the browser of the current playlist.
●
The browser displays the current playlist and the current item
played.
●
Up/Down/P+/P–: Navigate in the playlist.
●
ENTER: Switch to the selected item in the playlist.
●
REPEAT: Toggle the cyclic playback of the playlist.
●
SHUFFLE: Toggle the random playback of the playlist.
Blu-ray Playback
The player supports playback of Blu-ray discs (when a Blu-drive is connected to the player)
and Blu-ray images (ISO files and BDMV folders). When you play a Blu-ray disc or image, the
player uses so called "Blu-ray playback mode
"
. In the Blu-ray playback mode, Blu-ray fea-
tures such as Blu-ray menu, Blu-ray subtitles, BD-J, Bonus View, BD Live, are supported.
Note: when playing a Blu-ray disc or image, make sure that the System Storage USB flash
drive is attached to the player and is recognized by the player (because it may be required for
playback of the Blu-ray disc or image). Check Setup / System Information / System Storage
to see whether the System Storage is attached. For more information on the System Storage,
please see http://dune-hd.com/support/usb_flash_drive/.
Note: only Blu-ray discs without AACS protection are supported. Retail Blu-ray discs with
AACS protection are not supported.
To play a Blu-ray disc, navigate to the Main screen of the file browser, and insert the disc into
a Blu-ray drive attached to the player. The player will recognize the inserted Blu-ray disc and
highlight the corresponding optical drive item on the Main screen. Select this optical drive
item and press ENTER or PLAY. The player will start loading the Blu-ray disc.
To play a Blu-ray image, select the corresponding ISO file or Blu-ray folder (a folder contain-
ing "BDMV
"
subfolder), and press ENTER or PLAY. The player will start loading the Blu-ray
image.
Depending on a particular Blu-ray disc or image, its loading may take some time (up to sev-
eral minutes). While a Blu-ray disc or image is being loading, you may see a blank screen or
"loading..." or a similar message on the screen. After the Blu-ray disc or image is loaded, the
player will start playback of the disc (e.g. will show the disc menu).
In Blu-ray playback mode, the following RC buttons are available:
Left/Right/Up/Down/ENTER/RETURN: Navigate the disc menu.
POP UP MENU: Display an interactive menu of the disc (selection of scenes, switching be-
tween titles, additional materials, etc).
TOP MENU: Switch to the top menu of the disc.
A (Red), B (Green), C (Yellow), D (Blue): Perform functions specific to a particular Blu-ray disc.
STOP: Finish the playback, return to the Main screen of the file browser.
PAUSE: First press: switch to the pause mode.
●
Subsequent presses: frame-by-frame playback (switching to the next frame).
●
PLAY: Continue the playback.
SEARCH: Go directly to the desired time position.
PREV (|<<): Start playing back the current chapter from the beginning or switch to playback
of the previous chapter.
NEXT (|>>): Move to playback of the next chapter on the disc.
FWD (>>), REW (<<): Switch to accelerated forward/backward playback mode, switching
between acceleration modes: 1x, 2x, 4x, 16x.
●
PLAY: Return to the normal playback.
SLOW (|>): Switch to the slow-motion playback. Switching between modes: 1x, 1/2x, 1/4x,
1/8x.
●
PLAY: Return to the normal playback.
Summary of Contents for HD Base 2.0
Page 1: ...Dune HD Base 2 0 User Manual...
Page 24: ...Dune HD Base 2 0 46...
Page 25: ...www o2media eu...


