Dundalk LeisureCraft Cedar Indoor Cabin Sauna
Assembly Instructions
1.
Start by deciding where you would like your indoor cabin sauna to be placed. Locating it over a
moisture-sensitive surface such as hardwood or engineered flooring is not recommended as there
could be some spillage of water from time to time, and heat and humidity over time could have an
adverse effect on certain flooring materials. A reasonably level concrete or tile floor that will not be
damaged by heat or moisture is recommended. Also consider the availability of 220v power for your
sauna heater when deciding on your sauna’s location.
2.
Find the
half-height
side wallboards (there will be two, and they will have flat bottoms with no
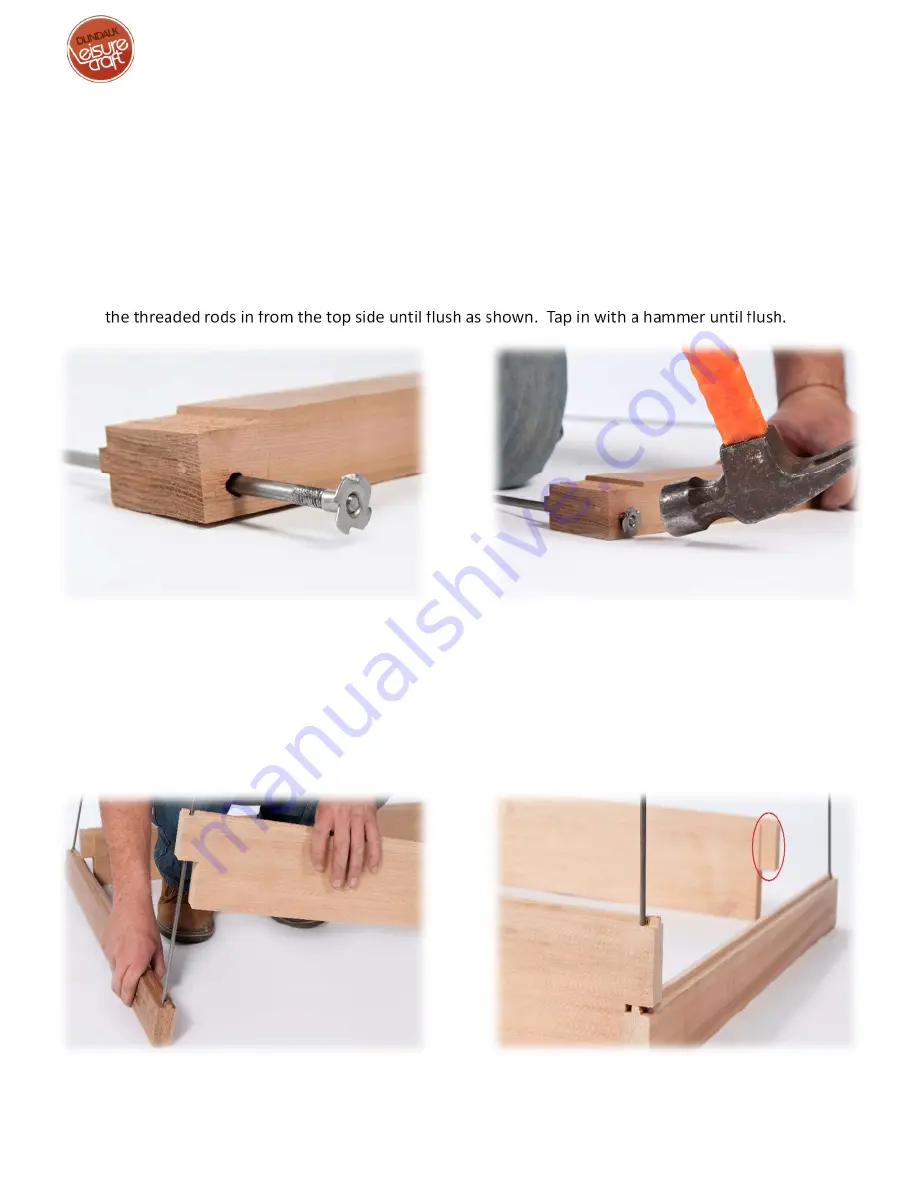
grooves in them) and insert the “knock-in” nuts into the bottom sides of the pre-drilled holes. Screw
the threaded rods in from the top side until flush as shown. Tap in with a hammer until flush.
Fig. 2.1
3. Stand one of the side board/threaded rod assemblies upright and lower the special flat-bottom front and
back wall boards (Note that just these bottom boards have flat bottoms – no groove) down onto it,
threading the rods through the holes in the ends (see Fig. 2.1) Note that with all of these wall boards, the
rabbeted (recessed) ends always have the rabbeted side (shown facing upward in Figs. 1.1 and 1.2) facing
towards the inside of the sauna. (see Fig 3.2)
Ph: 519-923-9813 | Fax: 866-458-7583 | Web: www.dundalkleisurecraft.com
Fig. 2.2
Fig. 3.1
Fig. 3.2 Rabbeted (recessed) face towards the
inside.


