


ENGLISH
Replacing the lamp
A lamp has finite product life. Using the lamp for long periods of time could cause
the pictures darker or the color tone poor. Note that each lamp has a different
lifetime, and some may burst or burn out soon after you start using them.
Preparation of a new lamp and early replacement are recommended. To prepare
a new lamp, contact to your dealer and tell the lamp type number.
Type number :
456-8755G
.
Turn the projector off, and unplug the power cord.
Allow the projector to cool for at least 45 minutes.
2.
Prepare a new lamp. If the projector is mounted
on a ceiling, or if the lamp has broken, also ask
the dealer to replace the lamp.
In case of replacement by yourself, follow the following
procedure.
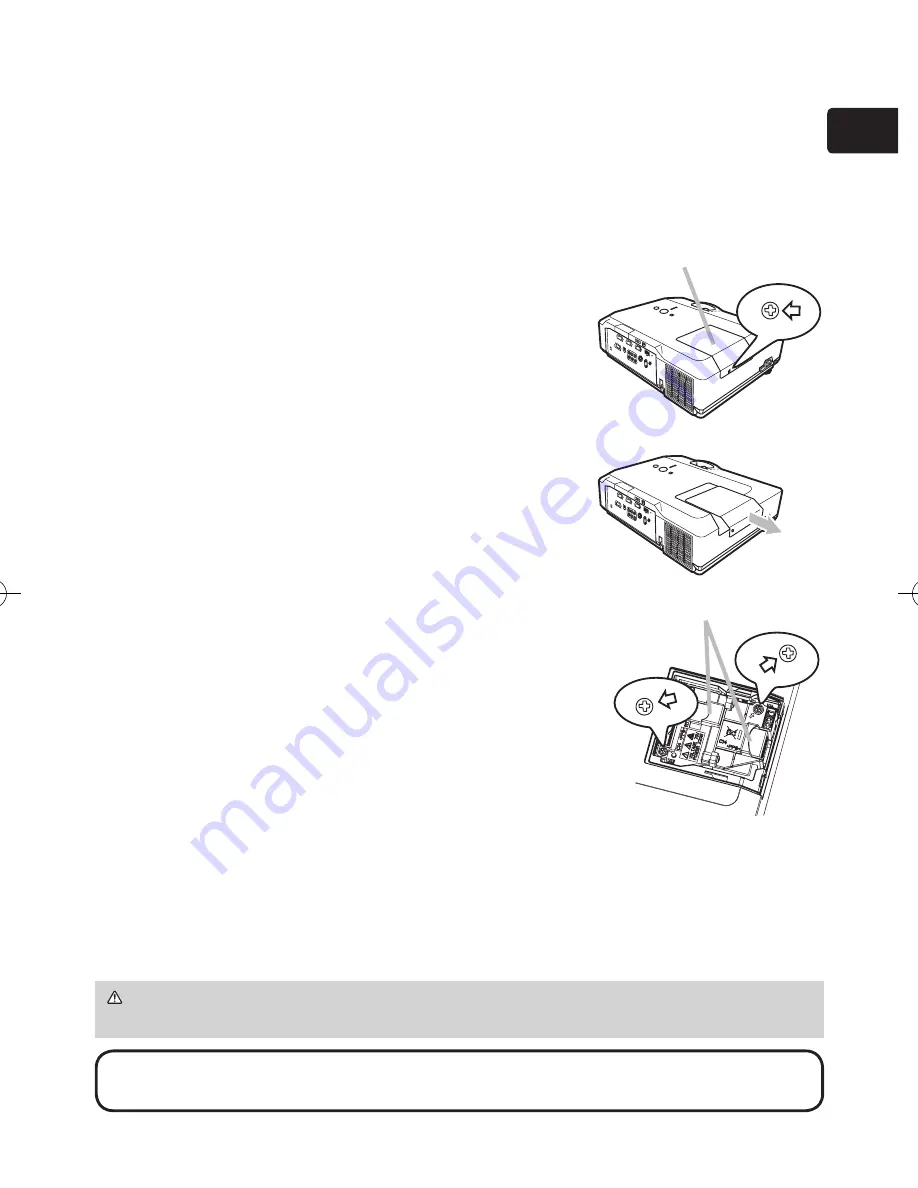
3.
Loosen the screw (marked by arrow) of the lamp
cover and then slide the lamp cover to the side to
remove it.
4.
Loosen the 2 screws (marked by arrow) of the
lamp, and slowly pick up the lamp by the handles.
5.
Insert the new lamp, and retighten firmly the
2 screws of the lamp that are loosened in the
previous process to lock it in place.
6.
Slide the lamp cover back in place and firmly
fasten the screw of the lamp cover.
7.
Turn the projector on and reset the lamp time
using the LAMP TIME item in the OPTION menu.
(1) Press the MENU button to display a menu.
(2) Point at the Go to Advanced Menu … in the menu
using the ▼/▲ button, then press the ► button.
(3) Point at the OPTION in the left column of the menu
using the ▼/▲button, then press the ► button.
(4) Point at the LAMP TIME using the ▼/▲ button, then
press the ► button. A dialog will appear.
(5) Press the ▲ button to select RESET on the dialog. It performs resetting the
lamp time.
NOTE
• Please reset the lamp time only when you have replaced the lamp,
for a suitable indication about the lamp.
CAUTION
►Do not touch any inner space of the projector, while the lamp
is taken out.
Lamp cover
Handles
Summary of Contents for ImagePro 8913-W
Page 1: ...LCD Projector Model 8913 W USER S MANUAL 080010...
Page 2: ......


