48
5. Using On-Screen Menu
(Advanced Page 2)
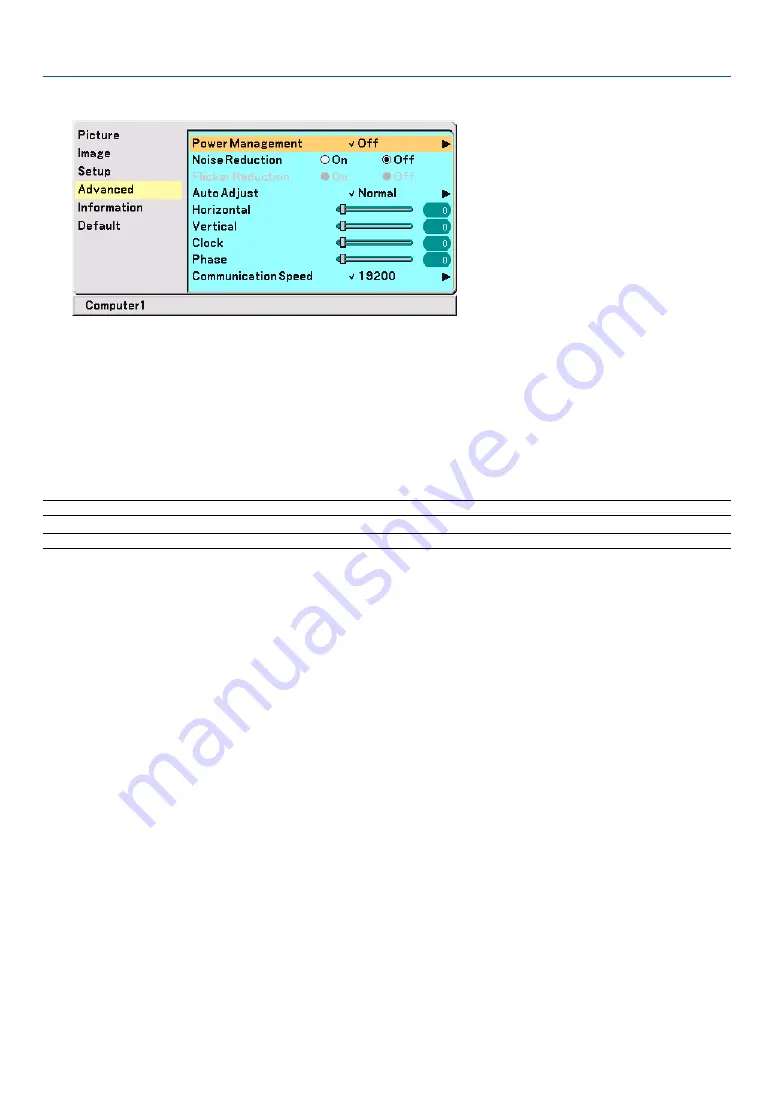
Enabling Power Management [Power Management]
When this option is on and there is no input for five minutes or more, the projector will automatically turn itself off.
Turning On Noise Reduction [Noise Reduction]
(not available for Video and S-Video signals)
Reduces video noise. Select “On” to enable the Noise Reduction feature.
Turning On Flicker Reduction [Flicker Reduction]
Reduces flicker which can occur in an interlaced signal. This feature is not available for RGB and HDTV signals.
NOTE: When the Flicker Reduction is ON, jagged lines can be visible depending on the signal. In that case, select OFF.
NOTE: This feature may not be available depending on your video equipment connected to the projector.
Setting Auto Adjust [Auto Adjust]
This feature sets the Auto Adjust mode so that the RGB image can be automatically or manually adjusted for noise
and stability. You can automatically make adjustment in two ways: Normal and Fine
Off ......................... The RGB image will not be automatically adjusted.
You can manually optimize the RGB image.
Normal .................. Default setting. The RGB image will be automatically adjusted. Normally select this option.
Fine ....................... Select this option if fine adjustment is needed. It takes more time to switch to the source than when “Nor-
mal” is selected.
Adjusting Position/Clock (when Auto Adjust is off)
This allows you to manually adjust the image horizontally and vertically, and adjust Clock and Phase.
[Horizontal/Vertical]
Adjusts the image location horizontally and vertically.
This adjustment is made automatically when the Auto Adjust is turned on.
[Clock] (available for RGB and HDTV signals only)
Use this item with the “Auto Adjust off” to fine tune the computer image or to remove any vertical banding that
might appear. This function adjusts the clock frequencies that eliminate the horizontal banding in the image. This
adjustment may be necessary when you connect your computer for the first time. This adjustment is made auto-
matically when the Auto Adjust is turned on.
Summary of Contents for ImagePro 8070
Page 1: ...Portable LCD Projector Models 8767A 8769 8771 8070 User s Manual...
Page 2: ......
Page 22: ...14 2 Installation and Connections...
Page 70: ...62 7 Appendix...
Page 81: ......


