background image

M9K9,&%

DE:G6I>DC

25

HXgZZcHZijeBZcj

HnhiZbHiVcYWn

Press the SCREEN button to access the SCREEN setup mode

• 

Select desired parameter you wish to change

• 

Page will return back to previous screen after 10 seconds of inactivity or by 

• 

pressing the RETURN button

SCREEN Setup Menu matrix

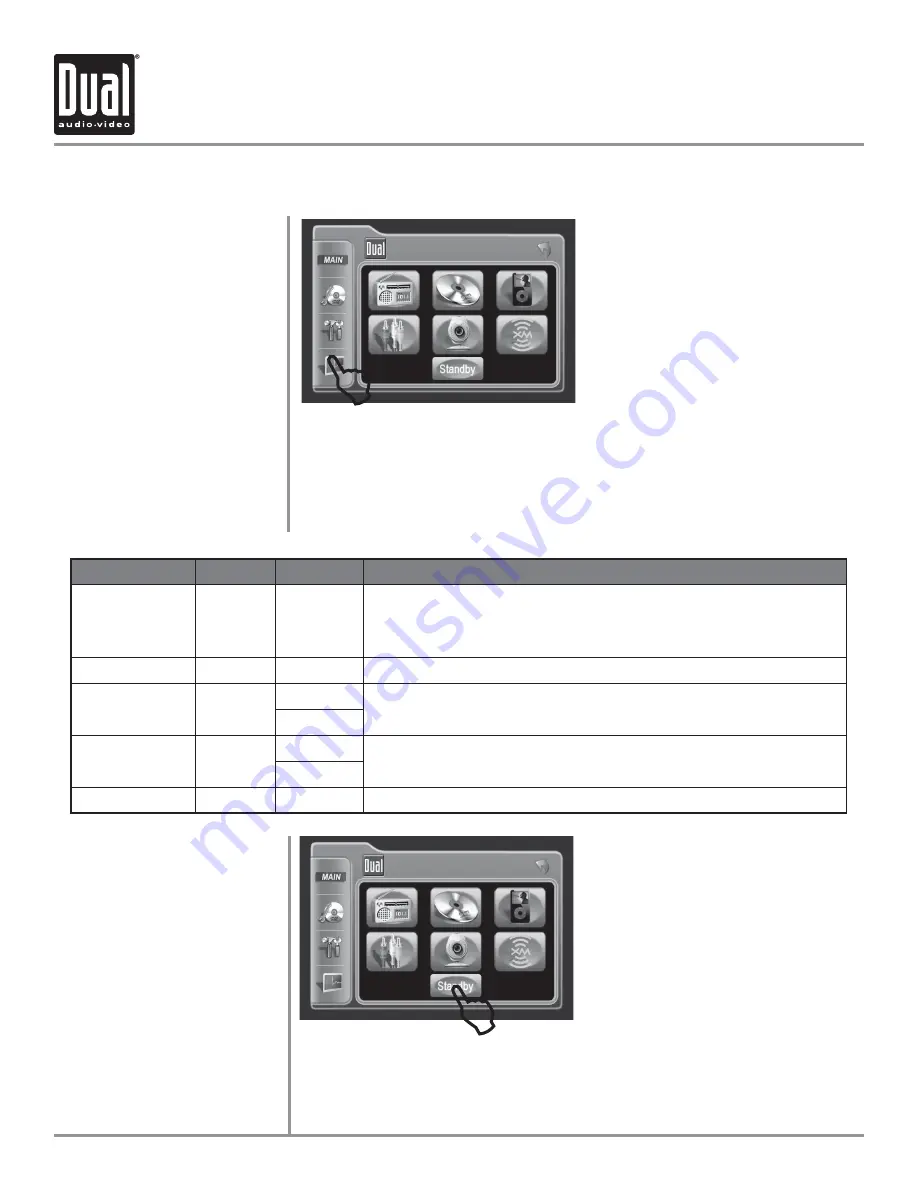
To conserve the LCD backlight lifespan or to eliminate glare while night driving, 
press STANDBY. The TFT screen will black out, however all other operations 
continue to operate. Press any button except 

KDAJB:

 or touch the screen again 

to return to normal viewing.

Settings

Default

Options

Function

Brightness

10

0 - 20

Press the 

W

 or 

X

 buttons on the remote or press the right 

rotary once and rotate clockwise/counter-clockwise to adjust 
the BRIGHTNESS to the desired setting

Screen Tilt

4

1 - 6

Select 1 to 6 to adjust the default tilt angle of the screen

Screen Saver

On

Off

Select On to activate the screen saver, Off to deactivate

On

TS Calibrate

No

No

Touch Yes to enter the Touch Screen calibration mode

Yes

Version

Software version of unit

/

H8G::CHZije"BZcj

/

Summary of Contents for XDVD710

Page 1: ... dash unit will not operate while the vehicle is moving This is a safety feature to prevent driver distraction In dash DVD video functions will only operate when vehicle is in Park and the parking brake is engaged It is illegal in most states for the driver to view video while the vehicle is in motion HV Zin CdiZh ...

Page 2: ...on Corporation and is intended for home and other limited viewing uses only unless otherwise authorized by Macrovision Corporation Reverse engineering or disassembly is prohibited Manufactured under license from Dolby Laboratories Dolby and the double D symbol are trademarks of Dolby Laboratories Windows Media and the Windows logo are trademarks or registered trademarks of Microsoft Corporation in...

Page 3: ...a 2 Japan Europe South Africa Middle East 3 Rep of Korea Taiwan Hong Kong Parts of Southeast Asia 4 Australia New Zealand Mexico South America 5 Eastern Europe Russia India Africa 6 China 2 3 4 5 7 8 9 10 11 12 13 14 15 20 21 22 23 24 25 28 29 30 31 32 39 40 42 43 44 45 46 47 48 49 50 51 EV Z DVD Region Management Warning Statement Safety Information Precautions Preparation Mounting Wiring Remote ...

Page 4: ... Z kZ XaZ h cdi c EVg º VcY dg i Z eVg c WgV Z h cdi jaan Zc V ZY L Zc chiVaa c i h jc i i Z chiVaaZg bjhi XdccZXi i Z eVg c WgV Z YZiZXi l gZ NZaadl 7ajZ AZVYº id i Z eVg c WgV Z bZX Vc hb c dgYZg id bV Z i Z eVg c WgV Z adX dji ZVijgZ deZgVWaZ 9D CDI h bean gdjcY i Z eVg c WgV Z YZiZXi l gZ id V bZiVa edgi dc d i Z kZ XaZ V ajgZ id egdeZgan chiVaa i Z eVg c WgV Z adX dji ZVijgZ XdjaY aZVY id Yg ...

Page 5: ... vehicle is moving Find a safe place to park and engage the parking brake 9 If you experience problems during installation consult your nearest DUAL dealer 10 If the unit malfunctions reset the unit as described on page 12 first If the problem still persists consult your nearest DUAL dealer or call tech assistance 1 866 382 5476 11 To clean the monitor wipe only with a dry silicone cloth or soft c...

Page 6: ...tion Zii c HiVgiZY s3LIDE THE UNIT OUT OF THE MOUNTING SLEEVE s NSTALL MOUNTING SLEEVE INTO OPENING BENDING TABS TO SECURE s ONNECT WIRING HARNESS AND ANTENNA AS SHOWN ON PAGES ONSULT A QUALIFIED TECHNICIAN IF YOU ARE UNSURE s ERTAIN VEHICLES MAY REQUIRE AN INSTALLATION KIT AND OR WIRING HARNESS ADAPTER SOLD SEPARATELY s4EST FOR CORRECT OPERATION AND SLIDE UNIT INTO MOUNTING SLEEVE s TTACH UNIT TO...

Page 7: ...h M9K9 CHI6AA6I DC meVcYZY L g c 9 V gVb cejih Djiejih The DVD video display of the in dash unit will not operate while the vehicle is moving This is a safety feature to prevent driver distraction In dash DVD video functions will only operate when vehicle is in Park and the parking brake is engaged It is illegal in most states for the driver to view video while the vehicle is in motion Altering or...

Page 8: ...7 L g c 9 V gVb Dei dcVa 6 K 8dccZXi dch M9K9 CHI6AA6I DC ...

Page 9: ... WViiZgn egdeZgan Id ghi jhZ i Z G GZbdiZ Xdcigda ndj bjhi ghi ejaa i Z WViiZgn chjaVi dc iVeZ dji chZgi dg gZeaVX c i Z 7ViiZgn GZbdkZ i Z WViiZgn daYZg GZbdkZ i Z WViiZgn gdb i Z WViiZgn daYZg chiVaa i Z cZl WViiZgn BV Z hjgZ id ZZe i Z h YZ je chZgi i Z WViiZgn daYZg 86JI DC 9d cdi hidgZ WViiZgn l i bZiVaa X dW_ZXih dg bViZg Vah ...

Page 10: ...ncorporates a motorized moving monitor Before final installation make sure the monitor will not obstruct the dash shifter or any other controls Upon installation do not attempt to move the monitor up down by hand Use the 6C A S T and DE C buttons on the front panel only The unit will stop if it encounters any obstacles during the open close sequence If this occurs remove the obstacle and press DE ...

Page 11: ...sc Rotate clockwise counter clockwise to select desired item and press once to CI G Press once to incrementally select desired source Selects the next chapter track for playback Selects the previous chapter track for playback Stop playback of DVD CD MP3 Press once for E6JH press again for EA6N Fast forward the content Fast reverse the content Press once to MUTE audio MUTE will appear in the second...

Page 12: ...C HH Press to G H I system The DVD video display of the in dash unit will not operate while the vehicle is moving This is a safety feature to prevent driver distraction In dash DVD video functions will only operate when vehicle is in Park and the parking brake is engaged It is illegal in most states for the driver to view video while the vehicle is in motion HV Zin CdiZh 8dcigda AdXVi dch Bdc idg ...

Page 13: ...ILL return to its last position automatically the next time it is opened Press C D button for 1 second to display DVD disc information Press and hold C D for 2 seconds to change TFT LCD 7G IC HH Press 6C A S to increase 6C A T to decrease or use KDAJB rotary to adjust the level up or down 0 minimum 20 maximum 10 is default If you experience abnormal operation or your unit is inoperable press the G...

Page 14: ...enu 4 Way Down 16 17 18 19 20 21 22 23 24 25 26 27 28 29 30 Root Repeat Chapter Track Down Chapter Track Up Fast Rewind Fast Forward Zoom Audio Angle Sub Title 31 32 33 34 35 36 37 38 39 40 1 2 3 4 The remote control uses one 3 volt Lithium CR2025 battery For best performance replace only with CR2025 or equivalent 8dcigda AdXVi dch GZbdiZ 7 6 40 37 38 36 34 32 30 28 26 39 35 33 31 29 27 25 17 18 1...

Page 15: ...rease KDAJB Displays DVD information Search function in the DVD CD disc mode Press to increment 76C9 or HIDE while in DVD MP3 mode Enter 6J9 D Setup mode Exit current menu Navigating system and DVD menus Enter the B6 C system menu 7G IC HH parameter setting for TFT Starts pauses playback or confirm settings Repeat playback from time frame A to time frame B Enters the title menu on DVD Enters the m...

Page 16: ... occur Use the front panel buttons or the remote control only s 4HE COLOR OF THE MONITOR VARIES BETWEEN VIEWING ANGLES 3ELECT THE angle with the most optimum view for your location s 4HE LAST POSITION OF THE MONITOR CAN BE SAVED IN MEMORY 4HE MONITOR WILL return to its last position automatically the next time it is opened CdiZh s 4HE VEHICLE MUST BE IN PARK AND THE PARKING BRAKE APPLIED TO VIEW V...

Page 17: ...KDAJB again to advance to desired parameter to be changed Turn KDAJB rotary 4 or 3 to adjust to desired level Press in KDAJB to advance to next selection Press and hold the KDAJB button on the front panel to exit Press the H A button Press the S T buttons on the remote to select an item to be adjusted Press W or X to adjust the desired setting Press the H8 button on the remote control to exit the ...

Page 18: ...ss and hold C D for 2 seconds to access E 8IJG B CJ press C D briefly again to step to next selection Press T or S to adjust the sharpness 0 minimum 20 maximum Press T or S to adjust the contrast 0 minimum 20 maximum Press T or S to adjust the color 0 minimum 20 maximum Press T or S to adjust the brightness 0 minimum 20 maximum Press T or S to adjust the tint 0 minimum 20 maximum PICTURE MENU SHAR...

Page 19: ... press once to CI G Press once to incrementally select desired source Selects the next chapter track for playback Selects the previous chapter track for playback Stop playback of 9K9 89 BE Press once for E6JH press again for EA6N Fast forward the disc content Fast reverse the disc content Press once to BJI audio press again to return audio an icon indicator will flash on the I I monitor Press EDL ...

Page 20: ...I monitor is closed AD86A indicator icon will be off when 9 HI6C8 DX is selected HI G D radio station indicator Displays IG68 time IJC C frequency BE 9 info 8AD8 etc ADJ9C HH selection indicator HZXdcYVgn A89 c dgbVi dc AD8 HI I B ADJ9 1 4 2 3 ZcZgVa DeZgVi dc ...

Page 21: ...splayed Touch to HI6C97N screen touch screen again or any button to resume display Note KDAJB level can be controlled in HI6C97N mode Touch to access 6JM A 6GN 6 K CEJI mode Touch to access H8G C H IJE menu Touch to access C G6A H IJE menu Touch to access 89 9K9 H IJE menu 89 9K9 must be inserted to function Touch to access B6 C Source menu G6E 9 9 6A can also control touch screen functions from t...

Page 22: ...erse Mirror camera input image 180 degrees Video Format Auto Auto System will auto detect NTSC or PAL NTSC For NTSC compatibility PAL For PAL compatibility TFT Auto Open Off On TFT panel will automatically open when IGN is turned on Off TFT panel will not auto open when IGN is turned on Manual TFT will only open close when OPEN button is pressed Anti theft Code 0000 Must enter password to turn ant...

Page 23: ...jhi c GVY d gZfjZcXn HiZe HiZe HiZe HiZe HiZe 1 Touch top left corner of screen 2 Touch GENERAL setup button 3 Touch USA 4 Touch the setting for your region Touch RETURN to exit C G6A HZije 6Y_jhi c GVY d gZfjZcXn 3 4 5 1 2 ...

Page 24: ...top left corner of screen 2 Touch GENERAL setup button 3 Touch 00 00 area in the CLOCK row 4 Keypad should now appear 5 Enter HOURS touch ok 6 Enter MINUTES touch ok 7 Touch AM or PM to set 8 Touch G IJGC to exit If you desire 24Hr format select 24Hr from CLOCK MODE then follow steps 1 8 3 5 1 2 8 7 6 ...

Page 25: ... 1 Touch top left corner of screen 2 Touch GENERAL Setup button 3 Touch down arrow button 4 Touch 5 Enter 0000 then press ok 6 Touch OFF 7 Touch ON 8 Touch again 9 Enter your new 4 digit password then press ok 10 Touch RETURN to exit 1 2 3 4 CdiZ i h gZXdbbZcYZY i Vi ndj X ddhZ ndjg dlc Y i eVhhldgY XVgZ jaan lg iZ i Ydlc hdbZl ZgZ VcY ZZe c V hV Z adXVi dc c i Z ZkZci ndj ZkZg addhZ dg dg Zi ndjg...

Page 26: ...l other operations continue to operate Press any button except KDAJB or touch the screen again to return to normal viewing Settings Default Options Function Brightness 10 0 20 Press the W or X buttons on the remote or press the right rotary once and rotate clockwise counter clockwise to adjust the BRIGHTNESS to the desired setting Screen Tilt 4 1 6 Select 1 to 6 to adjust the default tilt angle of...

Page 27: ...g i Z I I Y heaVn Wg icZhh I h XVc Vahd WZ hZi Wn egZhh c i Z C D Wjiidc dc i Z gdci I I eVcZa HiZe HiZe HiZe HiZe HiZe 1 Touch top left corner of screen 2 Touch SCREEN setup button 3 Touch to dim TFT 4 Touch to brighten TFT 0 20 is possible Default 10 5 Touch RETURN to exit 1 2 3 4 5 ...

Page 28: ... Zl c Vc aZ c ndjg kZ XaZ HiZe HiZe HiZe HiZe HiZe 1 Touch top left corner of screen 2 Touch SCREEN setup button 3 Touch a number displayed in SCREEN TILT row 4 Touch desired angle for best viewing angle 1 6 is possible Default 4 5 Touch RETURN to exit 1 2 3 4 5 ...

Page 29: ...2 Touch SCREEN setup button 3 Touch No in TS Calibration row 4 Then touch Yes 5 Touch and hold the pointers as indicated on the screen for 2 seconds each 6 Screen will automatically return to MAIN MENU touch RETURN to exit 3 4 1 2 CdiZ dg egdeZg XVa WgVi dc ndj bjhi idjX ZVX ed ciZg dg hZXdcYh ed ciZgh VgZ cdi idjX ZY egdeZgan i Z XVa WgVi dc hZfjZcXZ l aa hiVgi dkZg jci a i Z XVa WgVi dc h YdcZ X...

Page 30: ...H I page down Auto station H86C button MANUAL TUNE up MANUAL TUNE down SEEK TUNE up SEEK TUNE down 6H EH AUTO STORE PRESET SCAN 76C9 selection FM1 FM2 FM3 AM KDAJB indicator ADJ9 indicator Equalizer indicator touch to access 6J9 D Setup menu Current radio frequency indicator Current radio 76C9 indicator 6B B IjcZg DeZgVi dc 6B B IjcZg I I 9 heaVn 19 18 17 8 5 1 2 4 3 6 7 9 10 14 13 12 11 15 16 ...

Page 31: ...r 10 seconds at each station Press H86C again to cancel Touch AD8 button on the TFT to activate AD8 9M tuning When the AD86A function is on AD8 will appear Only radio stations with a strong signal are received 9 HI6C8 9M is for radio stations that are far away and or have weak signals Up to 36 FM stations and 12 AM stations can be stored To store a station select the desired band and station Press...

Page 32: ...Z kZ XaZ h cdi c EVg º VcY dg i Z eVg c WgV Z h cdi jaan Zc V ZY L Zc chiVaa c i h jc i i Z chiVaaZg bjhi XdccZXi i Z eVg c WgV Z YZiZXi l gZ NZaadl 7ajZ AZVYº id i Z eVg c WgV Z bZX Vc hb c dgYZg id bV Z i Z eVg c WgV Z adX dji ZVijgZ deZgVWaZ 9D CDI h bean gdjcY i Z eVg c WgV Z YZiZXi l gZ id V bZiVa edgi dc d i Z kZ XaZ V ajgZ id egdeZgan chiVaa i Z eVg c WgV Z adX dji ZVijgZ XdjaY aZVY id Yg k...

Page 33: ... audio can be heard while the vehicle is in motion without engaging the parking brake Follow these two initialization procedures carefully to allow video playback on XDVD710 front panel TFT There are two situations that start the PARKING BRAKE sequence ghi h ijVi dc h l aZ Yg k c 1 Stop vehicle put in Park make sure PARKING BRAKE is off released 2 Depress PARKING BRAKE for 1 second 3 Release PARKI...

Page 34: ...VD software encoded for other region areas than the region areas for which it has been designed The XDVD710 will play discs labeled Region 1 or All 9K9 gZ dc XdYZh 1 USA Canada 2 Japan Europe South Africa Middle East 3 Rep of Korea Taiwan Hong Kong Parts of Southeast Asia 4 Australia New Zealand Mexico South America 5 Eastern Europe Russia India Africa 6 China CdiZh Some DVD discs can be played on...

Page 35: ...ic DVD disc for other features Note If PARENTAL Lock is activated and the disc inserted is not authorized a 4 digit code must be entered and or the disc be authorized See RATING MENU on page 42 Note Only one disc can be inserted at a time Press the EJECT button If the disc loads abnormally or an system error occurs press and hold the eject button for 3 seconds to reset the loading mechanism The di...

Page 36: ...DJ8 H8G C areas outlined below A area can be used in any mode to access B6 C menu A F areas can be used in 9K9 mode to access A Displays B6 C menu B Displays 9K9 track information C Selects EG K DJH chapter D Selects C MI chapter E Displays the full 9K9 transport controls F DID search menu 9K9 DeZgVi dc IdjX HXgZZc 8dcigdah ...

Page 37: ...lects C MI chapter E Displays the full 9K9 transport controls F DID search menu 6G 6 6 6XXZhh B6 C BZcj 6G 6 7 9 heaVnh IgVX c dgbVi dc 6G 6 8 HZaZXih EG K DJH IgVX 6G 6 9 HZaZXih C MI IgVX 6G 6 jaa 9K9 IgVchedgi 8dcigdah 6G 6 9K9 HZVgX CdiZ 6 9K9 Y hX bjhi WZ chZgiZY id VXXZhh i ZhZ jcXi dch VcY ZVijgZh 9K9 DeZgVi dc IdjX HXgZZc 8dcigdah ...

Page 38: ... scroll through the following DVD Repeat Title Repeat Chapter Repeat Off A Use the A B function to define a specific area of disc to repeat Press the Repeat A B button to set a start point of the A selection B Press the A B button again once you reach the desired end point B of the repeated section The selected portion of the DVD will now repeat continuously C Press A B button once again to cancel...

Page 39: ...ng to their intentions some functions may not work as intended Please be sure to read the instructions provided with each disc HZVgX c V 9K9 HZVgX c Wn I bZ I iaZ dg 8 VeiZg HZVgX Wn I B ZmVbeaZ Touch the top right screen AREA F 1 Touch the in the TIME area 2 A touch keypad will now appear enter your desired TIME to search 3 Press ok 9K9 DeZgVi dc HZVgX c V 9K9 ...

Page 40: ...r desired language You can also touch AREA E and use the button to change languages If you are watching a disc recorded in multiple languages with subtitles press the SUB T button on the remote control to choose your desired subtitle You can also touch AREA E and use the button to change subtitles During playback press the INFO button on the remote control or touch AREA B to display the DVD playba...

Page 41: ...tup page Press to select desired disc subtitle language English French Spanish Auto Off DEFAULT Press to select desired disc audio language English DEFAULT French Spanish Press to select desired disc menu language English DEFAULT French Spanish A6C J6 HZije BZcj 9 hX HjWi iaZ 6jY d AVc jV Z 9K9 BZcj CdiZ 6 9K9 Y hX bjhi WZ chZgiZY id VXXZhh i ZhZ jcXi dch VcY ZVijgZh 9K9 HZije BZcj AVc jV Z ...

Page 42: ...on to select gdb i Z daadl c bZcjh Press to select desired TV shape Select On to activate angle mark Press to select desired view mode K YZd HZije BZcj IK H VeZ 6c aZ BVg K Zl BdYZ CdiZ 6 9K9 Y hX bjhi WZ chZgiZY id VXXZhh i ZhZ jcXi dch VcY ZVijgZh 9K9 HZije BZcj K YZd CDGB6A L 9 On DEFAULT Off FILL Original H FIT W FIT FIT to Screen DEFAULT Pan Scan 4 3 16 9 DEFAULT ...

Page 43: ...de 2 Write the code down 3 Save in a safe place When unlock symbol is displayed press current rating then select desired rating 1 Kid Safe 2 G 3 PG 4 PG 13 5 PG R 6 R 7 NC 17 8 Adult DEFAULT In the event you forget or loose your E6G CI6A AD8 password enter 9991 GVi c HZije BZcj cVWaZ EVgZciVa AdX EVhhldgY HZii c EVgZciVa AdX EVhhldgY GVi c HZii c EVgZciVa EVhhldgY DkZgg YZ CdiZ 6 9K9 Y hX bjhi WZ ...

Page 44: ...ck Touch to PAGE down Touch to PAGE up Touch to FAST REVERSE current track Touch to FAST FORWARD current track Touch to SCAN CD tracks for 10 seconds each track touch again to deactivate Touch to activate deactivate REPEAT Single mode Touch to activate deactivate RANDOM mode Current track and total number of tracks on the disc Elapsed playback time Playback information Volume indicator 89 DeZgVi d...

Page 45: ...gVX 6XXZhh EgZk djh CZmi EV Z After inserting a CD disc files will play in numerical order in the directory Touch to display keypad Enter desired track number and press ok Touch desired track for DIRECT TRACK access Touch to view UP DOWN pages of available TRACKS 89 DeZgVi dc ...

Page 46: ... Touch to PAGE down Touch to PAGE up Touch to PREVIOUS FOLDER Touch to NEXT FOLDER Touch to FAST FORWARD MP3 tracks touch PLAY to deactivate Touch to activate deactivate REPEAT Single mode Touch to activate deactivate RANDOM mode Touch to access the DIRECT TRACK access keypad Current track and total number of tracks on the disc Elapsed playback time Playback information Volume indicator BE LB6 DeZ...

Page 47: ...X 6XXZhh EgZk djh CZmi EV Z After inserting an MP3 WMA disc files will play in numerical order in the directory Touch to display keypad Enter desired track number and press ok Touch desired track for DIRECT TRACK access Touch to view UP DOWN pages of available TRACKS BE LB6 DeZgVi dc ...

Page 48: ...s that do not include MP3 WMA files are skipped This unit may not play files in the order they were recorded in Refer to your recording software s user s manual for more information s 3 LEVEL s 3 LEVEL s 9ELLOW OOK s 9ELLOW OOK 2 s ULTI SESSION s AXIMUM FILES s AXIMUM FOLDER LEVELS s 0 UDIO AYER ISO9660 standards s AXIMUM NESTED FOLDER DEPTH IS INCLUDING THE ROOT FOLDER s 6ALID CHARACTERS FOR FOLD...

Page 49: ...WMA extension 32kHz 48kHz 32kHz 48kHz 40kbps 320kbps constant Variable bit rates 40kbps 192kbps constant Variable bit rates CdiZ Some files may not play or be displayed correctly depending on sampling rates and bit rates For best results use the following settings when burning an MP3 disc 128kbps or higher constant bit rate 44 1kHz or higher sampling frequency For best results use the following se...

Page 50: ...ipment of the product L Vi id Yd4 1 Before you call for service check the troubleshooting guide in your owner s manual A slight adjustment of any custom controls may save you a service call 2 If you require service during the warranty period you must carefully pack the product preferably in the original package and ship it by prepaid transportation with a copy of the original receipt from the reta...

Page 51: ...Wji cd k YZd Parking brake safety circuit not connected Parking brake not applied Check connections at parking brake Apply parking brake Cd k YZd Y heaVn l Zc c gZkZghZ Reverse circuit not connected Vehicle is not in reverse Check connections at reverse lamp Select reverse gear 9K9 YdZh cdi hiVgi eaVnWVX Physical defect in media Wrong region Check media for scratches Use discs labeled Region 1 or ...

Page 52: ...7 bb Y V dcVa bZVhjgZbZci View angle up down left right Resolution L m Brightness cd m2 Contrast ratio Elements Operating voltage K98 cZ Vi kZ gdjcY Speaker output impedance s d bh Line output voltage Kdaih Line output impedance d bh Chassis dimensions m m m m bb Design and specifications subject to change without notice CEA 2006 Power Standard Specifications reference 14 4VDC 0 2V 20Hz 20kHz Powe...

Page 53: ...Dual Electronics Corp Toll Free 1 866 382 5476 www dualav com 2009 Dual Electronics Corp All rights reserved NSA0509 V03 Printed in China ...

Page 54: ......

Page 55: ......

Reviews: