background image


4

BASIC FUNCTION 

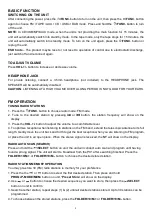
SWITCHING ON THE UNIT   

After connecting the power, press the 

/FUNC.

 button to turn on the unit, then press the 

/FUNC.

 button 

again to choose FM / TAPE / AUX / CD / USB or DAB mode. Press and hold the 

/FUNC. 

button to turn 

off the unit. 

NOTE:

 In CD/USB/MP3/AUX mode, when the unit is not providing the main function for 15 minutes, the 

unit will automatically switch into standby mode.


In the tape mode, only the tape stops for 15 minutes, the 

unit will automatically switch into standby mode. To turn on the unit again, press the 

/

FUNC.

 button or 

replug the unit. 

ESD hints

 – The product maybe reset or not reset to operation of control due to electrostatic discharge, 

just switch off and reconnect again.   


TO ADJUST VOLUME 

Press 

VOL.+/- 

button to increase or decrease volume. 


HEADPHONE JACK 

For  private  listening,  connect  a  3.5mm  headphone  (not  included)  to  the  HEADPHONE  jack.  The 
SPEAKER will be automatically disabled. 

CAUTION

: LISTENING AT A HIGH VOLUME OVER A LONG PERIOD IS NOT GOOD FOR YOUR EARS. 


FM OPERATION   

TUNING RADIO STATIONS


1.  Press the 

/FUNC. 

button to choose radio mode: FM mode. 

2.   Tune  to  the  desired  station  by  pressing 

  or 

  button,  the  station  frequency  will  show  on  the 

display.   

3.  Press the 

VOL.+/-

 button to adjust the volume to a comfortable level. 

4. To optimize reception when listening to stations on the FM band, extend the telescopic antenna to its full 
length. Gently move the unit back and forth to get the best reception when you are listening to FM program, 
or place the unit in an open place. When the stereo signal is received, the

 ST

 will show on the display. 

 
RADIO AUTO SCAN (SEARCH) 

Press and hold the 

/SELECT 

button on unit, the unit will conduct auto scan and program until having 

found a strong signal. The unit will start to broadcast from the P01 after searching finished. Press the 

FOLDER/10/M.+ 

or 

FOLDER/10/M.- 

button


to choose the desired stored station. 


RADIO STATION MEMORY OPERATION 

You may pre-store 30 (FM) radio stations in memory for your preference. 
1. Press the the 

  or 


button to select the first desired station. Then press and hold 

PROG./P-MODE/MEM.

 button on unit, “

Preset Store

” will show on the display.   

2. Use 

  or 


button to choose the desired sequence you want to store, then press the 

/SELECT


button on unit to confirm. 

3. Search another station, repeat steps (1) & (2) until all desired stations stored. Up to 30 stations can be 

programmed. 

4. To choose between the stored stations, press the 

FOLDER/10/M.+ 

or 

FOLDER/10/M.- 

button. 


Summary of Contents for DAB-P 210

Page 1: ...Instruction Manual PORTABLE CD MP3 USB CASSETTE PLAYER WITH DAB RADIO Dual DAB P 210 IMPORTANT Please read before using and retain for future reference ...

Page 2: ...zed modifications could void the user s authority to operate the equipment Avoid installing the unit in locations described below 1 Places exposed to direct sunlight or close to heat radiating appliance such as electric heaters on top of other stereo equipment that radiate too much heat 2 Places locking ventilation or dusty places 3 Places subject to constant vibration 4 Humid or moist places Oper...

Page 3: ...2 FUNC BUTTON 23 SPEAKERS 24 CASSETTE COMPARTMENT 25 AC SOCKET 26 BATTERY COMPARTMENT POWER SOURCE This unit is designed to be operated on AC DC AC OPERATION Plug the smaller end of AC power cord into AC jack on unit and the other bigger end into household AC wall outlet The batteries will be automatically disconnected DC OPERATION Open the BATTERY COMPARTMENT DOOR Install 6 pcs UM 1 D size batter...

Page 4: ...ssing or button the station frequency will show on the display 3 Press the VOL button to adjust the volume to a comfortable level 4 To optimize reception when listening to stations on the FM band extend the telescopic antenna to its full length Gently move the unit back and forth to get the best reception when you are listening to FM program or place the unit in an open place When the stereo signa...

Page 5: ...et 1 then press the SELECT button to confirm Repeat this operation to save up to 30 preset stations Manual tune To do a manual tune press the STOP MENU INFO button to enter menu selection select the Manual tune option and press the SELECT button to confirm Use the or button to tune to the desired stations Now playing information While a station is playing the screen shows its name and DLS Dynamic ...

Page 6: ...ss to play cassettes REWIND From stop mode press to rewind the tape toward the beginning F FWD From stop mode press to advance the tape toward the end STOP EJ Press to stop current tape activity or to open the cassette compartment door when no buttons are active PAUSE Press to interrupt tape play Press the second time to resume tape play PLAYING A CASSETTE TAPE 1 Press the FUNC button to Choose TA...

Page 7: ...pen CD compartment lid grasp the CD by its edges and carefully take it out Note 1 To ensure good system performance wait until the disc tray completely reads the disc before proceeding 2 If no disc is loaded into the compartment or the disc is placed upside down the display will show N0 DISC PLAYING A DISC 1 After loading the disc the unit starts playback automatically 2 To interrupt playback pres...

Page 8: ...u have two options 1 Press the STOP MENU INFO button when the disc is stopped and 2 Open the CD compartment lid program will be erased NOTE If there are several folders in the USB or MP3 disc it is necessary to program folders first and then the tracks Press the FOLDER 10 M or FOLDER 10 M button to select the first folder you want to program After that press or button to chose the first desired tr...

Page 9: ...the USB the unit will start playback automatically 3 Press the STOP MENU INFO button on unit to stop playing The display will show total number of USB and folders and STOP 4 Proceed repeat play repeat 1 repeat folder repeat all RANDOM INTRO program play skip up and back operation as the same described in above CD MP3 OPERATION CAUTION Do not use any USB extension cable for connecting the USB bar w...

Page 10: ...tion temperature 5 o C 35 o C RECEIVER SECTION FM Frequency Range 87 5 108 MHz DAB Frequency Range 174 928 239 200MHz COMPACT DISC SECTION Optical Pickup 3 Beam Laser Frequency Response 100Hz 16KH z CASSETTE SECTION Bias System DC Bias Frequency Response 125 4 K H z Wow and Flutter 0 4 WRMS AUDIO SECTION Power output Maximum 1 5 Watts x 2 ACCESSORIES Instruction Booklet 1 AC Cord 1 ...

Reviews: