background image


OPERATION


Internal Battery 

Warning!  

!


The


Internal


battery


pack


should


only


be


replaced


by


an


authorized


DT


Research


service


representative.


Please


contact


your


product


and/or


service


provider


for


internal


battery


replacement


service.


Powering ON and OFF 

To


activate


the


DT395BV,


push


and


quickly


release


the


Power


Button.


The


display


will


come


on


in


a


few


seconds.


To


put


the


DT395BV


in


Standby


mode,


push


and


quickly


release


the


Power


Button.


To


turn


the


DT395BV


off


for


extended


storage,


power


off


safely


using


any


software


function


that


"shuts


down


computer"


provided


in


the


software


operating


system.


NOTE:


The


battery


packs


shipped


with


your


tablet


may


be


low


in


power—please


use


the


AC

DC


adapter


with


the


DT395BV


when


setting


up


for


the


first


time


to


fully


charge


the


internal


battery


pack.


NOTE:


When


the


battery


pack(s)


is


(are)


charging,


the


blue

colored


Battery


LED


should


blink


slowly.


If


plugging


in


the


AC

DC


adapter


does


not


trigger


this


blinking


activity


and


the


LED


stays


dark,


the


battery


pack(s)


may


have


been


drained


substantially.


Try


unplugging/


replugging


the


AC

DC


adapter


to


the


DT395BV


a


few


times


to


activate


the


charging


process.


NOTE:


To


conserve


power,


use


(push


and


quick


release)


the


Power


Button


to


put


the


tablet


in


“Standby”


mode


while


not


in


use.


Pushing


briefly


on


the


same


button


will


wake


up


the


system


within


seconds.


NOTE:


Avoid


using


the


Power


Button


(“hold


4+


seconds”


feature)


to


turn


off


the


tablet—this


form


of


hardware


shutdown


is


intended


to


be


a


means


of


recovery


from


lockups,


and


not


as


normal


operation.


ENGLISH


4


Summary of Contents for DT395BV

Page 1: ...Intel Celeron dual core processor offering optimal combinations of performance and power savings The DT395BV is available with Windows or Android operating system Each software operating system featur...

Page 2: ...DT395BV ENGLISH 2...
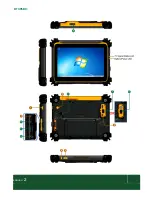
Page 3: ...tton To adjust the monitor brightness and the speaker volume 6 Monitor mode switch To switch to display the video signal from HDMI port Battery and Power Management The DT395BV is equipped with an int...

Page 4: ...ease use the AC DC adapter with the DT395BV when setting up for the first time to fully charge the internal battery pack NOTE When the battery pack s is are charging the blue colored Battery LED shoul...

Page 5: ...detect all 802 11 access points in the vicinity for you to select the access point of your choice for connection The SSID and WEP WPA WPA2 if enabled parameters on the DT395BV and the access points ha...

Page 6: ...harge or power the tablet do NOT use any AC DC adapter other than the one provided or acquired from the manufacturer or its partners In the unlikely event that smoke abnormal noise or strange odor is...

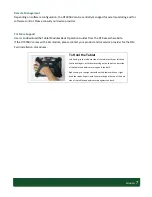
Page 7: ...h a 3G module please contact your product and or service provider for the SIM Card installation procedures To Hold the Tablet Left hand grip the left back side of the tablet with your left hand four i...

Page 8: ...f the following measures Reorient or relocate the receiving antenna Increase the separation between the equipment and receiver Connect the equipment into an outlet on a circuit different from that to...

Page 9: ...built in speaker SD Slot 1 micro SD card slot I O Ports USB port 1 USB 3 0 Headphone out 1 3 5mm DC in 1 Mechanical AC DC Adapter Input 100 240V AC Output 19V DC 3 42A Battery Pack Internal 7 4V 3760...

Reviews: