


4
3
4. To insure the proper status display, certain options must be set. To start this procedure,
enter
‘*8’
on the Virtual Panel while the system is disarmed
5. When prompted for
“Installer Code”
, enter
‘5555’
, where 5555 is the default installer code.
If the code is different for this system, use the actual code.
6. When prompted for the
“Section”
, enter
‘*076’
.
7. Wait for the screen that says
“Toggle Option -------”
, where
“-------”
is a list of numbers
and
“-”
characters, you must make sure the numbers 2, 4, and 8 do not appear in this list.
If they do appear type the number of whichever option appears to disable it. So if
“2”
appears
in the list type
‘2’
and it will toggle off. You may need to wait a few seconds for each change
to appear.
8. After the toggle option list is set to not contain 2, 4, and 8 return to user mode by typing
‘###’
9. In the User Code field on the pop-up, the customer will enter a User Access Code for the
alarm system. Please note that this step is not required for manual operations.
This will enable the customer to set up
Rules
through the
Security Wizard
in their web account
(Until the customer completes this step, the XG1000 Controller will NOT be able to Arm/Disarm
the panel as part of a Rule/Schedule or through the quick
‘ARM/DISARM’
buttons at the top of
the
Device List
page).
NOTE:
The user enters user code whenever they manually issue a command to arm/disarm from
their Virtual Keypad in their web account
,
just as they would if they were standing in front of their
keypad in their home.
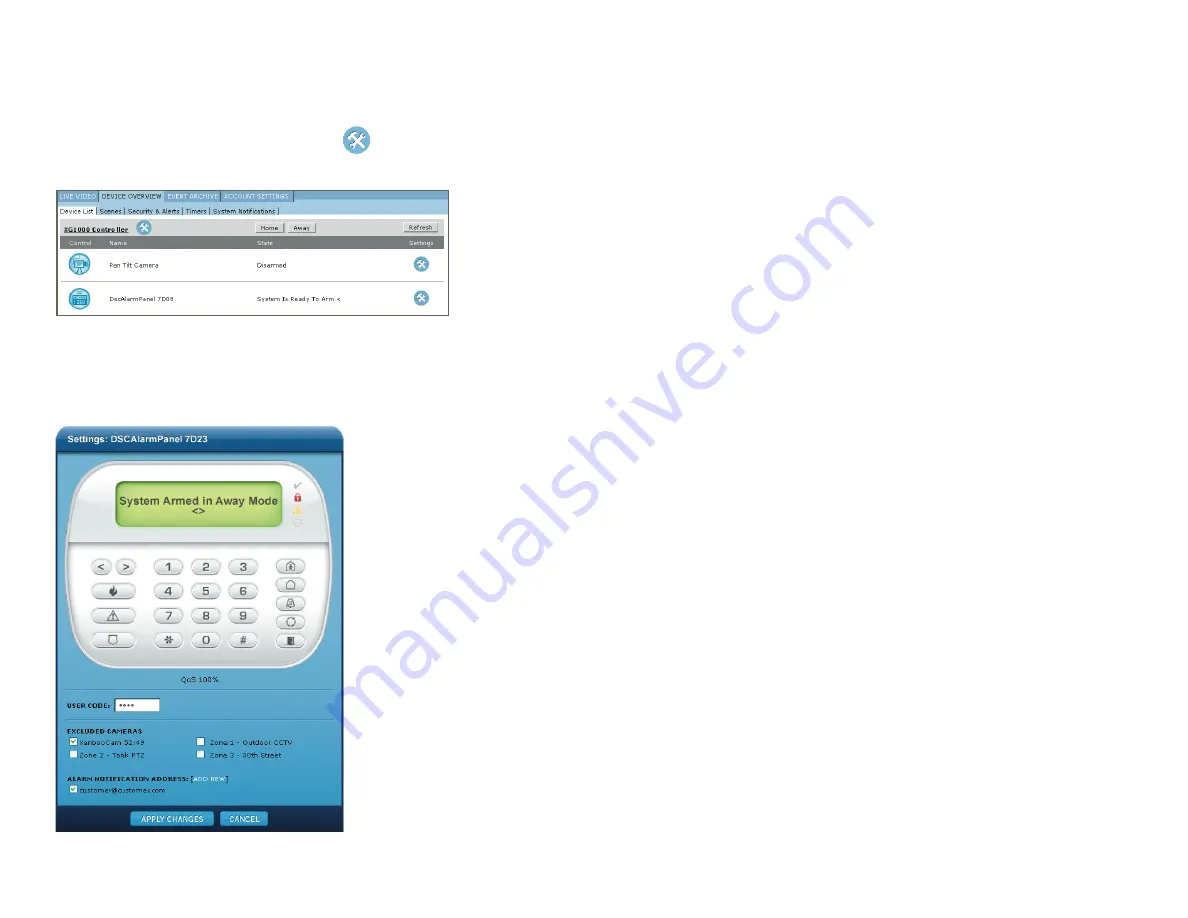
10. Select the email/SMS addresses that you would like to receive
Alarm Notifications
(if the address does not already appear in the list, click on the Add New button) and any
camera you would like to exclude from capturing video in the event of an
Alarm Condition
.
Click on the
‘APPLY CHANGES’
button to save your settings.
11. You must also go into programming and disable the
Auto Stay
function on the
Alarm Panel
–
otherwise if the alarm is set to Arm Away mode and the exit door is not opened the
Alarm Panel
will automatically go to Arm Stay mode.
DEVICE OVERVIEW PAGE
COMPLETING THE INSTALLATION ///
1. Access your remote account via a PC browser and log in using your account
UserID
and
Password
.
2.
Click on the
Device Overview
tab to access the Device List for the system.
Once you are at the Device List, click on the
Settings
icon for the
DSCAlarmPanel
to the right of the Device List.
3. Send a test command through the Virtual Keypad to disarm the system and the status of
the panel will appear.


