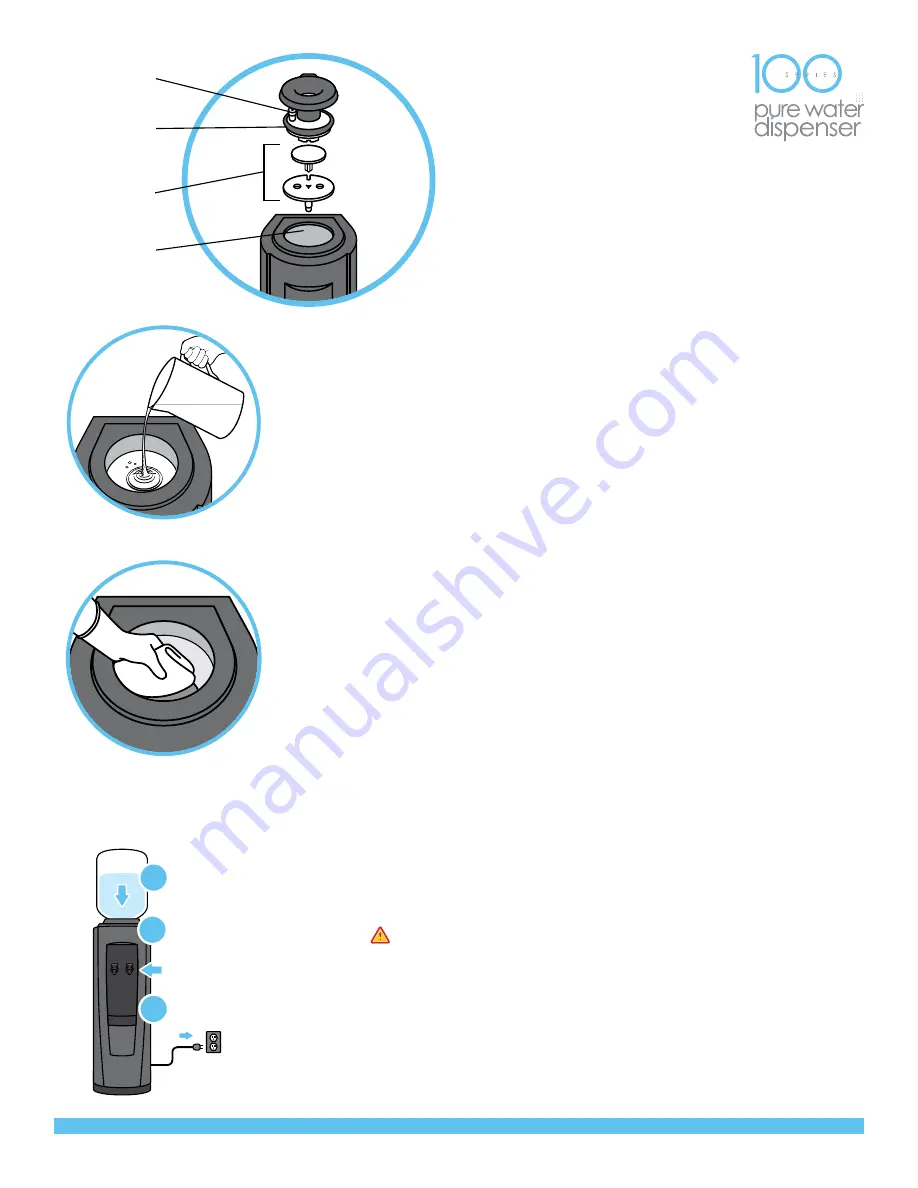
6. Remove the separator by pulling it straight out.
Make note of the separator positioning before
removing so that it can be re-installed correctly.
Clean these parts with dishwashing soap and let
them dry thoroughly
(Fig 4)
.
No-spill
dispenser insert
Air filter
Separator
Reservoir
Fig 4
8. Wearing disposable non-latex gloves, wipe the inside of the reservoir with a clean
cloth or soft brush. Use caution as the water may still be hot to the touch
(Fig 6)
.
9. Completely drain the water from the reservoir by dispensing the water through
the hot and cold spigots into a container.
10. Repeat steps 7 and 9 to completely flush the dispenser. It is not necessary to wipe
the inside of the reservoir a second time.
11. Replace the separator and the no-spill dispenser insert. Wipe down the cooler and
the surrounding area to dry any water spills.
12. Wash your hands thoroughly with soap and water for at least 20 seconds. Install
a full water bottle on the dispenser. Dispense water through the hot and cold
spigots. Plug it in and turn on the hot tank heater switch located at the rear
of the dispenser.
Fig 6
7. Carefully pour hot water into the reservoir until it is ¾ full. Let the water sit
for 5 minutes
(Fig 5)
. Always use caution when handling hot water.
TM
©2020 DS Services of America, Inc.
Fig 5
1
3
2
Load water bottle FIRST.
Dispense water from
hot and cold faucets.
THEN plug in dispenser
and turn on the hot
tank switch.
WARNING:
Dispense water through the hot and cold
spigots before plugging in and turning on the hot tank
switch. Failure to follow proper installation instructions
may cause damage to water dispenser.


